Veslink - System Configuration
Veslink standardizes voyage communications to help you collect and analyze current positions and other critical voyage data and share information with a network of trusted partners.
Note: You must have the Configure System General Permission enabled.
On the Settings menu, you can click System Configuration to configure general settings, email settings for forms, third-party interfaces, and the Agent Portal, and import Custom Reports from IMOS and Microsoft Power BI.
To save changes, click 
General
To open the System Configuration page, hover over the Settings menu and then click System Configuration.
The System Configuration page opens to the General settings.
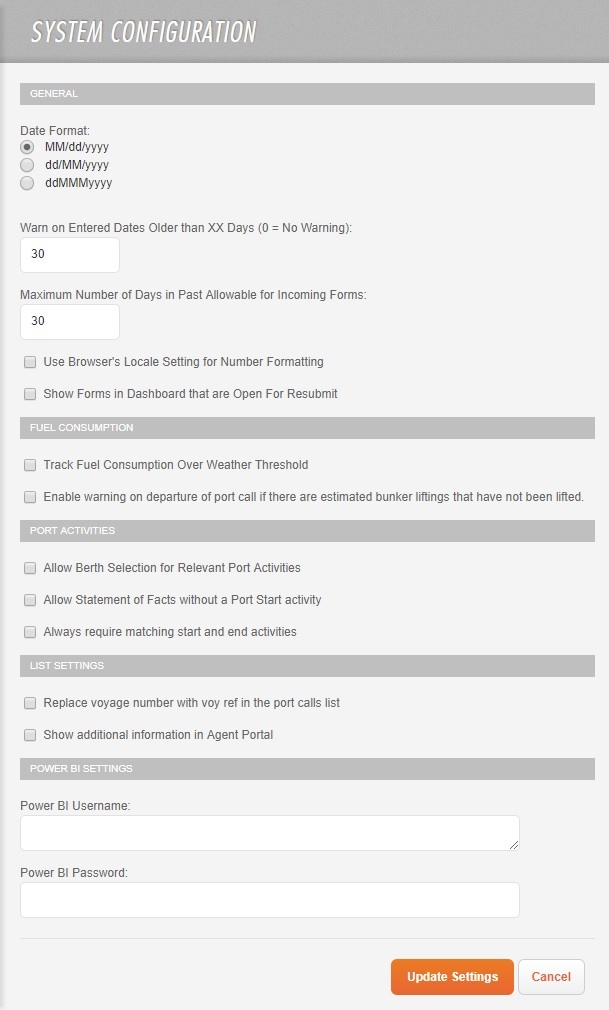
General:
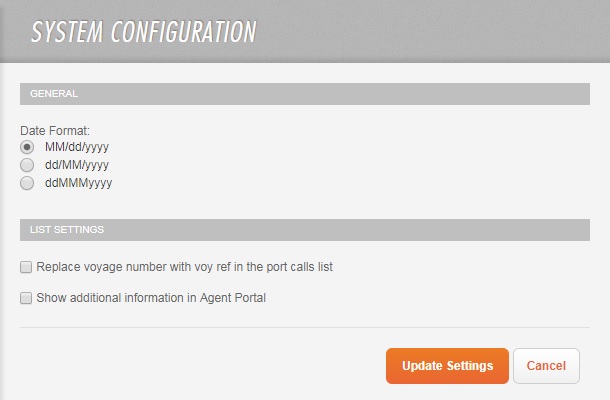
Date Format: Each user can select a preferred format for dates:
MM/dd/yyyy (12/31/2015): default
dd/MM/yyyy (31/12/2015)
ddMMMyyyy (31Dec2015)
Warn on Entered Dates Older than XX Days (0 = No Warning): A value between 0 and 999; 0 = No Warning. This feature helps prevent date input errors from making it into Veslink.
Maximum Number of Days in Past Allowable for Incoming Forms: Number of past days allowed for forms to be accepted.
Use Browser's Locale Setting for Number Formatting: When Enable Number Formatting is selected for Integer and Decimal fields in the Data Dictionary or Form Designer, number formatting respects browser locale settings.
Fuel Consumption:
Track Fuel Consumption over Weather Threshold: Select to have the Over Weather Threshold field appear in the ROB control. This field indicates how much of the fuel consumed was due to the weather being worse than the maximum weather conditions for which the charter party warranties are applicable. This field defaults to 0 and cannot exceed the total consumption value.
Port Activities:
Allow Berth Selection for Relevant Port Activities: Displays a Berth column in the Port Activity control on the Statement of Facts form; this field is enabled for entry only if its corresponding Port Activity has its Berth column selected in the IMOS Data Center, or if it is a Port Activity of type AF or AD.
Always require matching start and end activities: Validates to ensure that there is a matching pair of OS/OE and DS/DE activities, even if there is no PE activity on a Statement of Facts form.
List Settings (for the Agent Portal):
Replace voyage number with voy ref in the port calls list: Select to replace the Voyage Number column with a Voyage Reference column in the Port Calls list. This column will display the Voy Ref field from the Partner's Voyage for each Port Call.
Note: The Partner must be using IMOS v7.9.1960+ for this field to properly populate.Show additional information in Agent Portal: Select to add Operation Type, Vessel Owner, Operations Contact, and Portcall Sequence columns to the Port Calls list.
Note: Requires IMOS v7.11.2944+.
Power BI Settings: To import Power BI reports based on Veslink form data, you must enter a Power BI Username and Power BI Password.
Note: IMOS can only be linked with one Power BI account.
If you would like to import dashboards created in a second account, then do the following:
For Pro Accounts, share the dashboards created in the second account with the Power BI account already linked to IMOS and upload them via the latter (already linked) account.
For non-Pro Accounts, export the dashboards from the second account, then import them into the Power BI account already linked to IMOS and upload them via the latter (already linked) account.
For Agents
If you are an Agent using the Agent Portal, on the Settings menu, click System Configuration to configure general settings.
Forms
To open the Forms page, on the left side, click Forms.
To see a field definition, hover over its underlined field label. Here are additional field definitions:
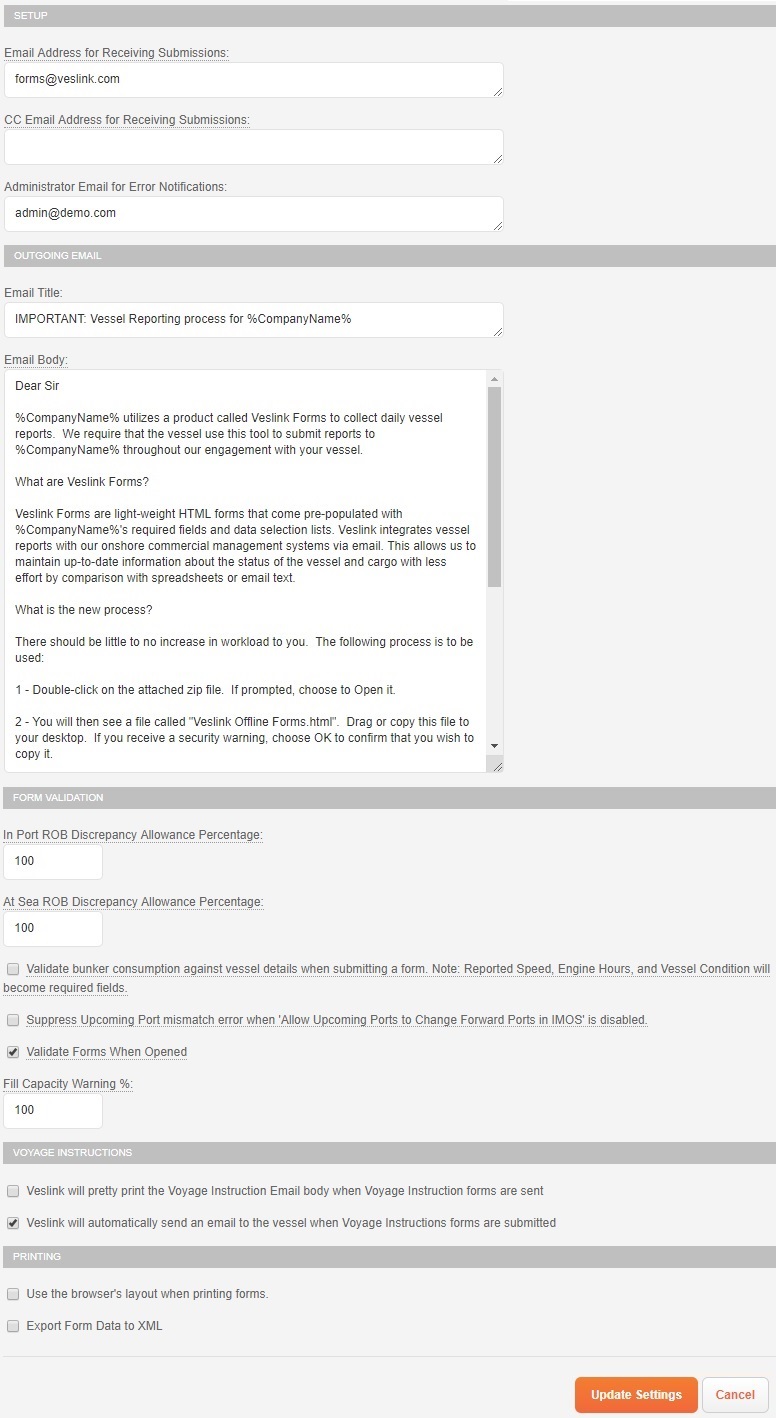
Setup:
Administrator Email for Error Notifications: Email address of the administrator to be notified when the forms fail or have errors due to incorrect data. This is a required field for Veslink forms to validate when submitted.
Example Errors:An error occurred when receiving an offline forms submission: Could not determine a GMT offset for the form, because a valid port was not entered.
An error occurred when receiving an offline forms submission: Upcoming ports contains a port named 'INCHON', but that name does not match any active ports.
An error occurred when receiving an offline forms submission: Could not determine a GMT offset for the form, because a valid port was not entered.
Outgoing Email
Email Title: The subject heading of the email being sent to the vessel.
Email Body: You can customize the instructions that are emailed to the vessel with the forms. Within the text, you can use the following tokens; they will be replaced by the applicable values when the email is generated:
%CompanyName%
%VesselName%
%FormsList%
%AdminEmail%
%SenderEmail%
Form Validation:
Validate Forms When Opened (requires IMOS v7.11.4308 or later; selected by default): Revalidates forms when opened by the operator. This may clear form errors if, when the form is opened, the data can be processed successfully.
Voyage Instructions:
Veslink will pretty print the Voyage Instruction Email body when Voyage Instruction forms are sent
Veslink will automatically send an email to the vessel when Voyage Instructions forms are submitted: Allows you to submit Voyage Instructions from IMOS, using Veslink.
Printing:
Use the browser's layout when printing forms.: Displays a print preview before printing a form.
Export Form Data to XML: Enables you to export forms to XML.
Interfaces
To open the Interfaces page, on the left side, click Interfaces.

IMOS
To reset the master data, click 
DA-Desk
If you have a DA-Desk interface, do the following:
Enter the Principal ID.
Under DA-Desk Invoice Number Preference, select a tag name:
InvoiceNumber (default)
InvoiceNo1
When importing invoices, the Invoice Number will be mapped from the tag name specified.
Apply relevant configurations:
(Beta) Use new parallel DA-Desk interface for sending portcall updates.
You can select only one of the following:
Import DA Invoice In Allowable Payment Currency. Only applicable to Veslink API integration method
Import DA Invoice In Local Currency. Only applicable to Veslink API integration method. When selected, the following data are mapped between DA-Desk and the IMOS simplePayment message type (for more information, see the Messaging Service Manual):
IMOS simplePayment Field | Disbursement Type | DA-Desk DIS XML Field |
|---|---|---|
currency | PDA, APR, or PVI | paymentAmout/DAPaymentAmount/DACurrency |
Other (FDA) | balanceAmount/DABalanceAmount/DACurrency | |
currencyAmount | PDA, APR, or PVI | paymentAmout/DAPaymentAmount |
Other (FDA) | balanceAmount/DABalanceAmount | |
baseCurrencyAmount | PDA, APR, or PVI | paymentAmount/CustomerAccountingPaymentAmount |
Other (FDA) | balanceAmount/CustomerAccountingBalance |
Agent Portal
The Agent Portal is available with Veslink Optimum.
To open the Agent Portal page, on the left side, click Agent Portal.
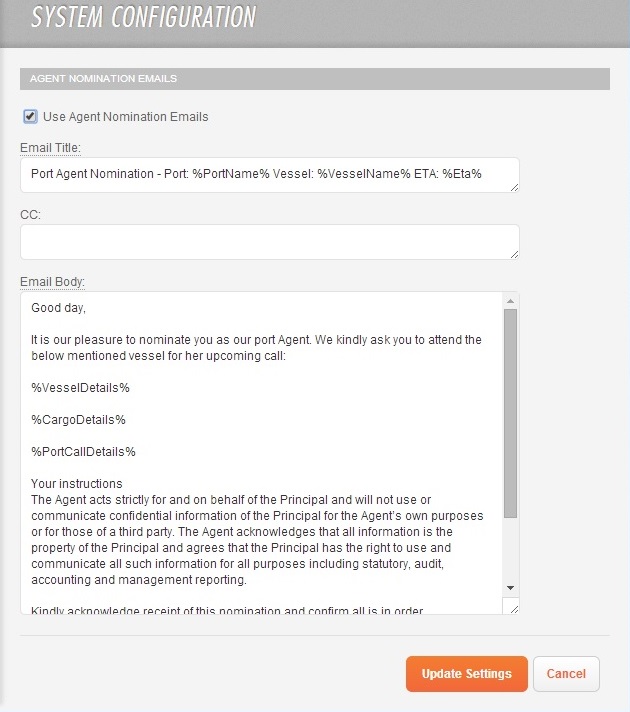
Use Agent Nomination Emails: Select to send an email to Agents when they are nominated for a port call. This email is sent to the email address associated with the Agent's Veslink account.
Email Title: The title of the email being sent to the Agent. Within the text, you can use the following tokens; they will be replaced by the applicable values when the email is generated:
%PortName%
%VesselName%
%Eta%
CC: Additional email addresses that will receive the Agent Nomination email.
Email Body: You can customize the body of the email. Within the text, you can use the following tokens; they will be replaced by the applicable values when the email is generated:
%CompanyName%
%VesselDetails%
%CargoDetails%
%PortCallDetails%
Custom Reports
To open the Custom Reports page, on the left side, click Custom Reports. On this page you can import custom reports of format .form created in Microsoft Power BI (based on Veslink form data) or the IMOS Report Designer.
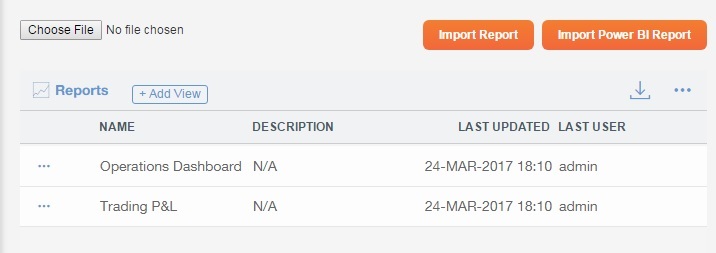
When you import a new report, it appears in the Custom Reports list and in the Reports card pane.
Importing an IMOS Report Definition
Note: Only IMOS report definitions with file type FORM File can be imported. If you receive an IMOS report definition from another user and you trust the source, make sure to remove .unsafe from the file name so that it converts to a FORM File.
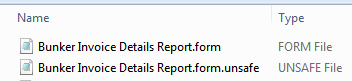
To import an IMOS report definition:
On the Custom Reports page, click

.
Browse for the IMOS report definition FORM File, select it, and then click Open.
Click

.
Importing a Power BI Report
To import a Power BI report based on Veslink form data:
On the General page, make sure your Power BI Username and Power BI Password are entered.
On the Custom Reports page, click

.
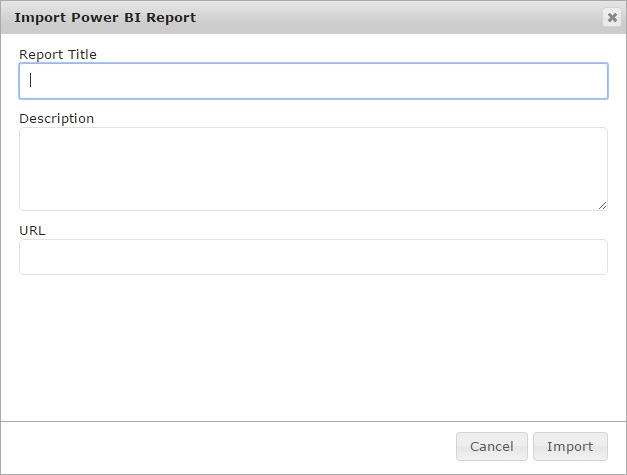
Enter a Report Title.
Enter the Power BI report URL.
Click Import.
To edit the Report Title, Description, and URL of a Power BI report, in the Custom Reports list, on its line item menu 
To delete a Power BI report, in the Custom Reports list, on its line item menu