
Overview
Webhooks in IMOS are a tool for generating real-time feedback and providing suggested changes as you work in the Voyage Estimator or Voyage Manager workspaces. Like Tasks & Alerts, messages are generated and displayed in the notifications panel based on logical rules applied to the current data. Unlike standard Tasks & Alerts, webhooks allow you to write whatever logic you choose in a programming language of your choice, as long as you can host it as a web endpoint. The response payload may also include suggested changes that can be automatically applied to the estimate itself.
Table of Contents:
Setting Up a Webhook in the Tasks & Alerts Form for Estimates
-
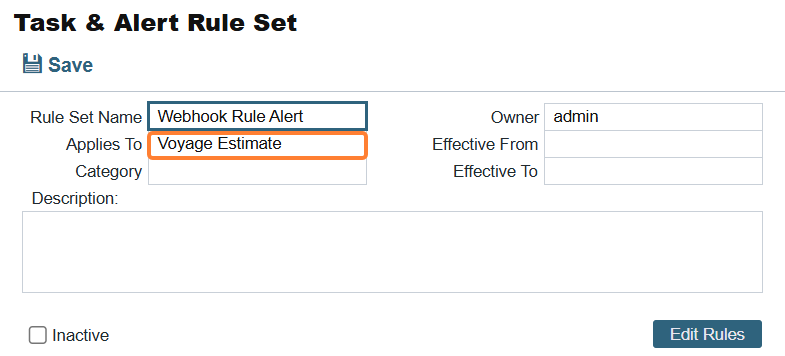
To set up a webhook, go to the Tasks & Alerts Rule Set List in the Data Center module and create a new Rule Set that applies to the Voyage or Voyage Estimate.
-
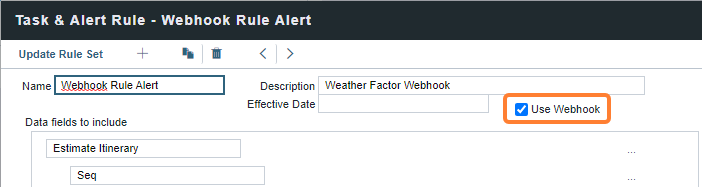
In the Edit Rules form, select the Use Webhook check box.
-
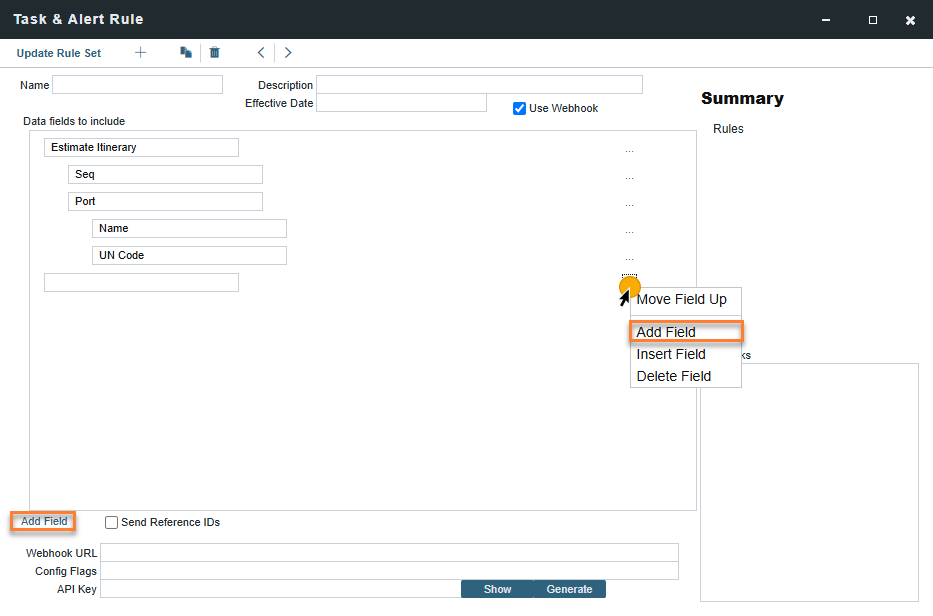
In the Data fields to include window, select the fields that you want to send to your webhook endpoint.
-
To add more fields, click the Add Field link below the field list.
-
To add multiple fields at a sub-object level (for example, more Port fields), use the '…' menu to the right.
-

-
Set the Webhook URL to your webhook endpoint. If your webhook needs to validate the sender, enter or generate an API key (recommend 32-64 random ASCII characters).
-
-
IMOS Config flag values can also be sent along in the header of a webhook request. This can be useful for integration with other third-party APIs, such as those that require access tokens on a client-by-client basis.
-
-
When finished, select Update Rule Set, then save the rule set.
If you only want to run a webhook conditionally, you can use the “stop processing if true” feature of Tasks & Alerts. Create a non-webhook rule that has the condition before the webhook rule in the same rule set.
Example: Using Webhooks with Fuel Modes
This example shows a Fuel Mode Webhook that sends Fuel Modes details from your Voyage Estimator workspace to a third-party system, and lets that system send a response back and modify the Fuel Modes fields. It's configured the same way as described above by selecting the Use Webhook check box, then in the Data fields to include window define what to send to the third-party system when you create or update an Estimate or Voyage. In this example, the Voyage Itinerary and Fuel Modes information are sent. Here's what it looks like in practice.
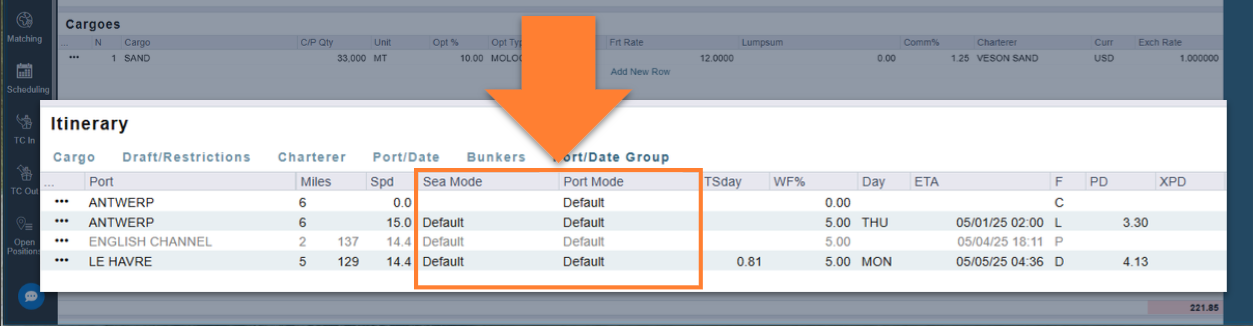
This estimate has a full voyage itinerary, including two port calls in the sea passage, with the Port Modes for Sea and Port set to Default.
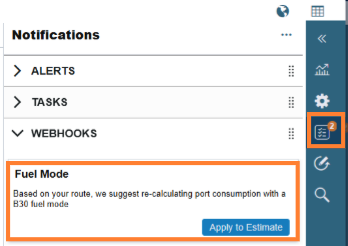
When you modify the estimate, the webhook communicates with the third-party system and shows a webhook notification in the right panel. Selecting Apply to Estimate also triggers the webhook to update the Fuel Modes in the Estimate.
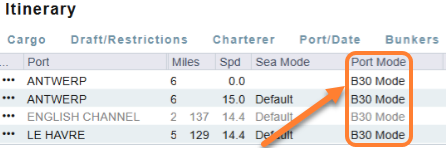
After selecting it, the Port Mode field in the Estimate Itinerary changes from Default to B30.
You can also configure webhooks to apply field changes automatically, without selecting Apply to Estimate.
Running Your Webhook
To run your webhook, navigate to Estimates in the Chartering module and open an estimate in details view. Then, expand the Notifications panel. In this panel, the response message returned by the webhook appears in the Notifications panel.
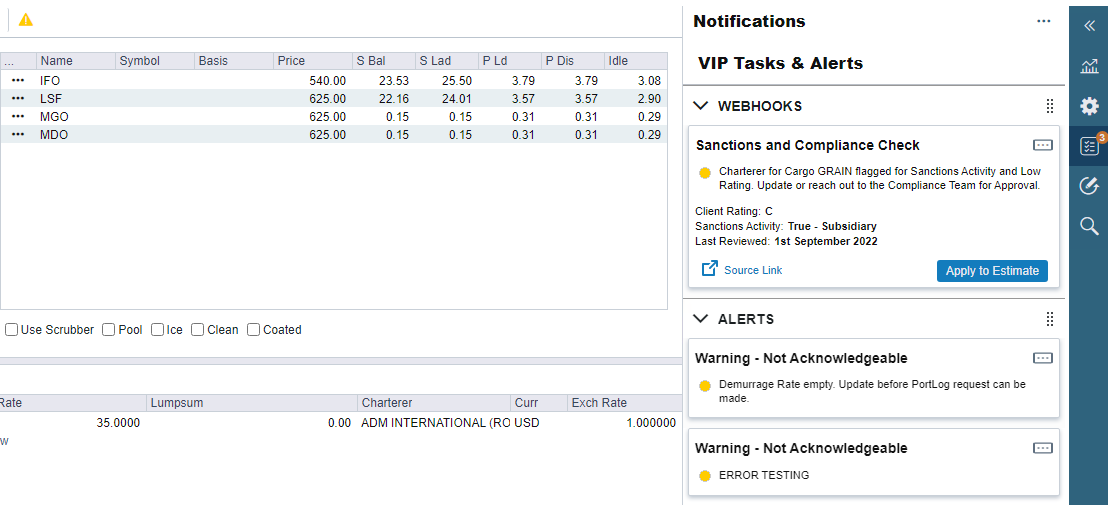
The Notifications panel, displays all Webhook Responses and Tasks & Alert results in card view when the CFGEnableAgGridInNotificationsPanel flag is enabled.
The cards are split into different sections based on the type of rule they are generated from (Tasks, Alerts, or Webhooks). These sections can be expanded/collapsed by clicking on the down/up caret at the top of each section and can be rearranged so that the highest priority items are present at the top of the panel.
You can also access notifications in the Worksheet Estimate Column by selecting the double arrow icon >> to expand the Notifications panel for that Estimate, including Tasks, Alerts, and Webhooks.
Card details
The Webhook Card in the Notifications panel has a standard structure to it:
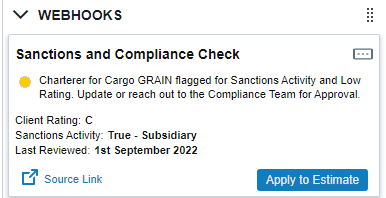
The name of the Rule from the Rule Set is displayed in bold at the top of the card, followed by any text that is sent back in the response payload.
If the response includes a link, then the card displays a Source Link button that redirects to the link provided. This is useful when the webhook response might require further investigation.
If the response includes a mutation, then the Apply to Estimate button is displayed in the card. You can click on this button to update the details in the estimate with whatever fields were sent across in the mutation.
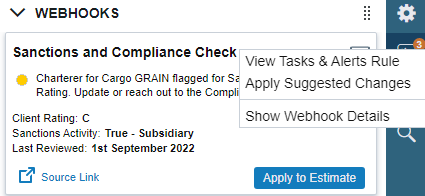
Lastly, there is a three-dotted menu button at the top right of the card where you can View the Tasks & Alerts Rule that triggered the card to be generated, Apply Suggested Changes which is presented only when there is a mutation, and acts the same as the Apply to Estimate button or Show Webhook Details. Selecting Show Webhook Details opens the Webhook Details form:
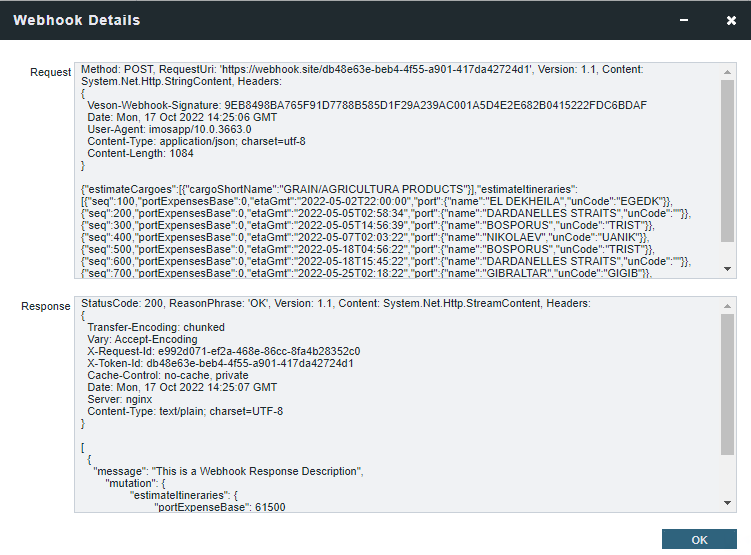
This form shows the technical details of what was sent to the webhook endpoint in the Request and what was returned from the webhook endpoint in the Response.
Specification
Whenever a user makes a change in Estimator, the current state of the estimate is serialized to JSON and POSTed to each configured webhook endpoint. The configured endpoints must use HTTPS and provide a certificate trusted by a common root CA. The response payload must be returned in less than 10 seconds, and the content length must be less than 1 MB.
Authentication
If an API key is specified in the webhook configuration, a Veson-Webhook-Signature header is included with each HTTP POST request. The value of the header is the HMACSHA256 signature of the request body (as UTF8 Bytes) with the API key string (as UTF8 bytes) as the key.
Request Format
The request includes the fields configured in the webhook setup, as per the IMOS Reporting schema, serialized as JSON.
Response Format
The expected response is a JSON blob consisting of an array of alert objects. An alert object can have the following fields:
|
Field |
Type |
Description |
|---|---|---|
|
|
string |
The message that appears to you. (Required) |
|
|
One of: |
Determines the icon that appears with the alert. (Optional) |
|
|
string (GUID) |
An identifier for the alert. If provided, should be unique in the context of a single response. Can be used to indicate that a given alert is the “same” as one provided in a previous response. (Optional) |
|
|
object |
A mutation that can be applied by you, in the same format used in the imos/applyUpdateEstimate GraphQL API (Optional) |
|
|
object |
Customized field labels and values that can be displayed in the body of the card (Optional) |
|
|
string |
Field label displayed in the body of the card’s Display Fields section (Optional) |
|
|
string |
Matching value displayed with the label in the body of the card’s Display Fields section (Optional) |
|
|
string |
A link specified by you, presumably leading to the source of the webhook data. (Optional) |
If you want applied mutations to appear as applied to you, include a consistent GUID (globally unique identifier) with the alert object. If no GUID or a new GUID is returned, the mutation is interpreted as new on the front-end and displayed as such.
Regardless, reloading an estimate reloads all webhook alerts and their statuses. This is planned for future improvement.
Schema and Veson proxy documentation