The main certificates page offers several features to help you manage the certificates for your fleet.
1.1 Overview
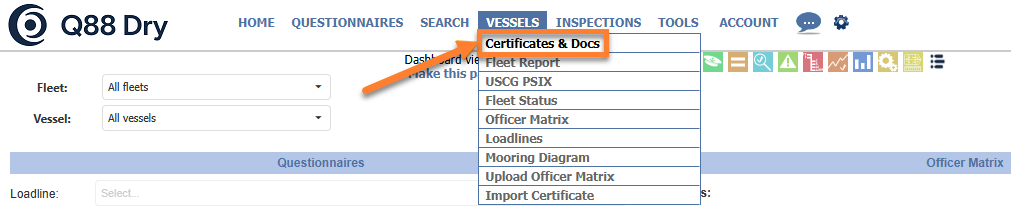
The Certificates & Documents page can be accessed from the Vessels tab → Certificates & Docs:
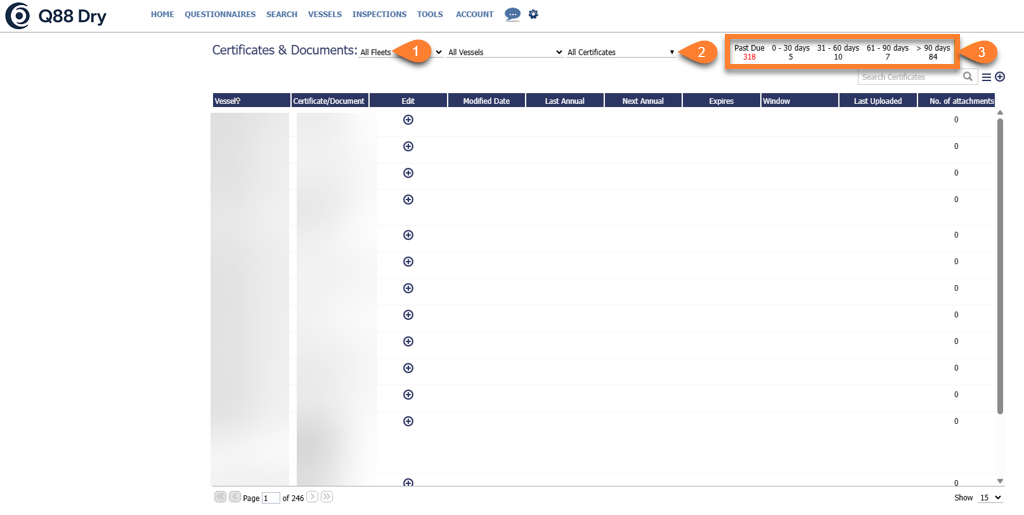
The Certificates & Documents page is the standard interface that is used across many of the modules and offers several key enhancements that allow better access to manage and view your certificates.
-
All Fleets filter: If you have your vessels split into multiple fleets, then the All Fleets dropdown list will be displayed on the upper-left part of the page. Select a fleet from the dropdown list to see the selected vessels
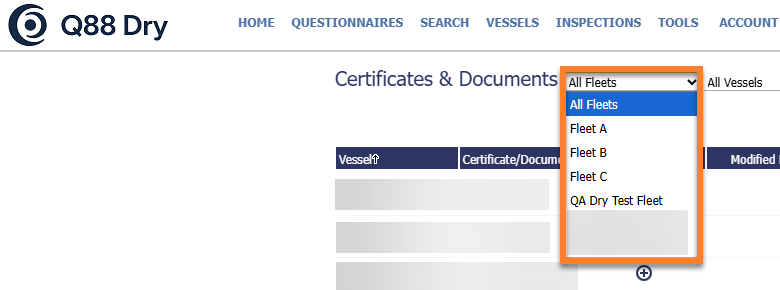
Selection for All Fleets filter
-
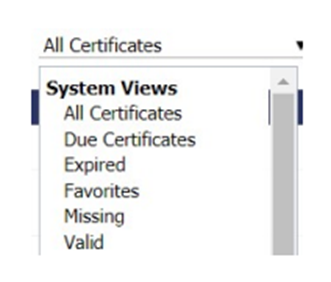
All Certificates filter: Allows you to select from a predefined list, such as the System Views for your fleets’ certificates. You also have the ability to create your own Custom Views.
-
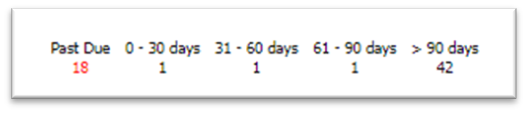
Certificate Expiry Day(s): You can see a quick overview of upcoming certificate expiry dates. Click on each of the date parameter to display the certificates that are due:
1.2 System Views
By default, the system provides several system views and you can choose from the following:

-
System Views: Visible to all users in your company, with fixed default views created for all accounts.
-
All Certificates: All certificates for your vessels.
-
Due Certificates: All the certificates which are due.
-
Expired: All the certificates which have expired.
-
Favorites: Customize the list of certificates that are commonly used.
-
Missing: List of all the certificates which are missing.
-
Valid: List of all certificates which are not missing.
1.3 Creating Custom Views
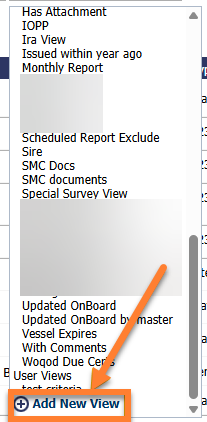
Additionally, the certificate module allows you to create your own custom views and there are two types of custom views that can be created:
-
Company Views: Visible to all users in your company that have a login under your account. (Only users with account admin permission will be able to create these views).
-
User Views: Only visible under an individual login.
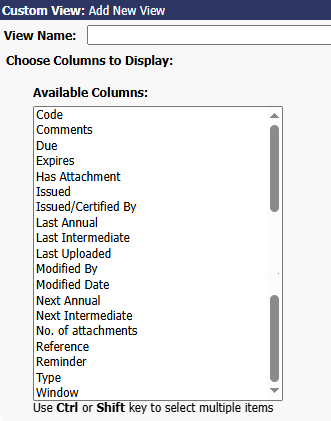
To create a new view click the Add New View link to add a new Company or User view.
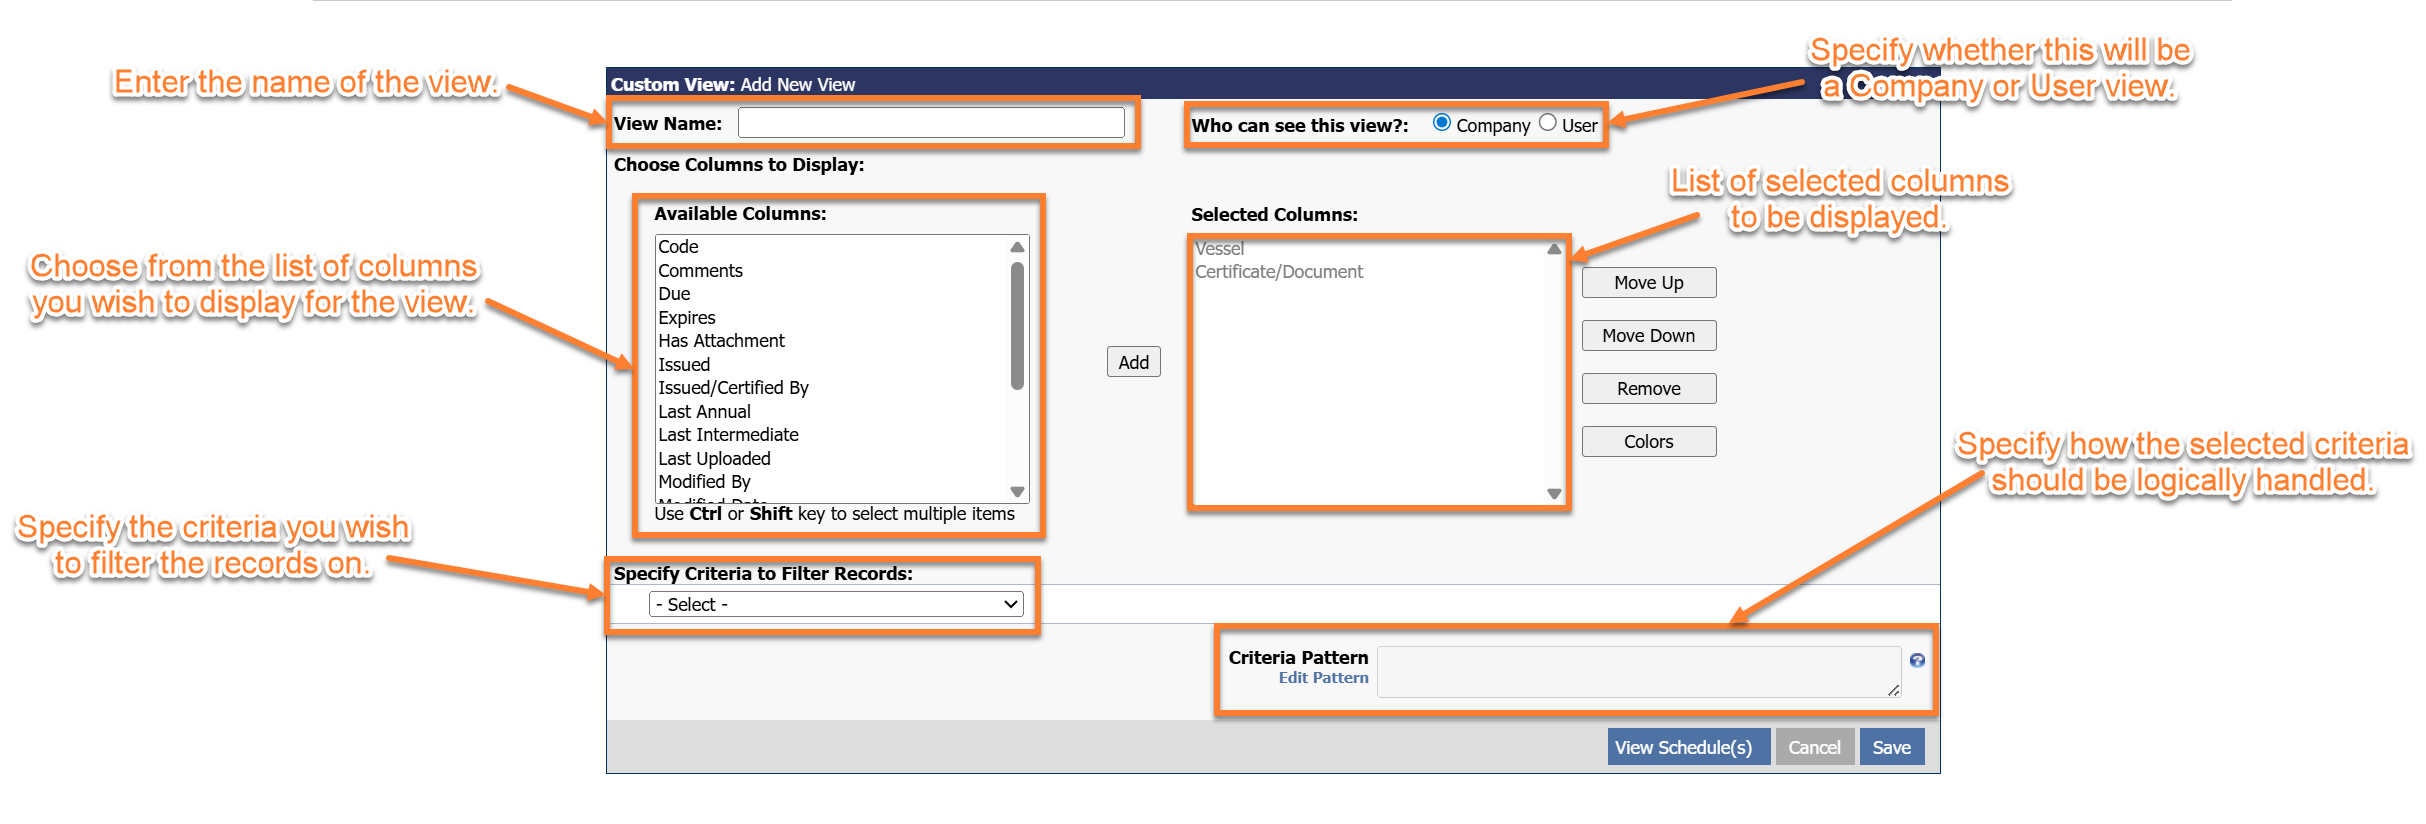
Once you are on the Add New View page, you can use the following filters to create the new view.
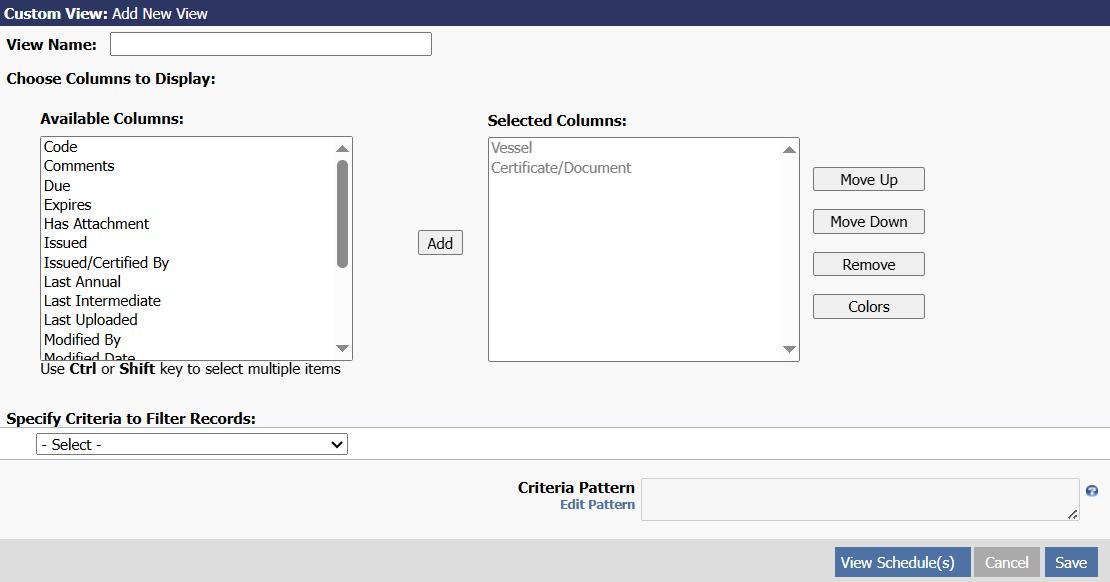
For Q88 Dry Onboard Users:
Please note that for Q88 Dry Onboard users, the Who can see this view option may not appear on your Add New View page:
1.4 How to Add a New Certificate
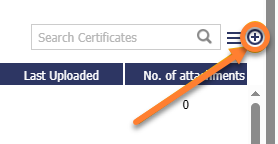
Add New Certificate: Scroll over to the right side of the screen → click on the plus icon. For more details, refer to Q88 Dry/Q88 Dry Onboard - Adding a New Certificate/Document.
1.5 Certificates with Attachments
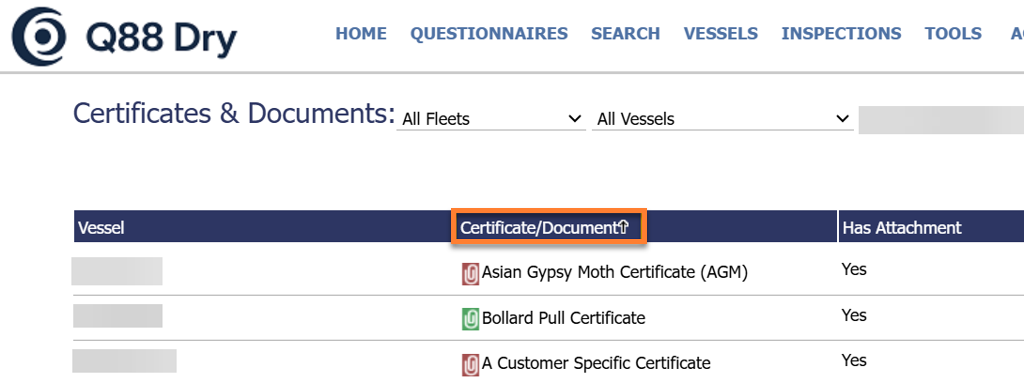
For certificates with attached documents, the system will display a paperclip icon next to the vessel name which you can click to view the certificate. Please see the following explanation for the paper clip colors.

1.6 Action Menu
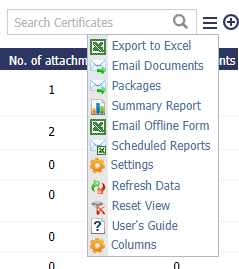
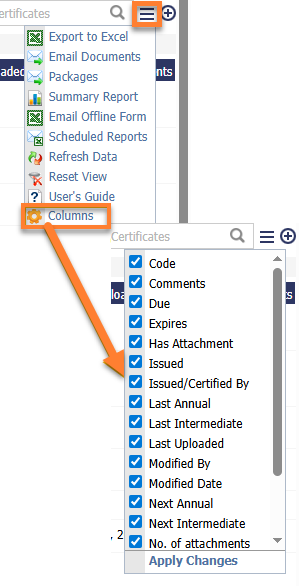
The Action tri-bar menu contains several options which can be performed from the Certificate & Documents page. Please refer to the following image and descriptions below:
-
Export to Excel: Exports the current list of certificate records to Excel.
-
Email Documents: Allows you to select and send documents from Q88Dry by email.
-
Packages: Allows you to create a group (package) of certificates and documents to email out together at once.
-
Summary Report: Creates a summary report in (Excel) for all selected certificates.
-
Email Offline Form: Sends offline form to the vessel for the Master to assist in updating the certificates/documents' date.
-
Scheduled Report: Schedule a report of any view (system or user-created) to be emailed to you.
-
Settings: Allows you to adjust the settings to the Certificates module.
-
Refresh Data: Refresh the underlying data from the database.
-
Reset View: Resets the sorting and filtering for the selected View.
-
User’s Guide: Download the User’s Guide to the certificate module.
-
Columns: Click to see a list of the available columns.
1.7 Criteria Columns Available for Filtering Records
-
Certificate/Document: Name of the certificate.
-
Code: Internal document code you can specify for each certificate.
-
Comments: This field contains the remarks entered for a certificate.
-
Due: Next due date for the certificate – whether it is the next annual, intermediate, or expiration date – whichever comes first.
-
Expires: Date the certificate expires.
-
Has Attachment: Filter certificates that have or does not have attachments.
-
Is Favorites: Filter certificates that are under your favorite list.
-
Is Missing: Filter certificates that are missing.
-
Issued: Date the certificate was issued.
-
Issued/Certified By: Company that issued or certified the certificate.
-
Last Annual: The last annual renewal date of the certificate.
-
Last Intermediate: The last intermediate renewal date of the certificate.
-
Next Annual: The next annual renewal date of the certificate.
-
Next Intermediate: The next intermediate renewal date of the certificate.
-
Reference: The reference information for the certificate (Eg. “SOLAS 1974”).
-
Reminder: Filters certificates based on the reminder date you set. It will be the date on which the window alert commenced.
-
Type: This is the Document Type field.
-
Vessel: Filter the list of certificates that you want or do not want to see for certain vessels.
-
Window: Filter the list of certificates showing specific window range.
1.8 Editing the Criteria Pattern
When building filters or queries in the Criteria Pattern Editor, understanding how logical operators like AND and OR work is essential. These two words define how multiple conditions are evaluated together which can change the greatly change the results.
The AND Operator
In order for a record to be included, the AND operator requires that all conditions must be true.
-
Eg. “I want the certificate type, 123, AND will expire in 2 months.”
-
Criteria 1: Type is “123” certificate
-
Criteria 2: Expires after 2 months
-
Pattern:
1 and 2
The OR Operator
The OR operator requires that at least one condition is true.
-
Eg. “I want the certificate type, 123, or a certificate that will expire in 2 months.”
-
Criteria 1: Type is “123” certificate
-
Criteria 2: Expires after 2 months
-
Pattern:
1 or 2
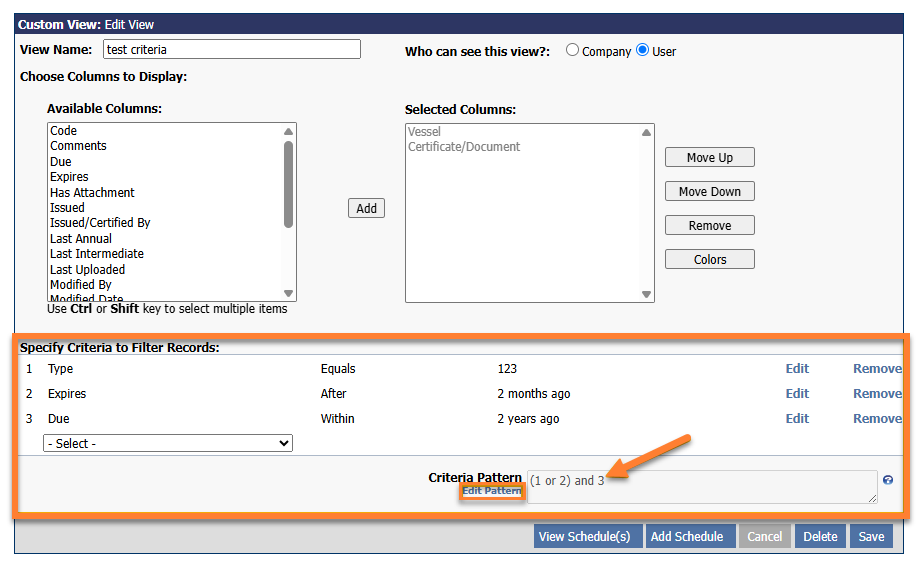
After specifying the criteria to filter records, use the Criteria Pattern editor to modify how the criteria logic is handled by clicking on Edit Pattern and adding the following texts:
-
Parentheses/Round Brackets '(' and ')': Group the criteria together.
-
AND Operator: Use between two criteria where the records should match both criteria.
-
OR Operator: Use between two criteria where the records should match one or both criteria.
-
Criteria Row Number: #
Note:
-
If the brackets do not match, it will display an error.
-
The number of criteria entered must match the numbers given in the criteria pattern editor.
-
If any of the criteria numbers are missing in the Criteria Pattern editor, then an error will display.
The following is a list of example criteria that can be entered:
-
1 and 2
-
1 or 2
-
(1 and 2) or (3 and 4)
1.9 Column Selection
The Certificate & Docs grid supports custom column selections. If you navigate to the Action menu located at the top right corner of the page → click on Columns → a list of available columns will appear.
Once the Column is added for the selected view, it will remain on the grid until it is removed and each view will have its own set of columns that each user can customize.
Note: The Export to Excel function will export the columns that have been selected in the current View.
2.0 Column Ordering
Each view (System Views, Company Views, or User Views) will have its own order of columns that is customizable. You can drag and drop the columns to change the order on the grid and it will automatically refresh the grid with the new column ordering set.

2.1 Column Resizing
You can easily customize the column sizing by placing the cursor between the two columns and dragging the column left to right automatically adjust the size:
Each view will have its own column ordering and is customizable.
2.2 Column Sorting
The grid supports multi-column sorting where a downward arrow is displayed next to each column that has been sorted.
-
To sort by a specific column, click on the column header.
-
To sort by multiple columns → hold down the Shift key → click each column you wish to sort by.
The screenshot below shows the sorting of Certificate/Document (ascending order).
2.3 Filtering the Data
Similar to the filtering available on Microsoft Excel® or SharePoint®, the grid supports column filtering.
To filter the data, click the downward triangle on the column header you wish to filter. A popup menu will be displayed, letting you select the items you wish to filter. Then, click the Apply Filter link to filter the selected items.
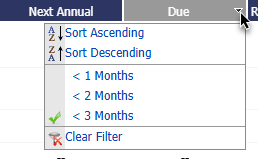
Once a filter has been applied, the filter icon is displayed in the column header and a dark-grey bar is shown across the top of the grid, indicating which column has been filtered on (shown in the following image).

2.4 Paging
By default, the grid will display 15 records per page. However, you can change this option by navigating to the lower-right of the page and select either 25, 50, 100, or 200 records per page.
On the bottom left side of the page, you can browse through the pages by clicking on the arrows.

2.5 Certificate Settings
The Certificate/Documents Settings page allows you to adjust the settings for each certificate. You can find the link to the Settings page under the Actions menu.
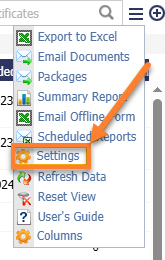
The Settings feature is accessible only for account admin users.
Note: For Q88 Dry Onboard users, you will not have access to the Settings feature:

When you click on Settings, the following page will display:
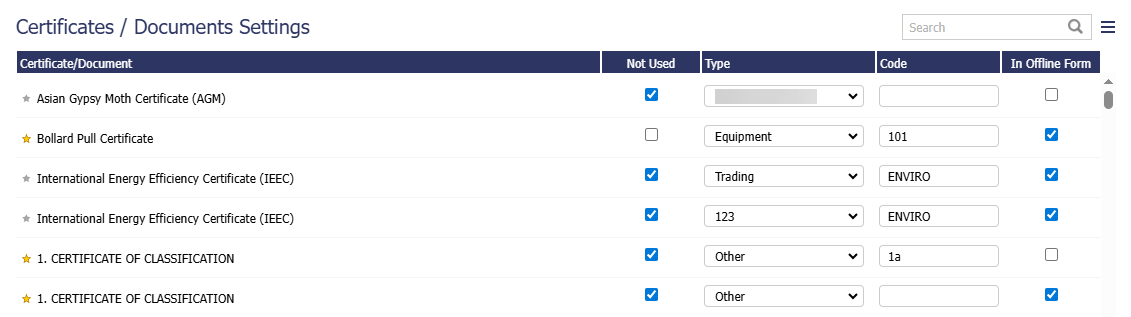
Here you can adjust the settings for each certificate. The fields that can be customized are as follows:
-
Not Used: Checking this box will hide the certificate for your entire fleet (unless you have already entered the data for a vessel). This is useful if you want to hide a certificate that does not apply to your fleet.
-
Type: By default, the system will assign each certificate a Document Type; you can change the Document Type for each certificate and even add your own type.
-
Code: This is an internal reference code that you can assign to each certificate.
-
In offline form: Customize the list of certificates to be shown in the offline form.
When you have made the necessary changes, please be sure to click the Save button at the bottom of the form.
2.6 Creating a Favorite List
A Favorite List can be created for a list of certificates that will be commonly used to help accelerate the process of viewing/updating them.
It can also be created by clicking on the greyed-out star (see the following image) shown next to the certificate/document name.
Once the certificate/document is listed as a favorite, it will be highlighted in yellow.

You can access your favorite list by clicking from the All Certificates dropdown list under system views.

For Q88 Dry Onboard users, as you do not have access to the Settings feature and can only view selected vessels, you won’t be able to create a Favorites List.