The Reminders feature in Shipfix allows you to snooze emails received in your private mailbox by setting a specific date and time to be reminded about them so you can stay on top of important messages without cluttering your inbox.
Note: Reminders do not work for emails in shared mailboxes.
Setting a reminder
-
Open the email (Inbox or Sent) you want to be reminded about.
-
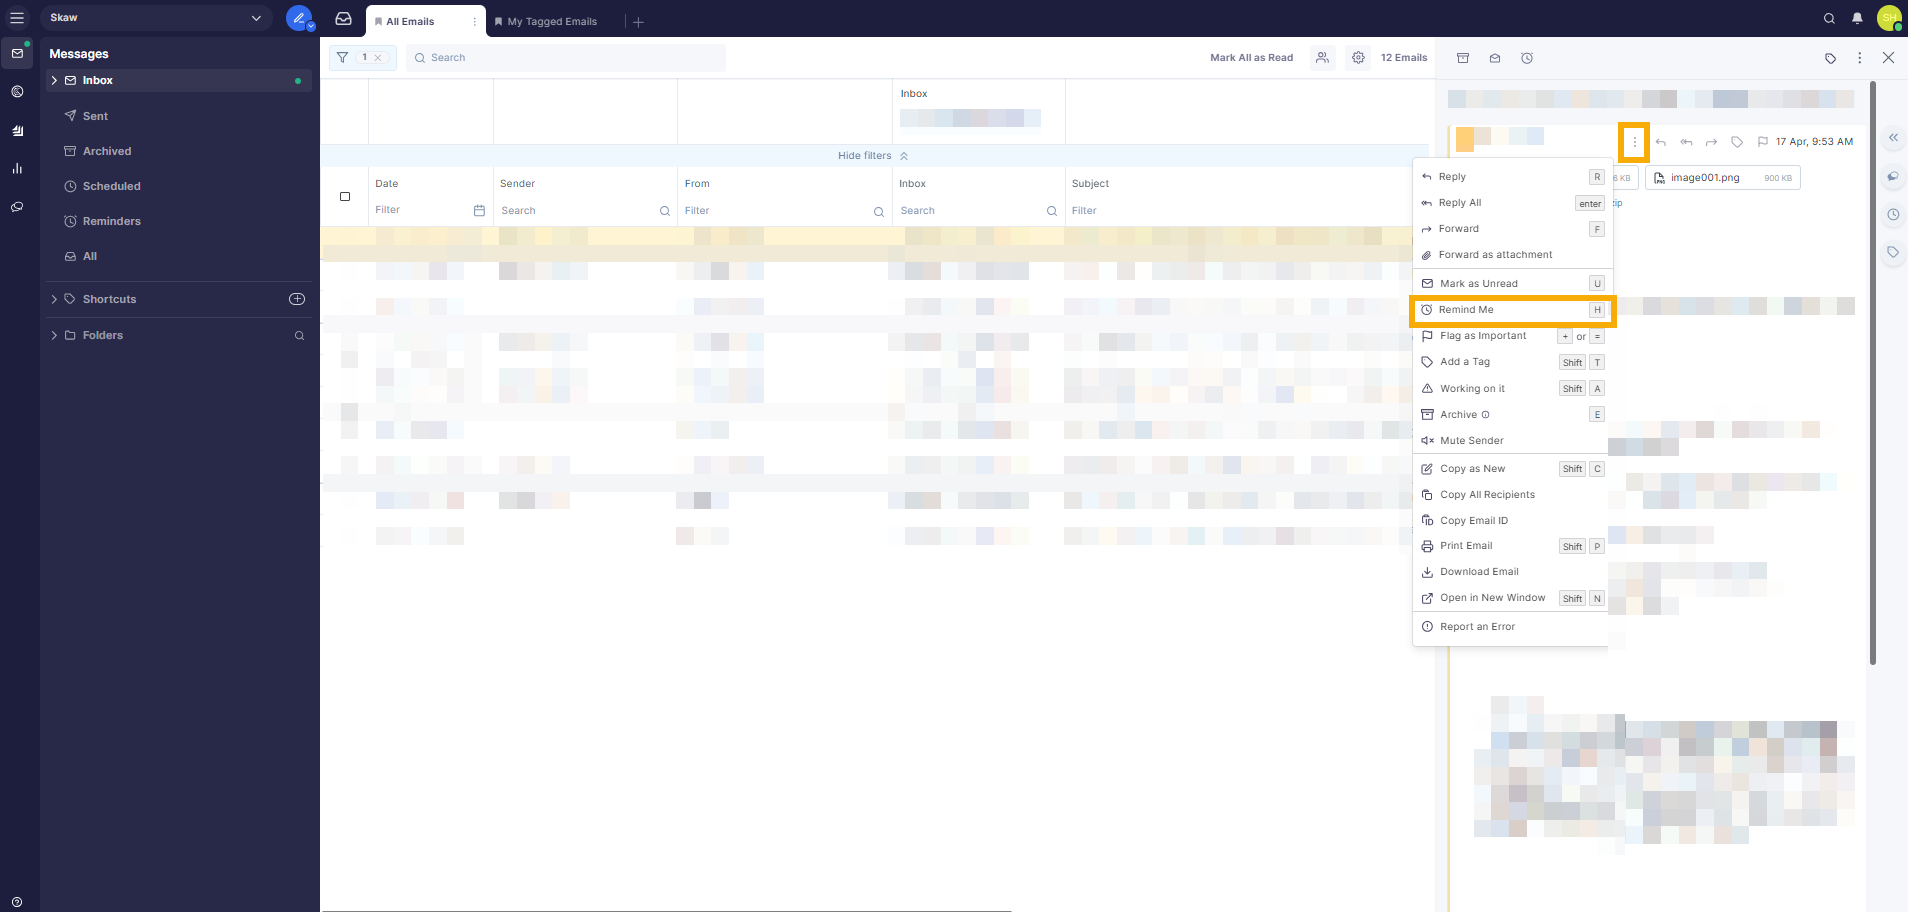
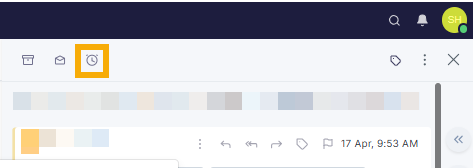
Click the three-dot menu at the top of the email and select "Remind Me".
-
Alternatively, press the “H” hotkey or click the "Remind Me" banner at the top of the email.
-
-
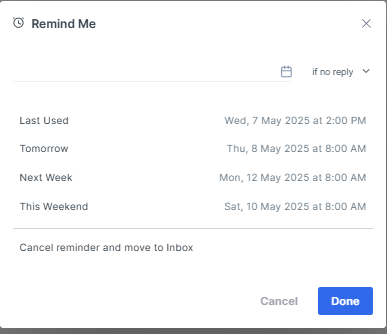
You can select a default reminder option: Tomorrow, Next Week or This Weekend.
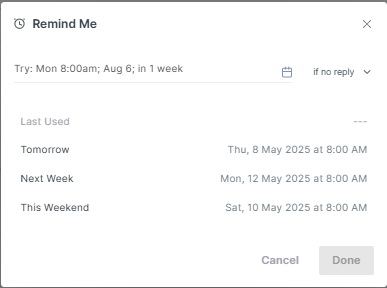
Or set a custom date and time:
-
Click the calendar icon next to the date field.
-
Select the date you want on the calendar.
-
Use the clock icon at the bottom left of the calendar to choose a time.
-
Click Apply to confirm your settings.
Reminder Conditions
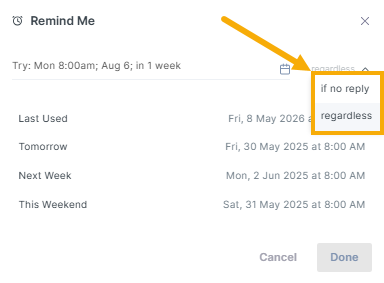
You can choose when the reminder is triggered:
-
"If no reply" – The reminder will only appear if no response is received before the scheduled time.
If a reply is received before the reminder time:-
The reminder will be automatically removed.
-
You will not receive a notification or see the reminder email in your Reminders section.
-
-
"Regardless" – The reminder will appear at the scheduled time, even if a reply is received beforehand.
If a reply is received before the reminder time:-
And group conversations are enabled, the reminder email will be focused when you open the email thread.
-
If group conversations are disabled, the reminder email will appear above the reply in the email list.
-
Once you're done, click Done to activate the reminder.
Note: Once a reminder is set, the email will be moved from your inbox or sent folder to the Reminders.
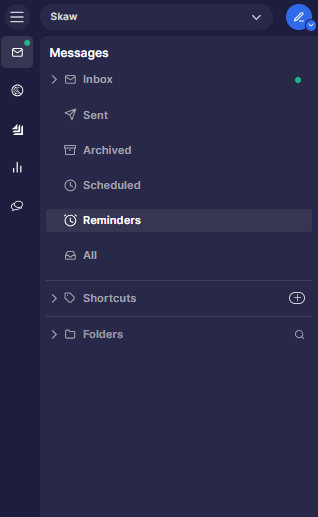
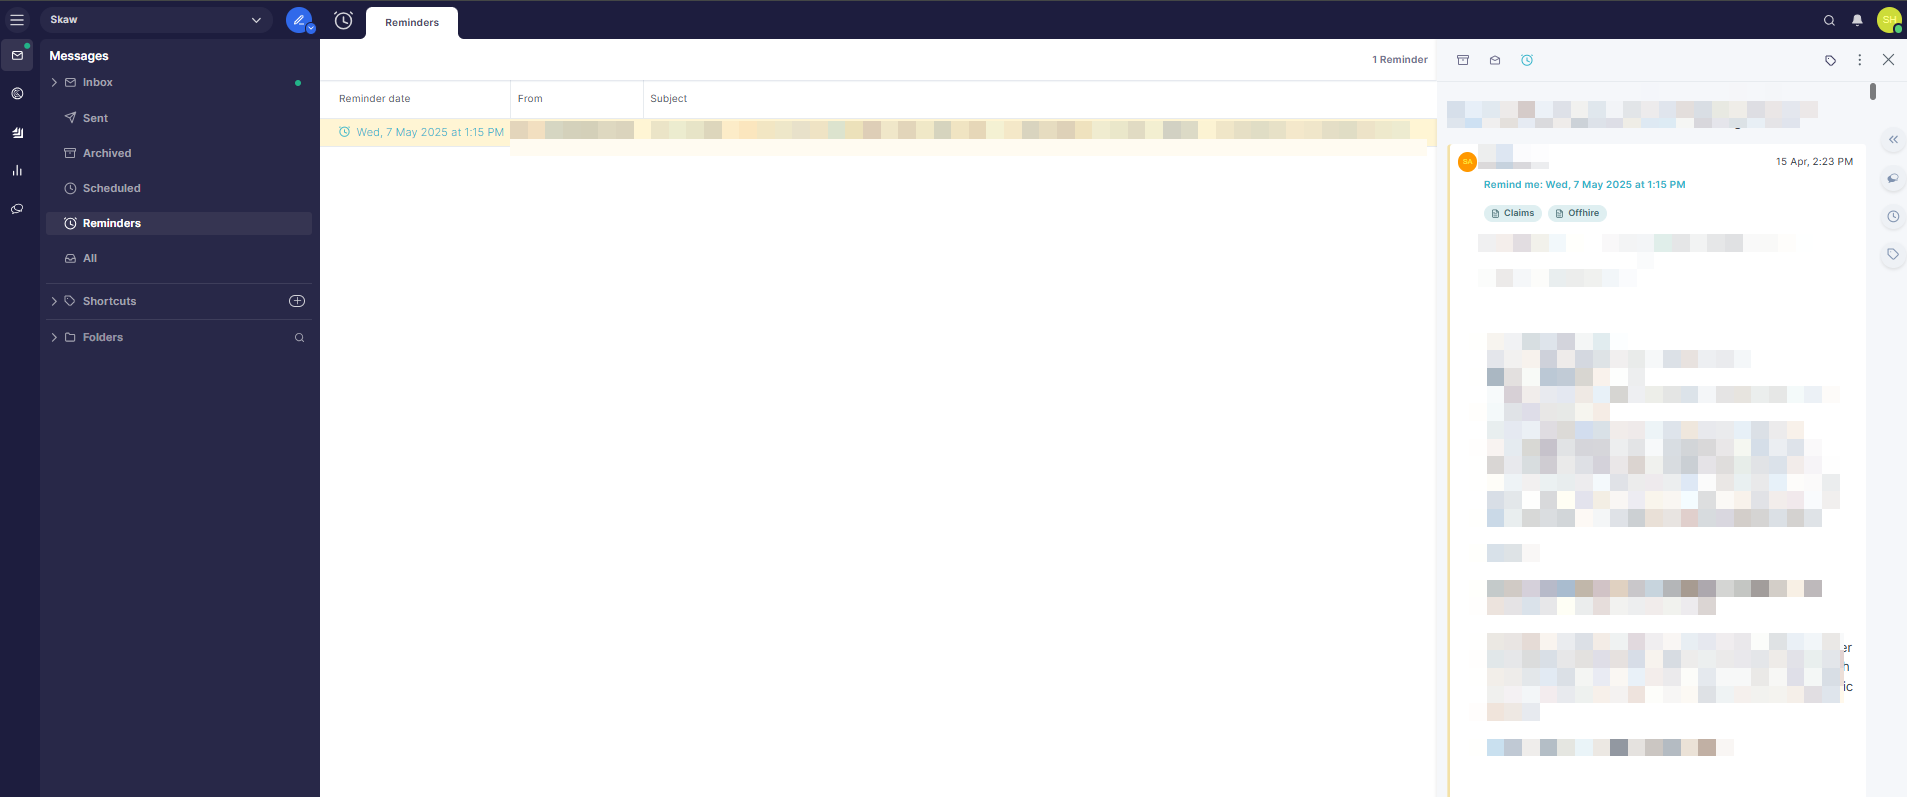
Viewing Reminders
After setting your reminder, you can view it by selecting Reminders located on the Messages sub-menu.
The list will display all your active reminders, with the scheduled reminder date and time highlighted in turquoise, both in the reminder date column and within the email itself.
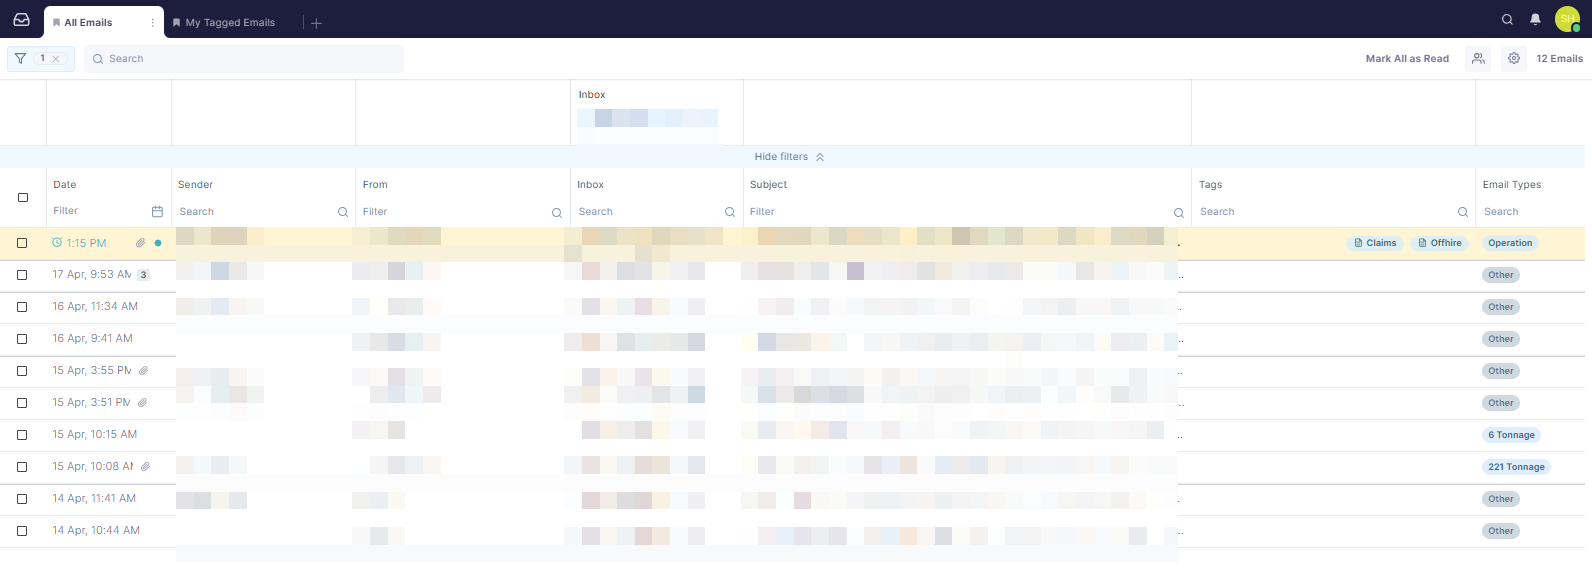
When the reminder time is reached, the email will automatically move from the Reminders list back to your Inbox.
In the inbox list:
-
The reminder date and time (in turquoise) will replace the email's original received timestamp.
-
This will push the email to the top of your inbox, making it more visible.
Editing and Cancelling a reminder
To edit or cancel a reminder, open the reminder email from the Reminders list and access the Remind Me window. You can do this by one of the following:
-
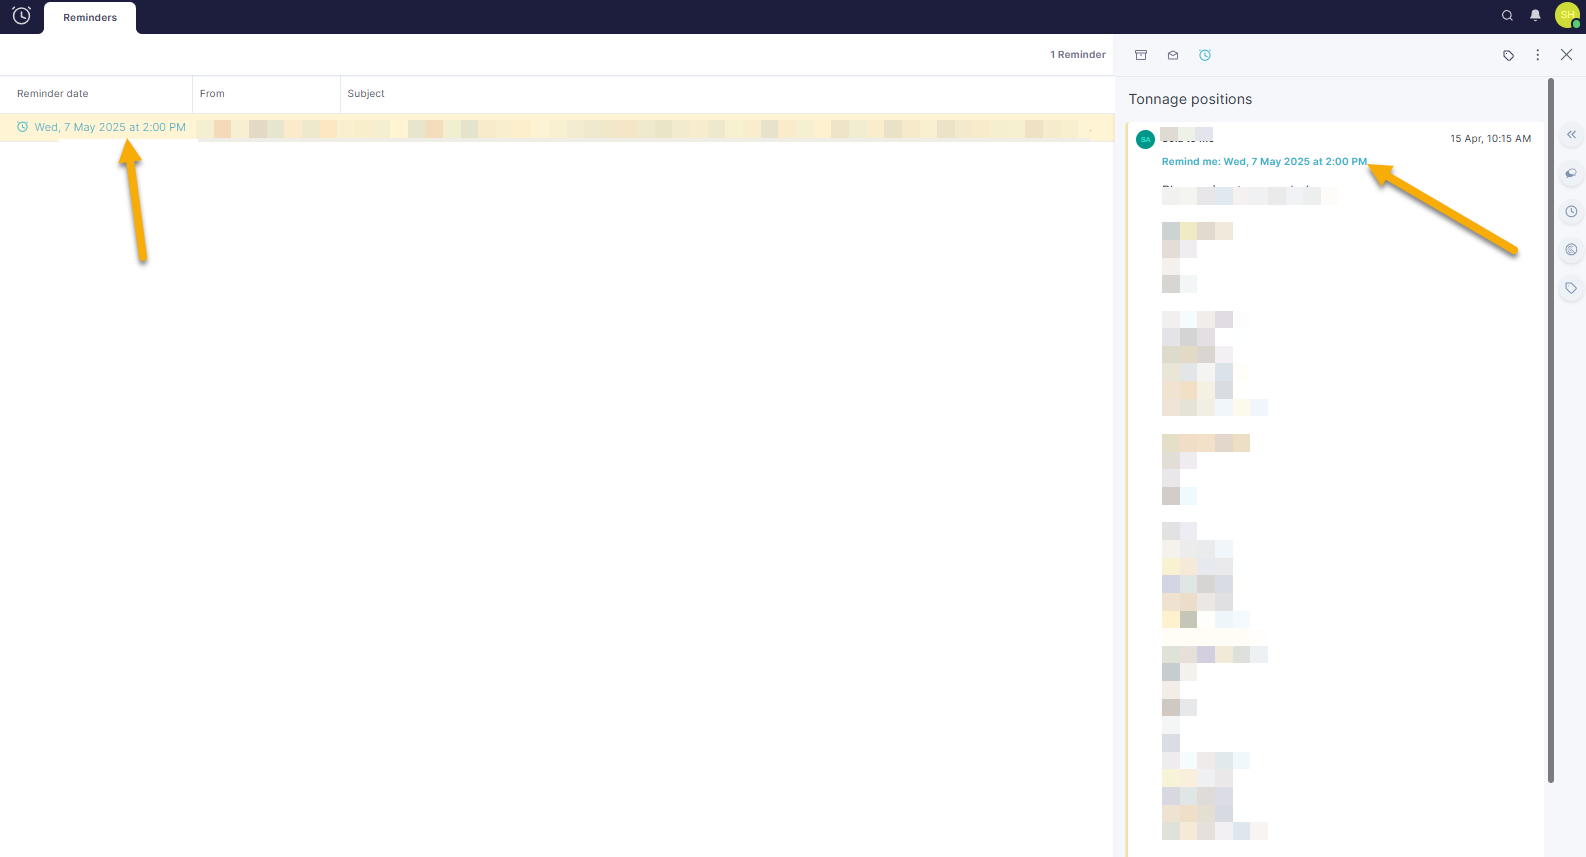
Clicking the reminder date in the Reminders list.
-
Opening the email and selecting the turquoise reminder date.
-
Pressing the “H” hotkey.
To edit the reminder:
-
In the Remind Me window, select a new date and time.
-
Click Done to save your changes.
To cancel the reminder:
-
Select “Cancel reminder and move to inbox” in the Remind Me window.
-
The email will be removed from the Reminders list and returned to your Inbox.
Clearing a reminder
You can clear a reminder from an email that has been returned to your Inbox after the reminder time has passed. This will restore the email to its original received date and position in your inbox.
To clear a reminder:
-
Open the email in your Inbox that has been returned from the Reminders list.
-
Open the Remind Me menu by clicking the "Reminder returned" message or using the "H" hotkey.
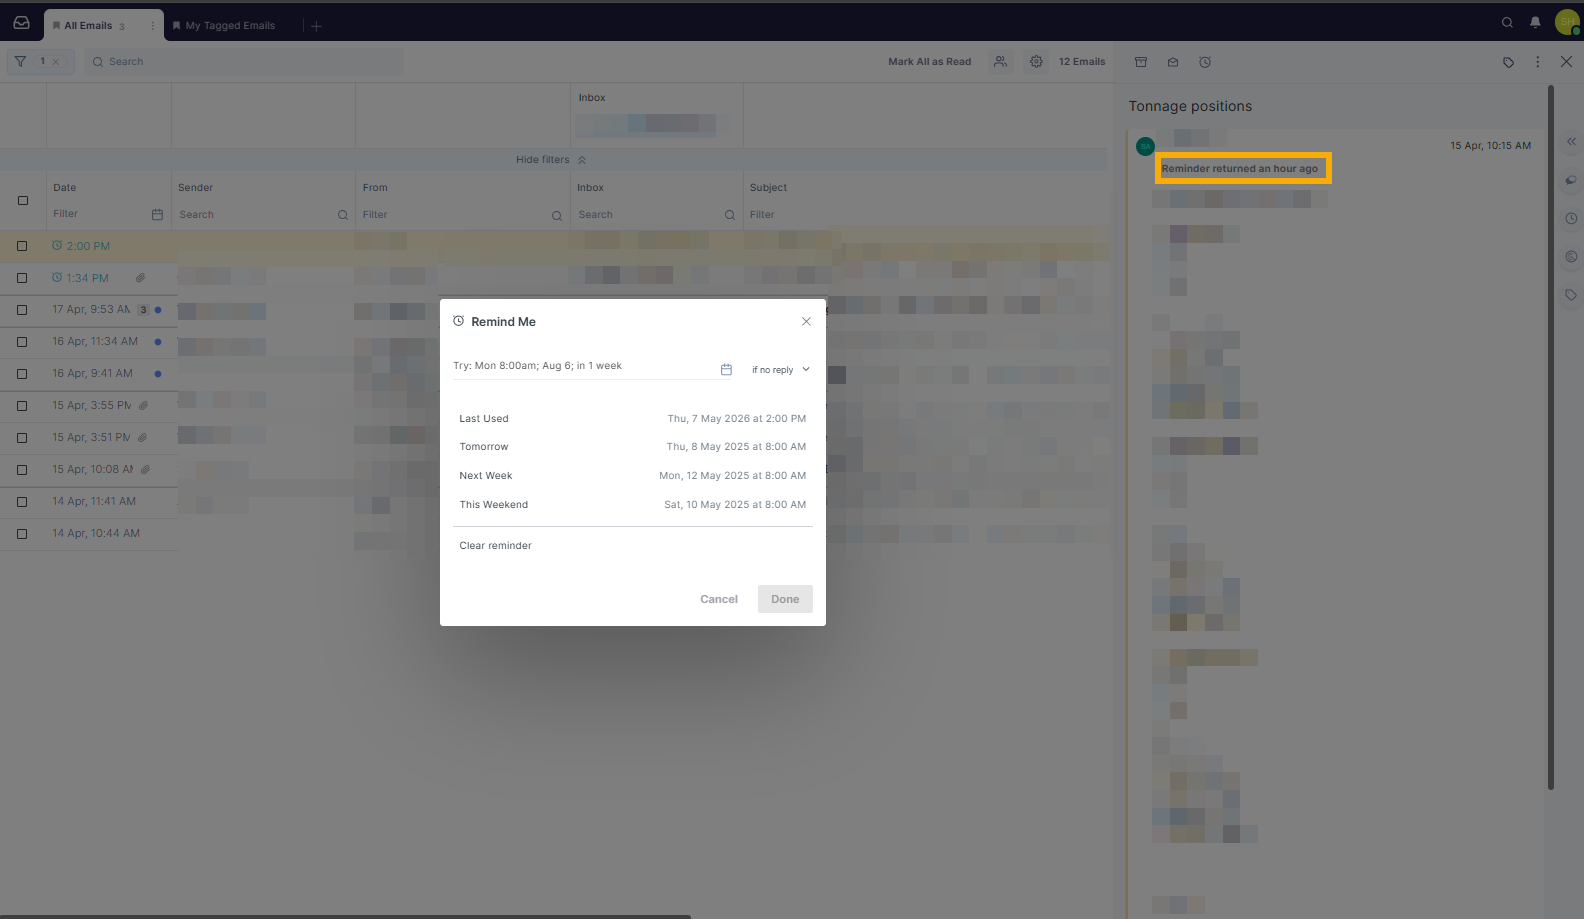
-
Select "Clear reminder".
Once cleared, the email will move back to its original place in the inbox or sent folder based on its original received date and time.