With the IMOS X Claims CoCaptain, you can leverage enhanced automation to handle claims intake quickly. CoCaptain automatically classifies and extracts documents, verifies data against multiple sources, and shares claims packages with your counterparties via email integration.
This solution requires an additional subscription and an IMOS Claims license.
Claims intake
Automatic claims screening
This feature is only available for Accounts Receivable claims.
CoCaptain automatically screens and categorizes claims, and can finalize straightforward no-demurrage cases, freeing analysts to focus on complex, high-value claims. You can customize specific screening rules and thresholds for categorizing claims. Claims are classified into three primary categories:
-
Demurrage – Claims that meet demurrage criteria
-
Needs Input – Claims requiring additional data or manual review
-
No Demurrage – Claims that do not qualify for demurrage charges
When a new claim comes in, CoCaptain automatically evaluates claims against predefined rules and logic, runs calculations across documents and operational data, determines the claim classification (Demurrage, Needs Input, No Demurrage), and provides a clear explanation of how it reached this conclusion.
Open a claim
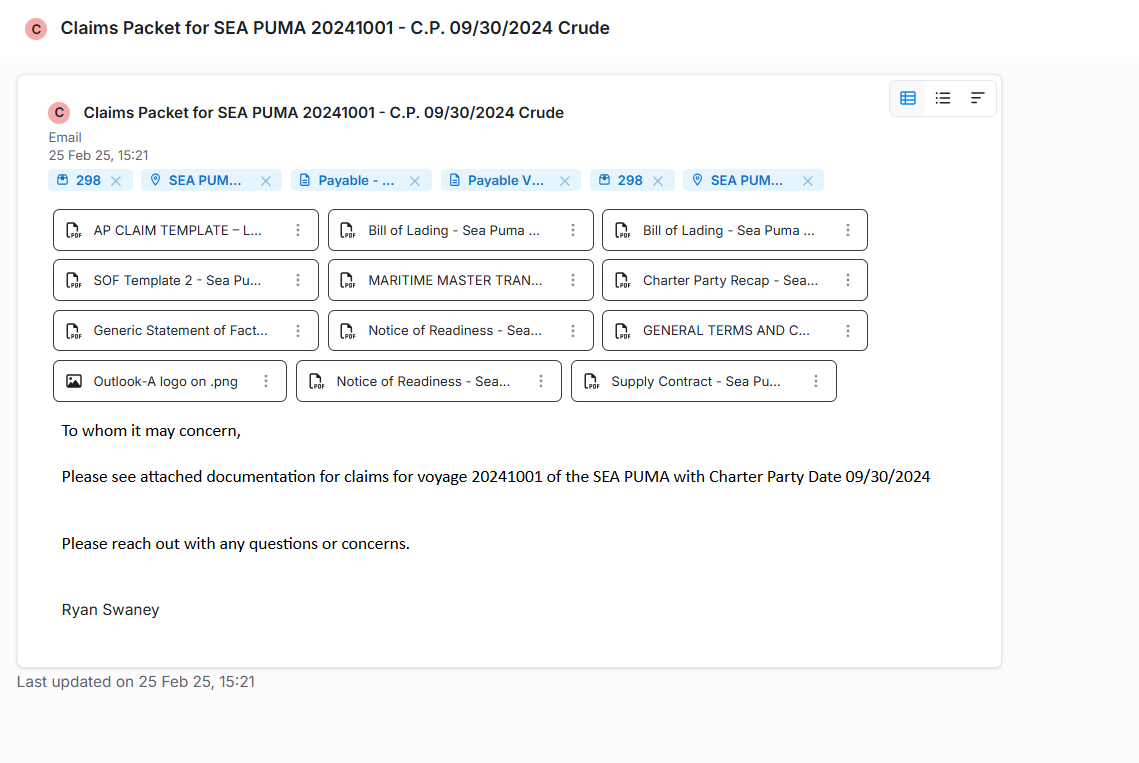
When a claim is received via email, the IMOS X CoCaptain automatically creates a claims entry and extracts information from the provided attachments, such as the Statement of Facts, Counterparty Claim, Notice of Readiness, Surveyor Contracts, or any other relevant files. You can review the entry to ensure the counterparty sends all the relevant documents you need to process the claim.
Select a claim email in the Inbox workspace to open it in Claims.
You can also access claims in the following ways:
-
In the Claims Workspace, access the Claims List view.
-
Use the global search bar to search for specific claims and filter your list.
Review a claim entry
The Document Insights side panel shows you where the system has pulled specific values or entries from the provided claim attachments, allowing you to ensure data accuracy.
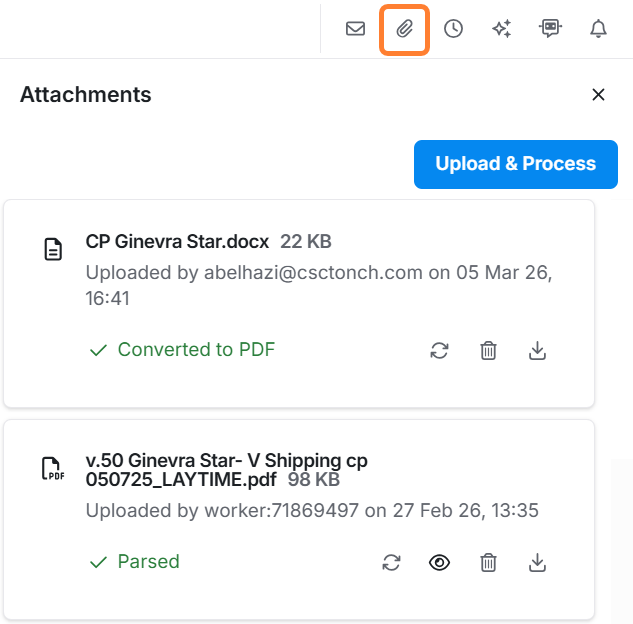
-
The Attachments tab 📎 shows you all the relevant documents classified by type, with specific links to each file. Select Upload & Process to add documents to the claim. CoCaptain uses AI document parsing to classify and extract data and link uploaded claim documents.
-
The Processing Sessions tab ✨ shows you the step-by-step logic used to parse the claim. You can add or remove tags as needed.
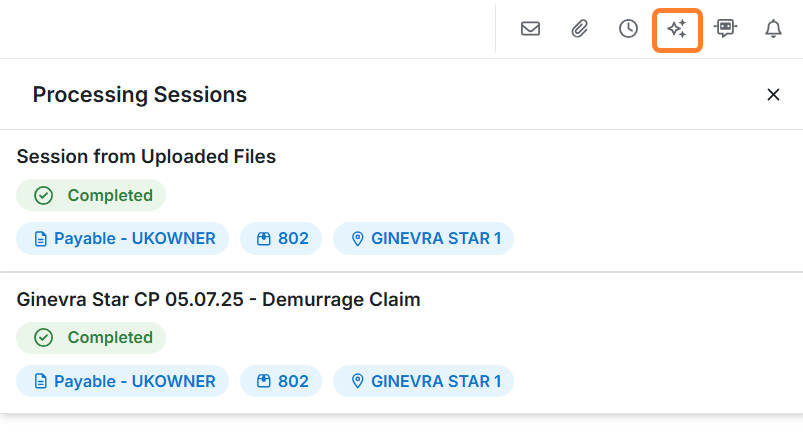
-
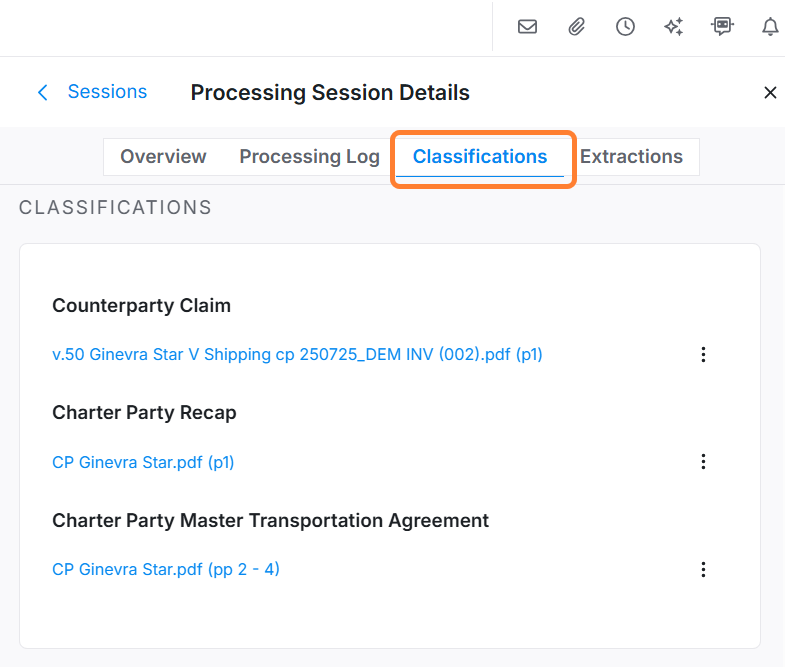
You can select a processing session to see the Classifications tab links all the related documents, grouped by document type, for quick reference.
-
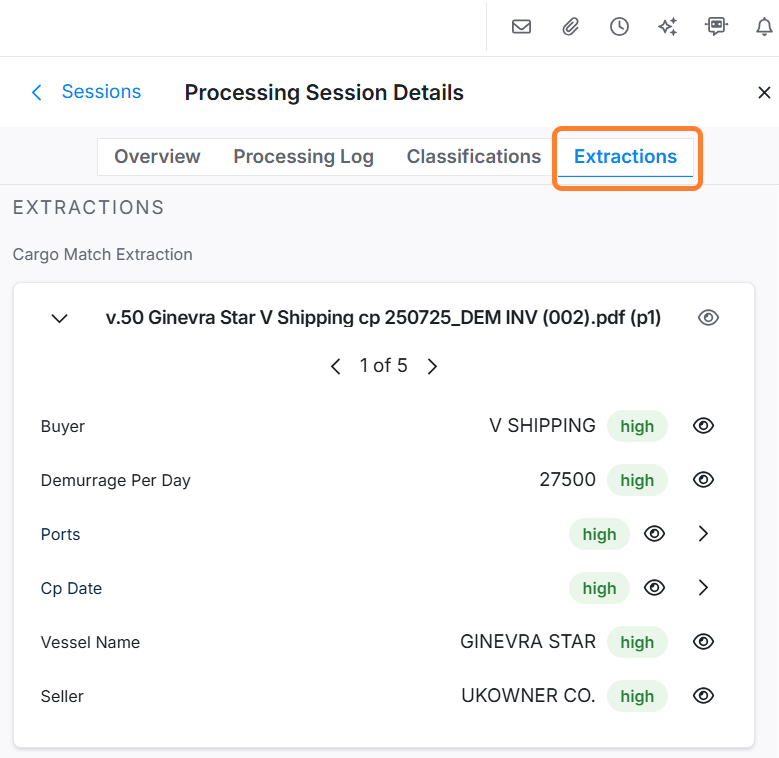
The Extractions tab shows the different contract elements. IMOS X CoCaptain identifies the different clauses that build the claim in the system and assigns a confidence level to each element, shown with a color-coded label. Select the eye icon to view the source of that data and see the highlighted contract elements in each file.
Claims reconciliation
After the claims submission is added and the documents are parsed, you can reconcile the claim information.
Ask the AI chat
Chat with CoCaptain to analyze your current claim. Use the quick-access options for executive summaries, obtaining rate/allowed time information, document assessments, or ask specific questions for tailored insights.

Validate the contract elements
-
Review the Original or Agreed fields and edit if needed. You can choose a claim value from the suggested amounts or manually override the amount with a new value.
-
Select a Type, Last Action, and relevant date fields.
-
Update the clauses using the checkboxes provided.
-
Select the Include in P&L checkbox.
-
Verify the timebar date.
Unsaved changes are highlighted in yellow. Once the data is reviewed and validated, IMOS X incorporates all of the updated claims information when you select Save.
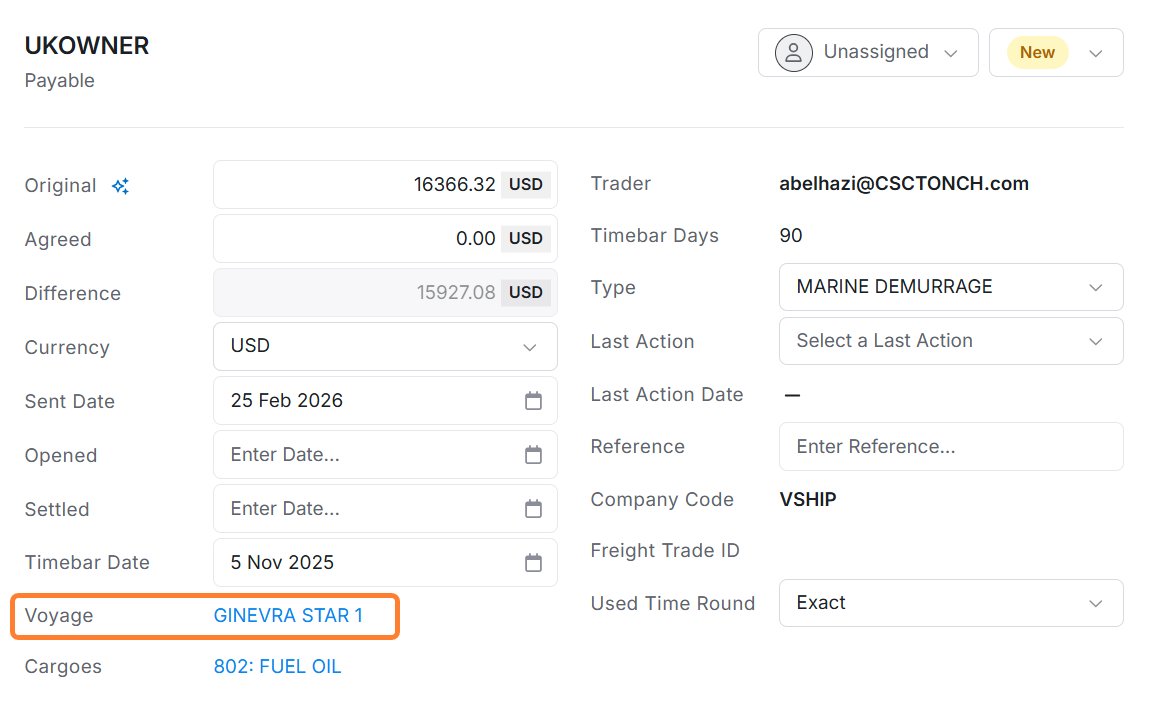
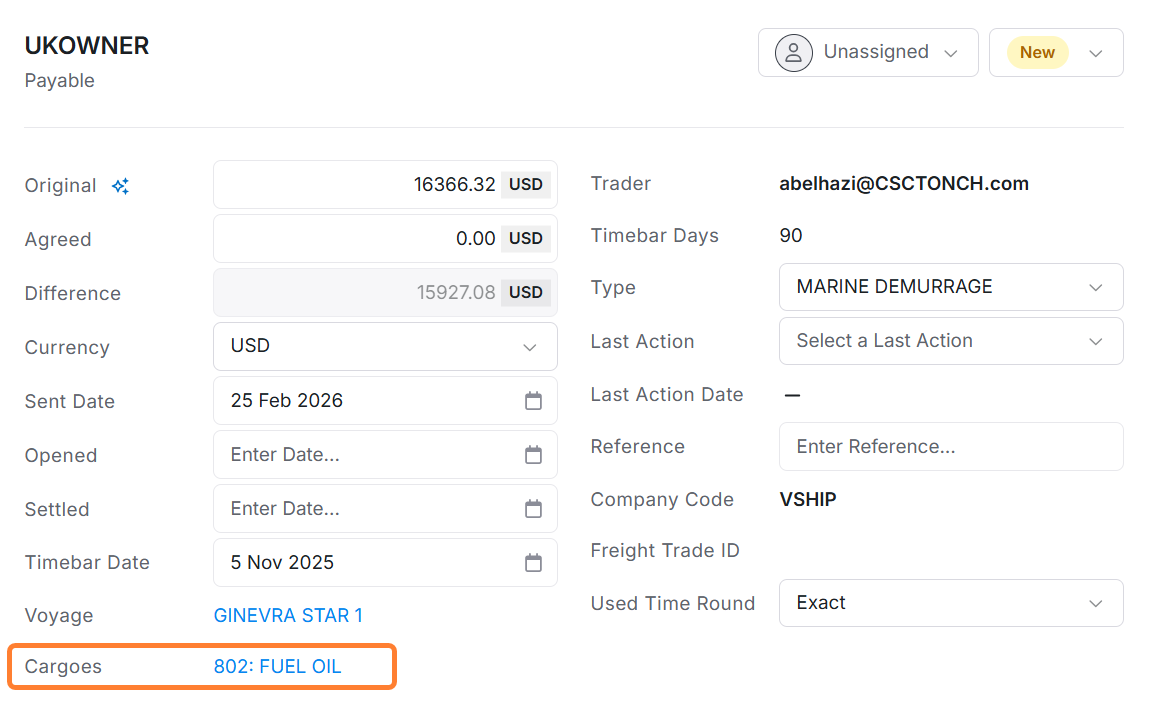
Review voyage and cargo information
Select the linked voyage or cargo in the claim entry to get high-level details about each directly in the side panel.
Change listed ports
You can adjust the listed ports by selecting the three-dot menu next to the relevant port and selecting Remove Port Call. You can also adjust the laytime calculation or rates using the editable fields in the Details section.
Review Deductions
You can see deductions per activity associated with the IMOS laytime calculation under the claim activities. Select Add Port Deduction to create a new one or delete existing deductions.
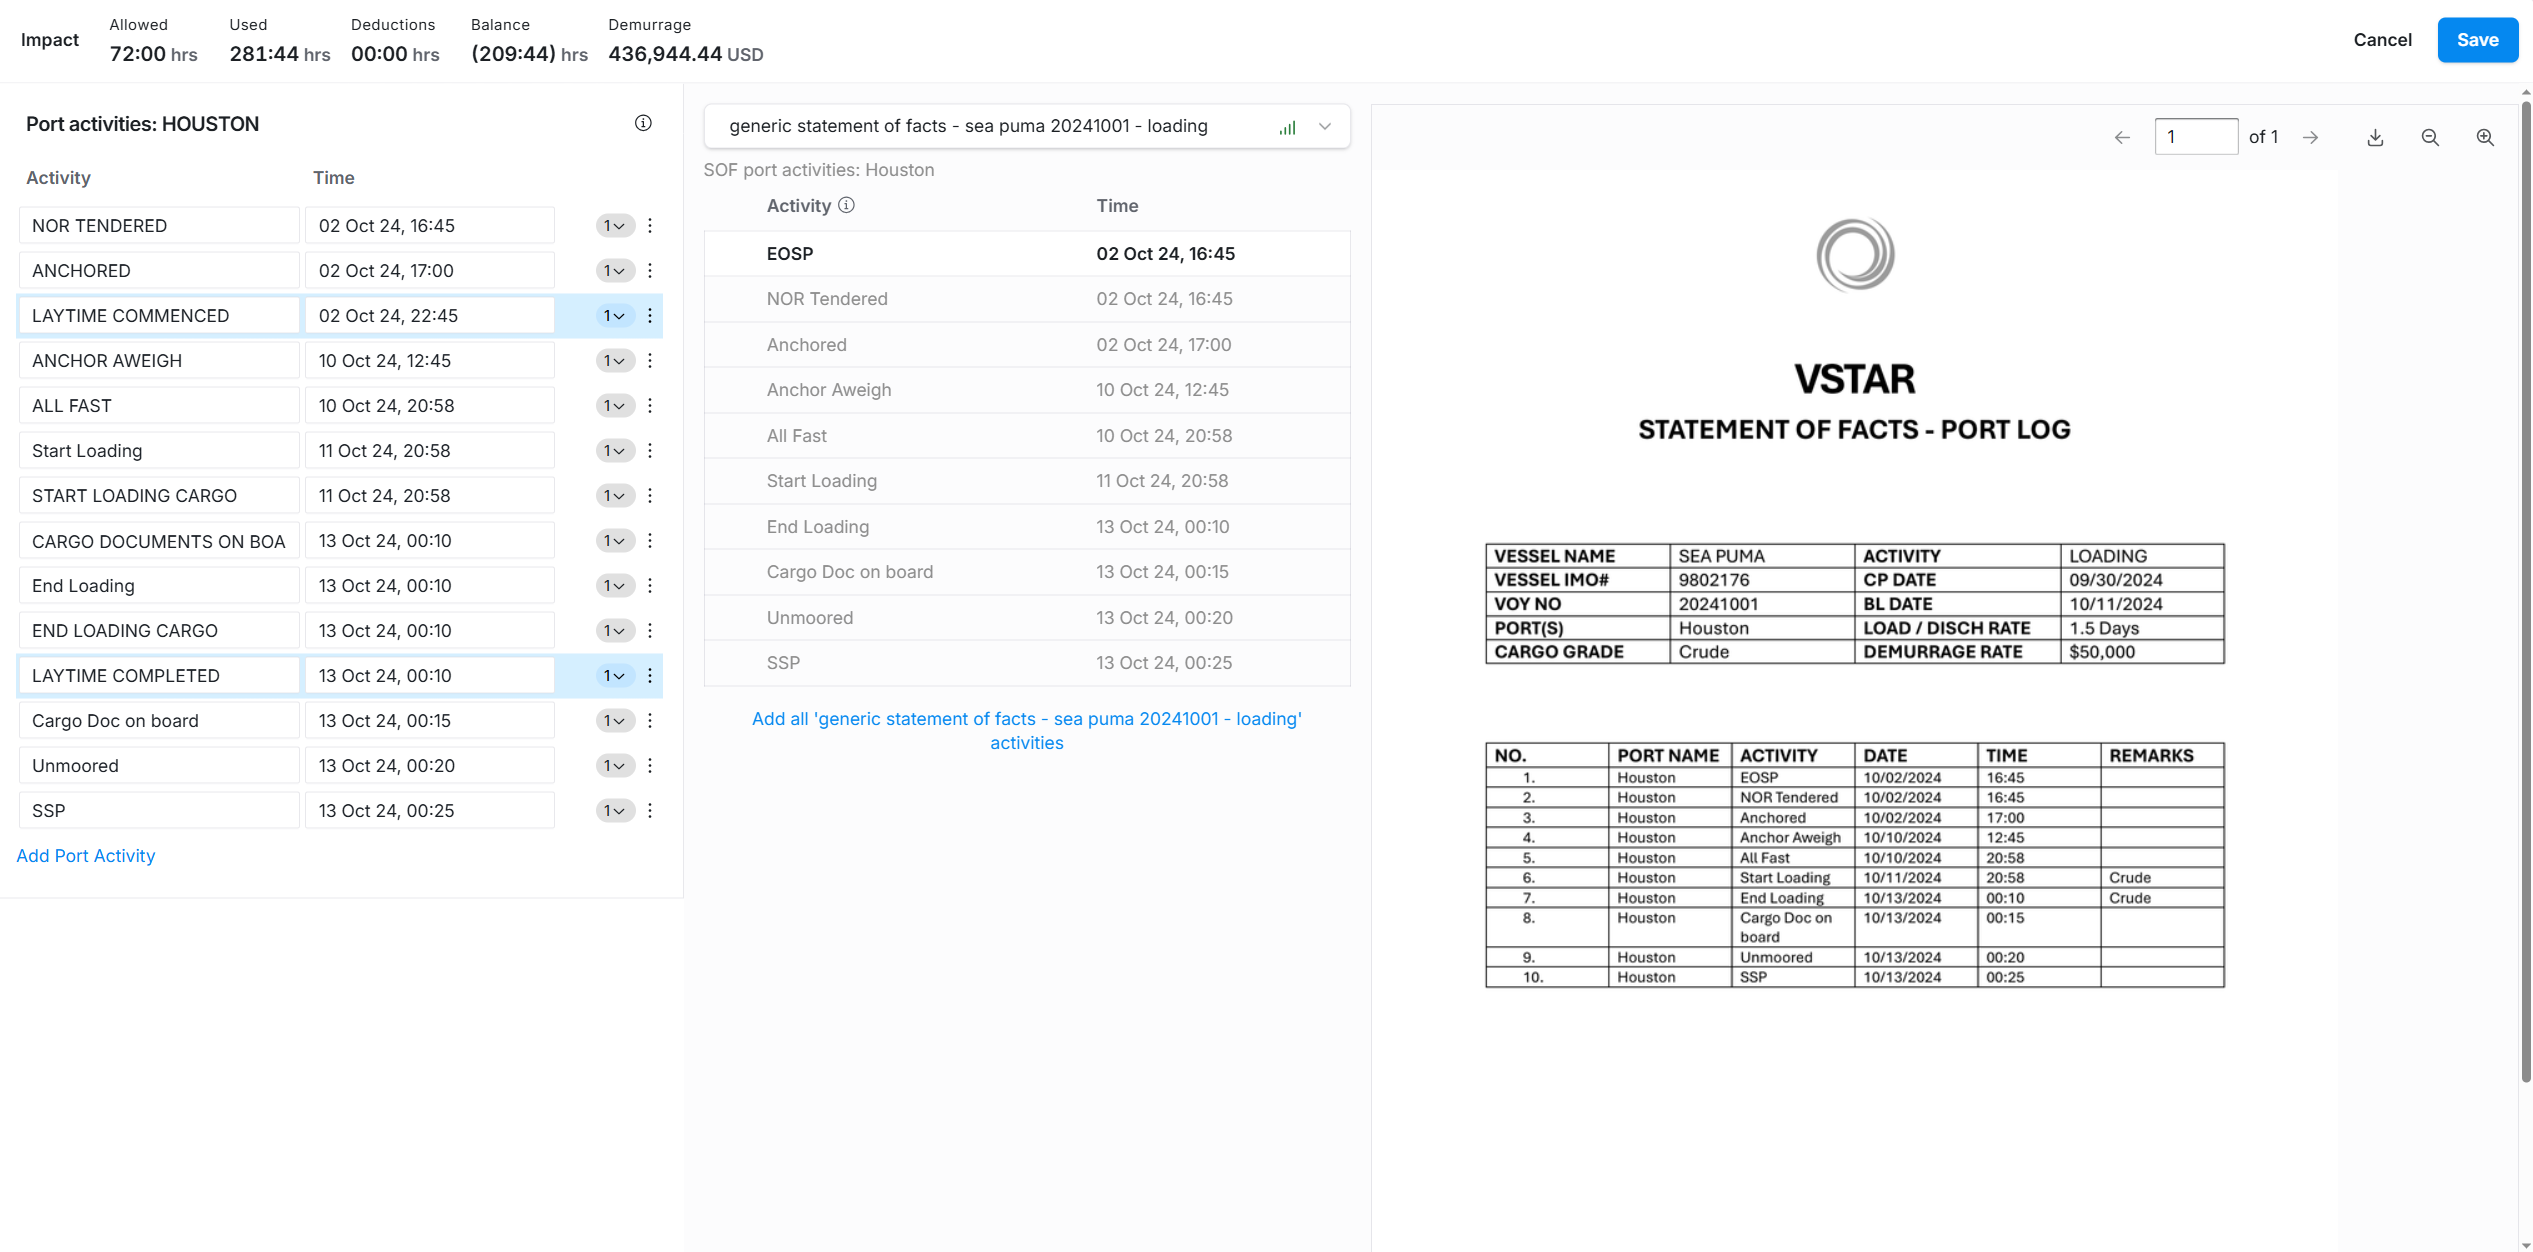
Compare SOFs
Select the SOF Compare button to reconcile port activities and compare information from the document parsing to what is stored in IMOS.
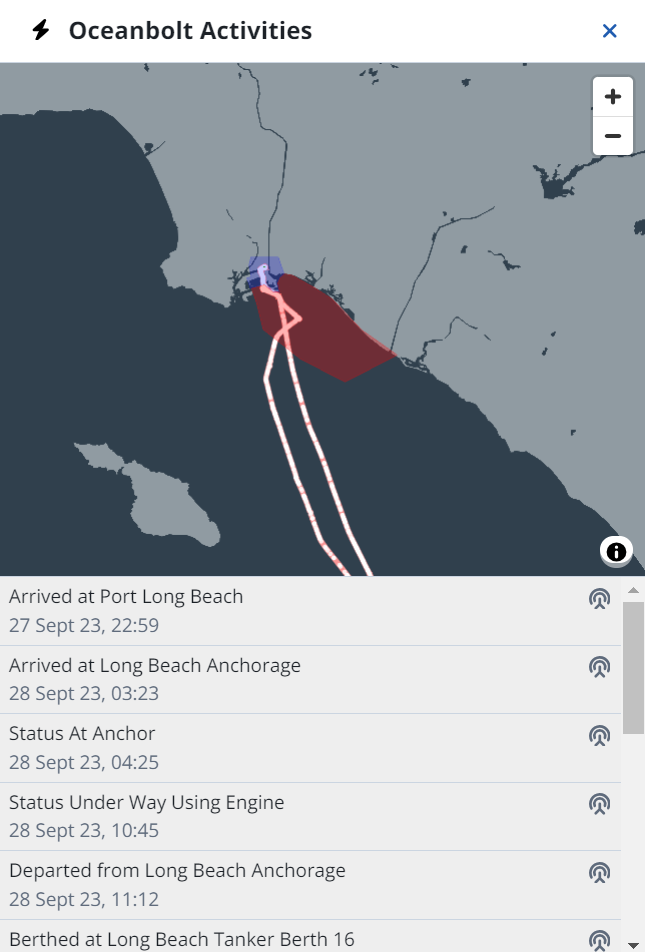
Review Oceanbolt Activities
Select the ⚡ Oceanbolt Activities button to open the activities in a map view side panel.
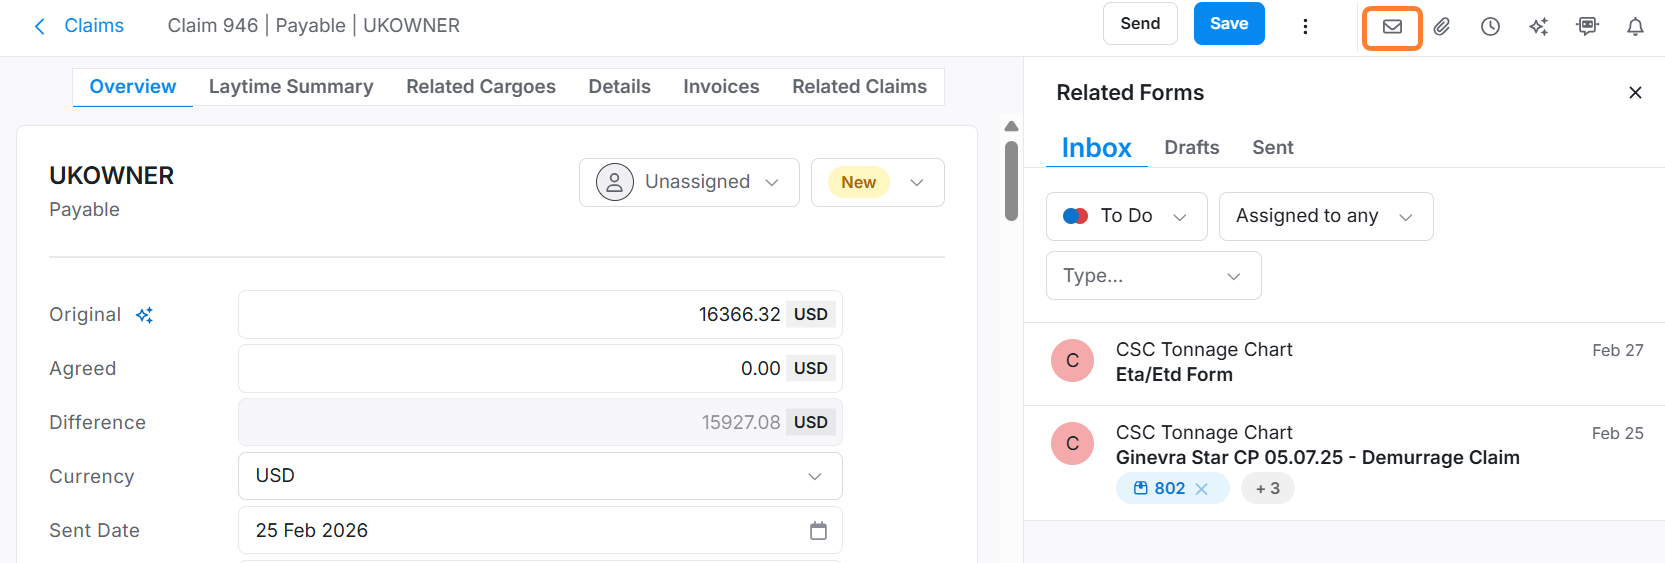
See Related Forms
You can monitor all of your back-and-forth email communication with a counterparty by selecting the Related Forms tab in the side panel of the claim entry.
This workflow is integrated with IMOS and automatically updates your P&L throughout the claims process.
During the review, you can update the claim status accordingly.
Review Suggested & Related Claims
Suggested Claims are claim opportunities based on time-bar tasks in IMOS.

Related Claims are existing claims that may be associated with your current claim.

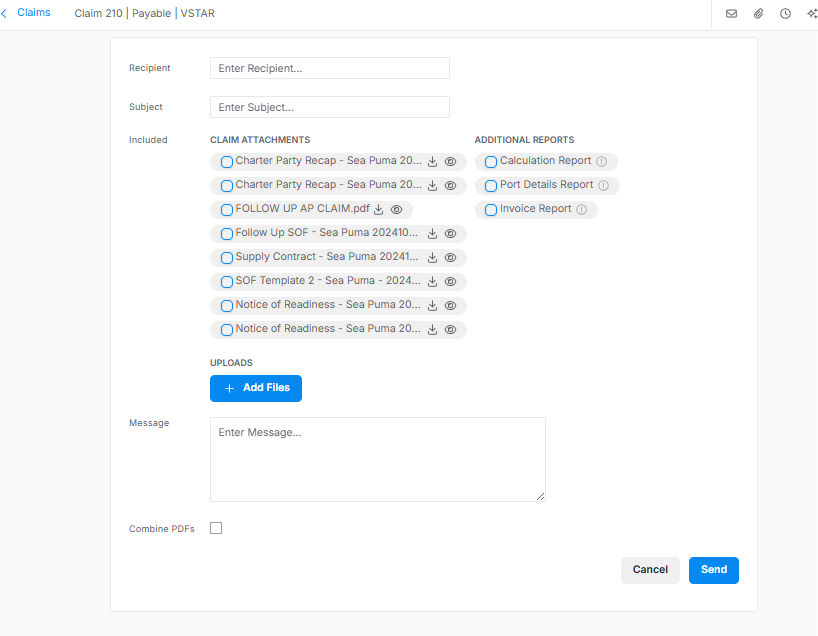
Send a claim to the counterparty
Select Send in the upper right of the claims entry to send the claim to the counterparty, customize your message, and select any relevant attachments.
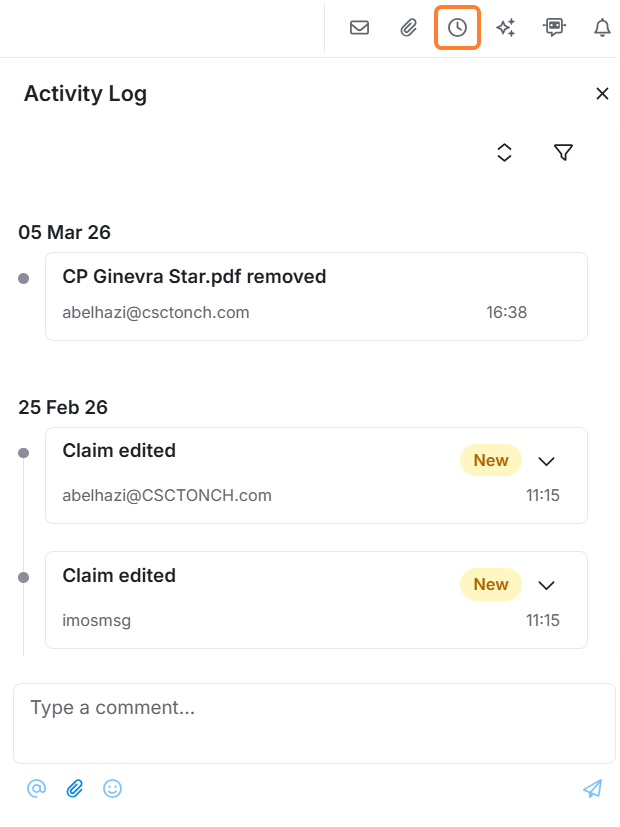
Monitor the Activity Log
The Activity Log 🕓 captures any changes made to the claim. It includes email communications, changes to the claim's metadata, relevant related records that would impact the claim, internal assignments, and approvals. You can use it to capture additional notes and communications.
The Activity Log groups changes made at the same time, so you can quickly review them. Use the Activity Log's filtering capabilities to refine your search to messages or file types, as well as edit or comment on activities.
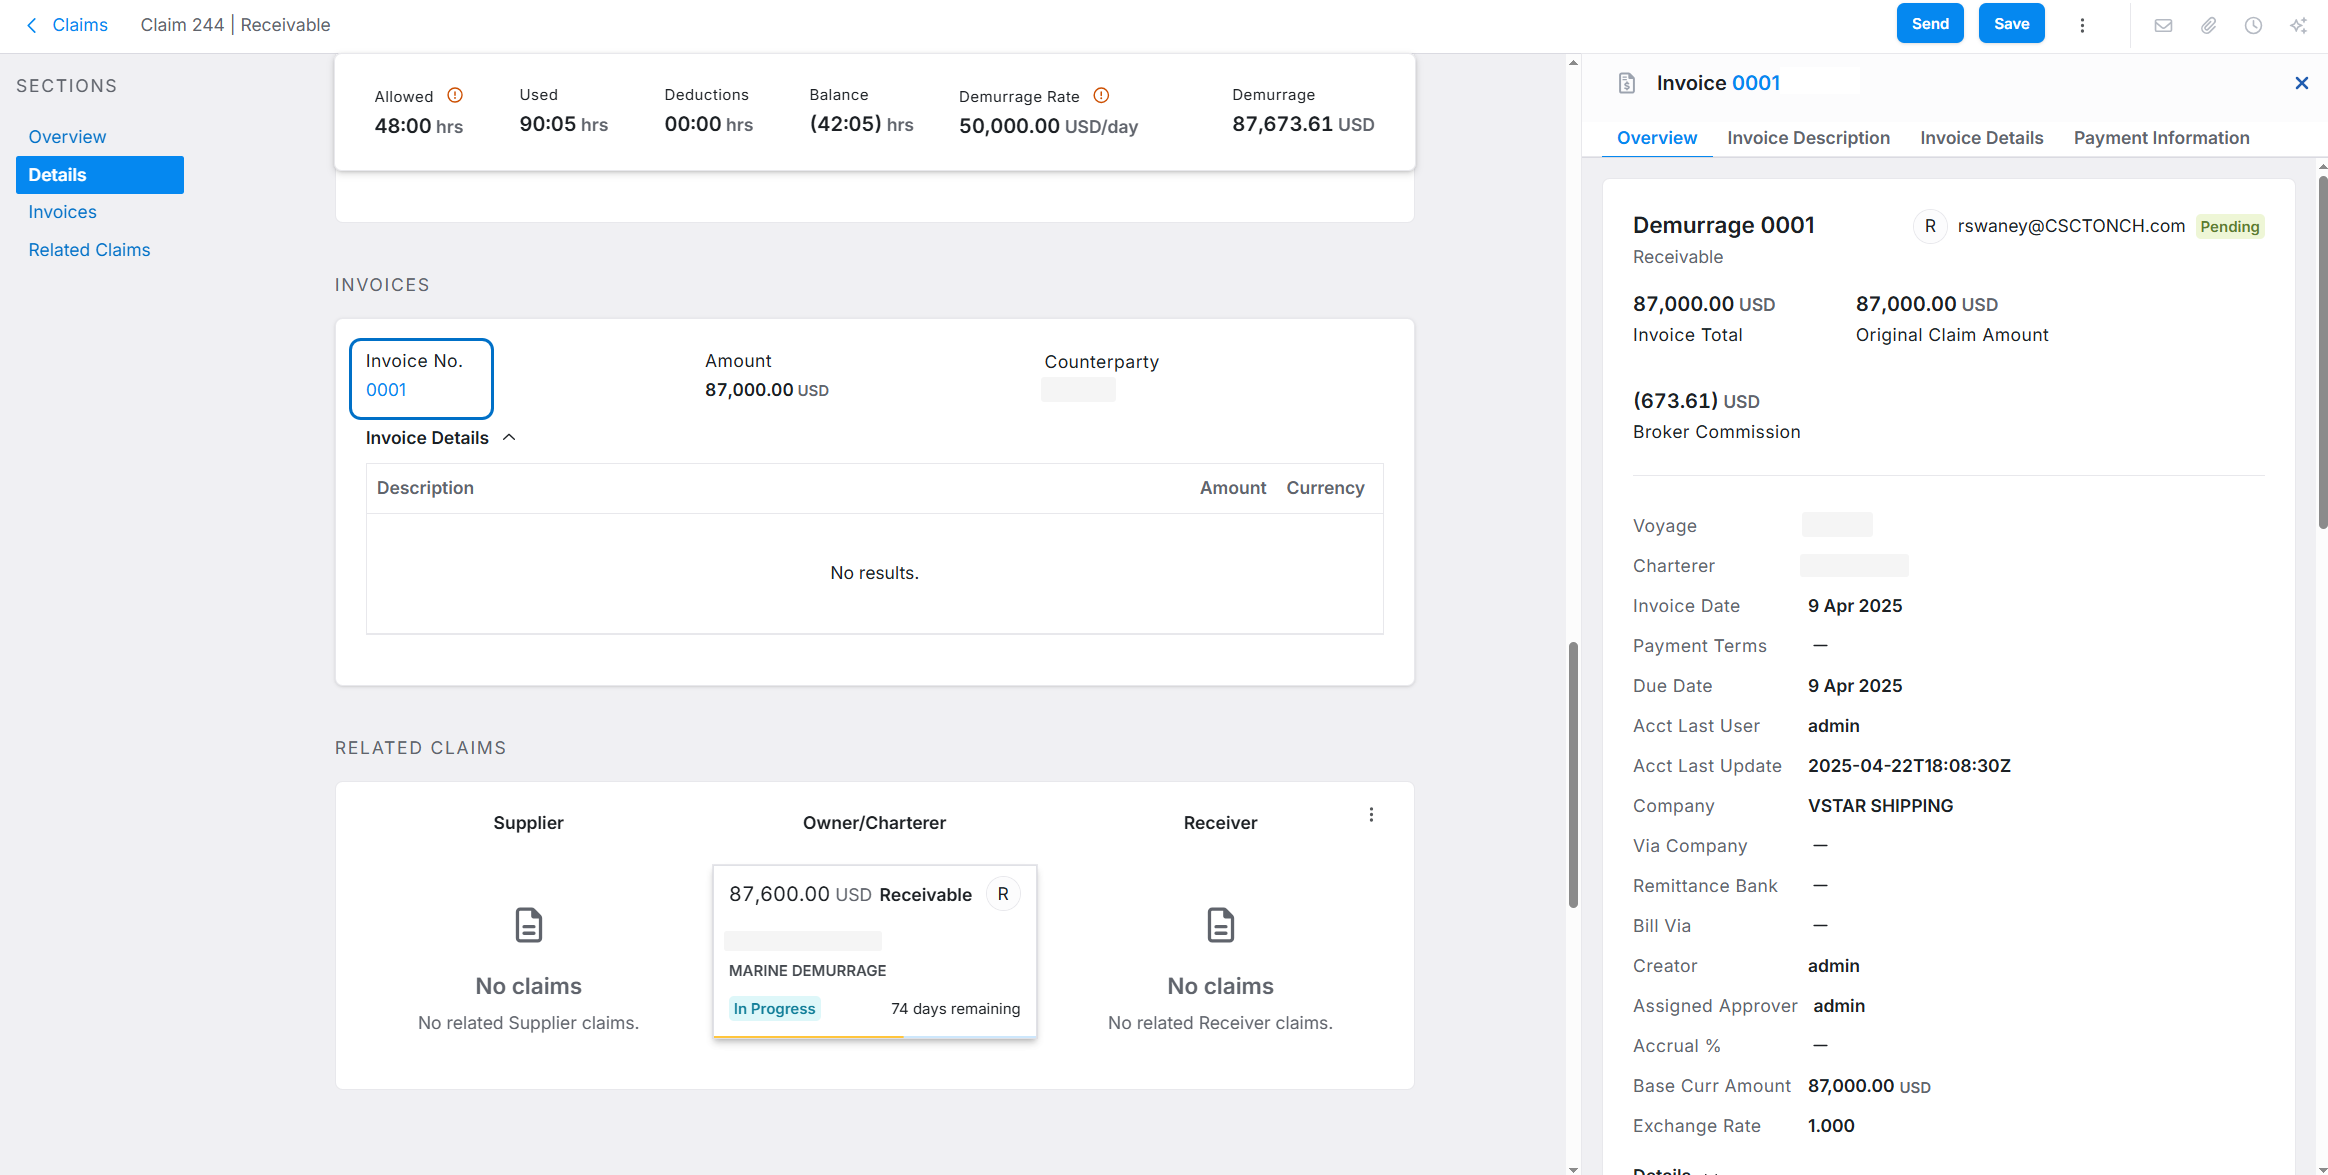
Review Invoices
After the claim is settled, select the linked invoice to open the Invoice side panel and view a PDF version directly in the claim entry. After approving the Invoice in IMOS X, it is available for final approval following the standard invoice workflow.