This feature is only available to subscribers with the Booking List option.
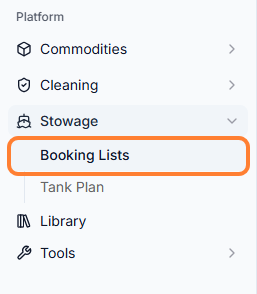
To access the module click on Booking Lists from the home page.
The Booking List module allows you to create a booking list for each vessels voyages. Further details are outlined below.
Overview
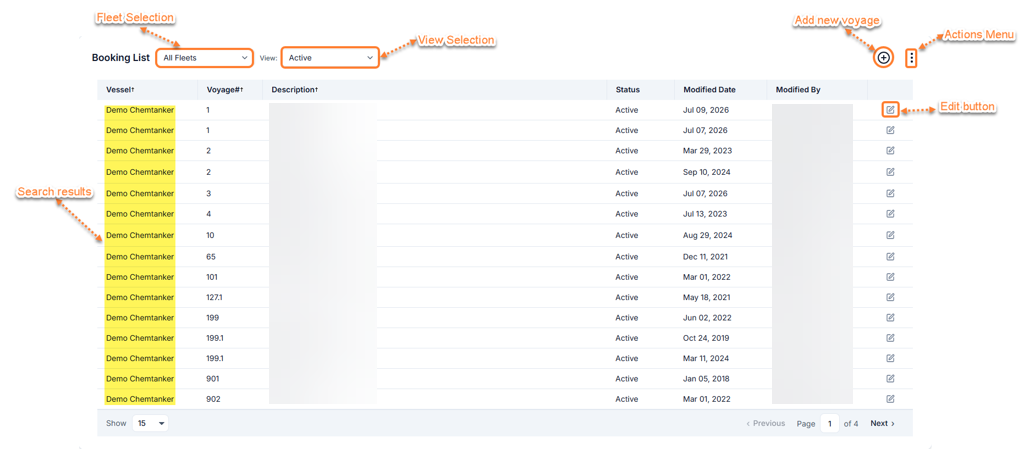
Column Sorting, Filtering and Paging
The Booking List module support the same sorting, filtering and paging which are available in the Commodity Search module.
Please see Commodity Search | 1.6 Column Sorting Commodity Search | 1.7 Filtering the Data Commodity Search | 1.8 Paging for more information.
Viewing a Booking List for a Vessel/Voyage
To view the booking list for a voyage click the Edit image for the selected vessel/voyage.

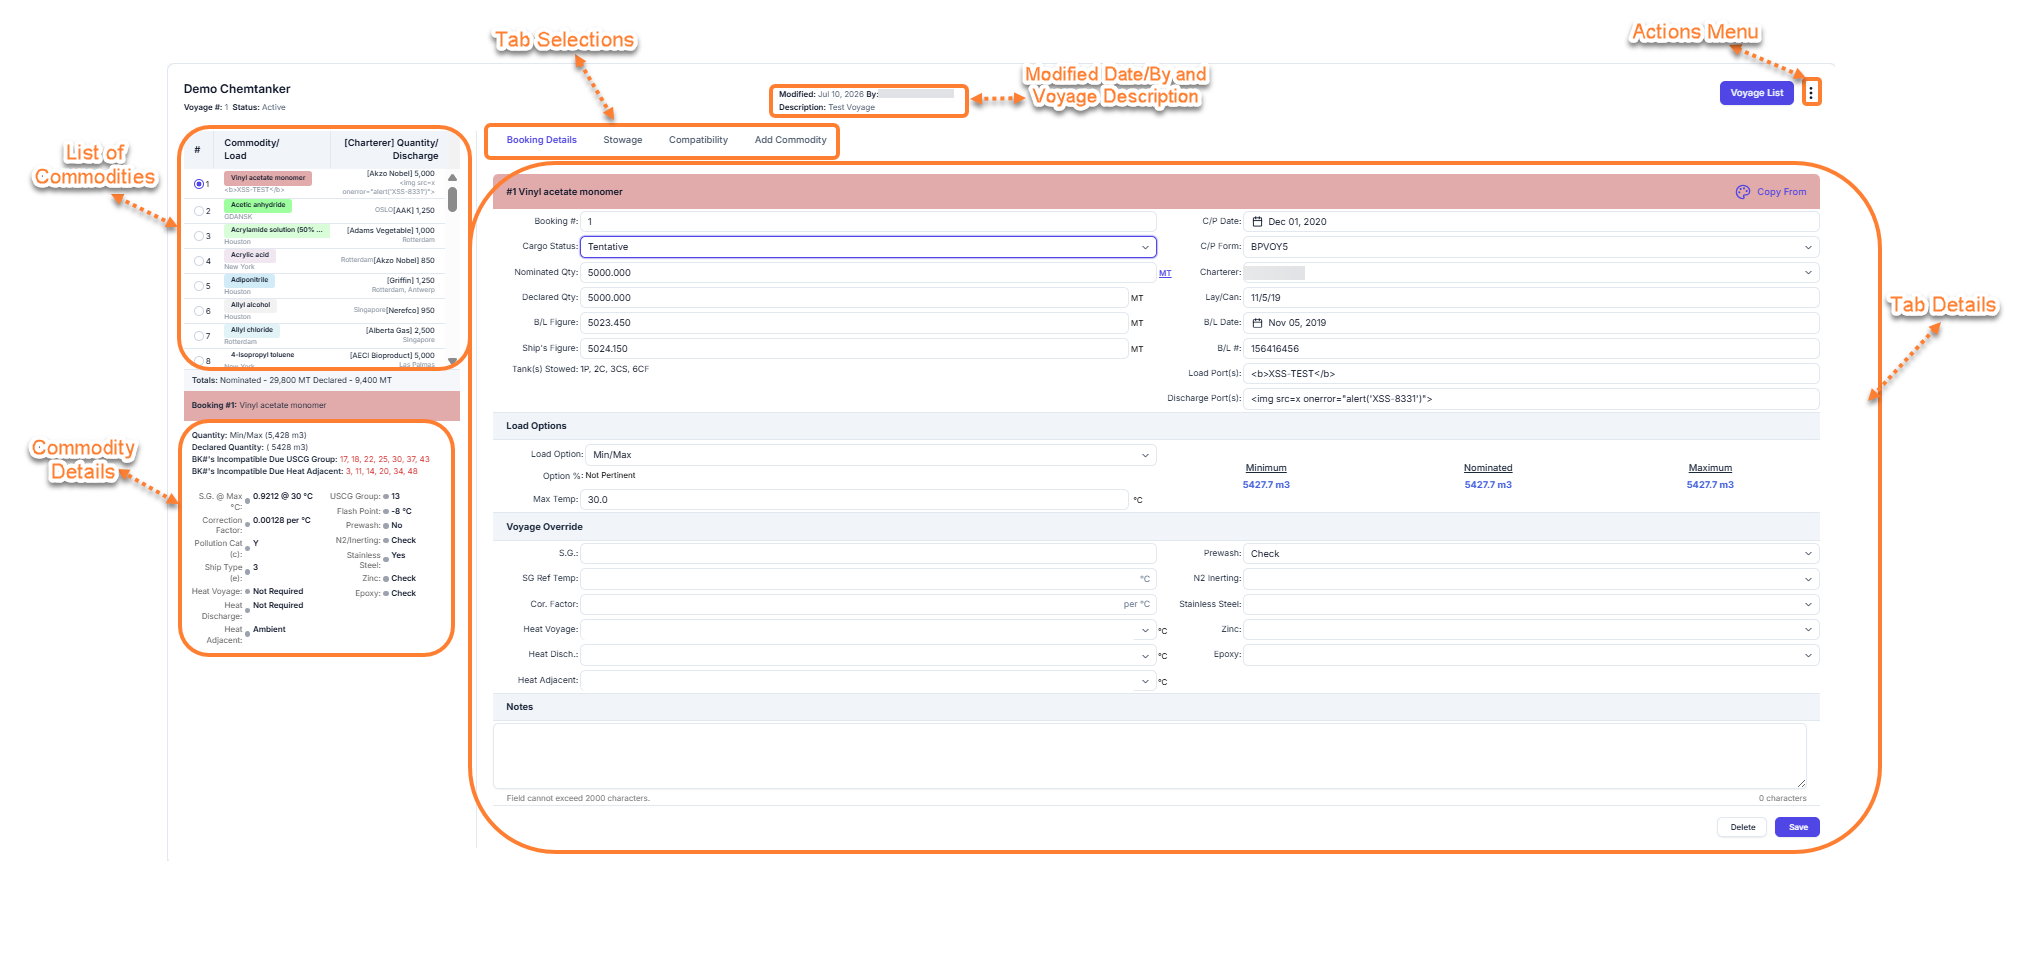
You will be redirected to the Booking List Detail page.
Creating a New Booking List
-
To create a new booking list for a vessel click the New Voyage button.

-
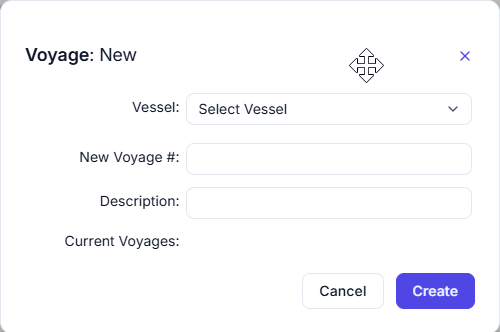
A popup window (shown below) is displayed where you can select the vessel or voyage you wish to create the booking list for.
-
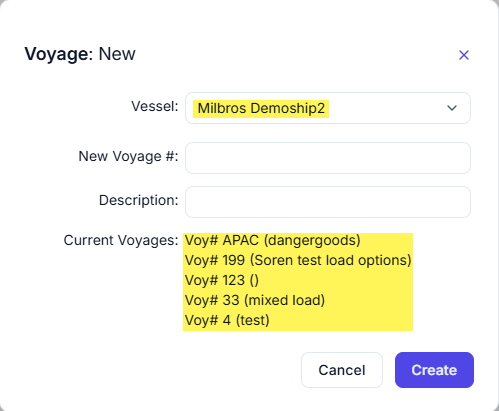
Once the vessel name is selected then the historical voyages for the selected vessel are displayed.
-
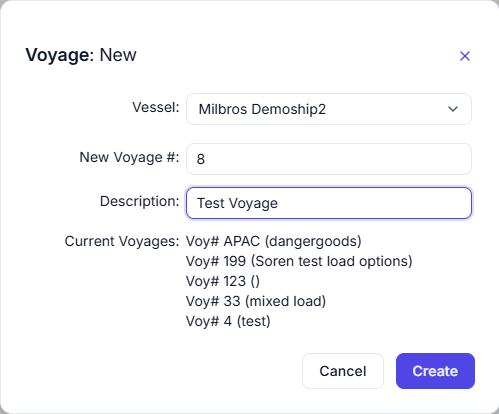
You then enter the Voyage # for the new voyage you wish to create a booking list for.
-
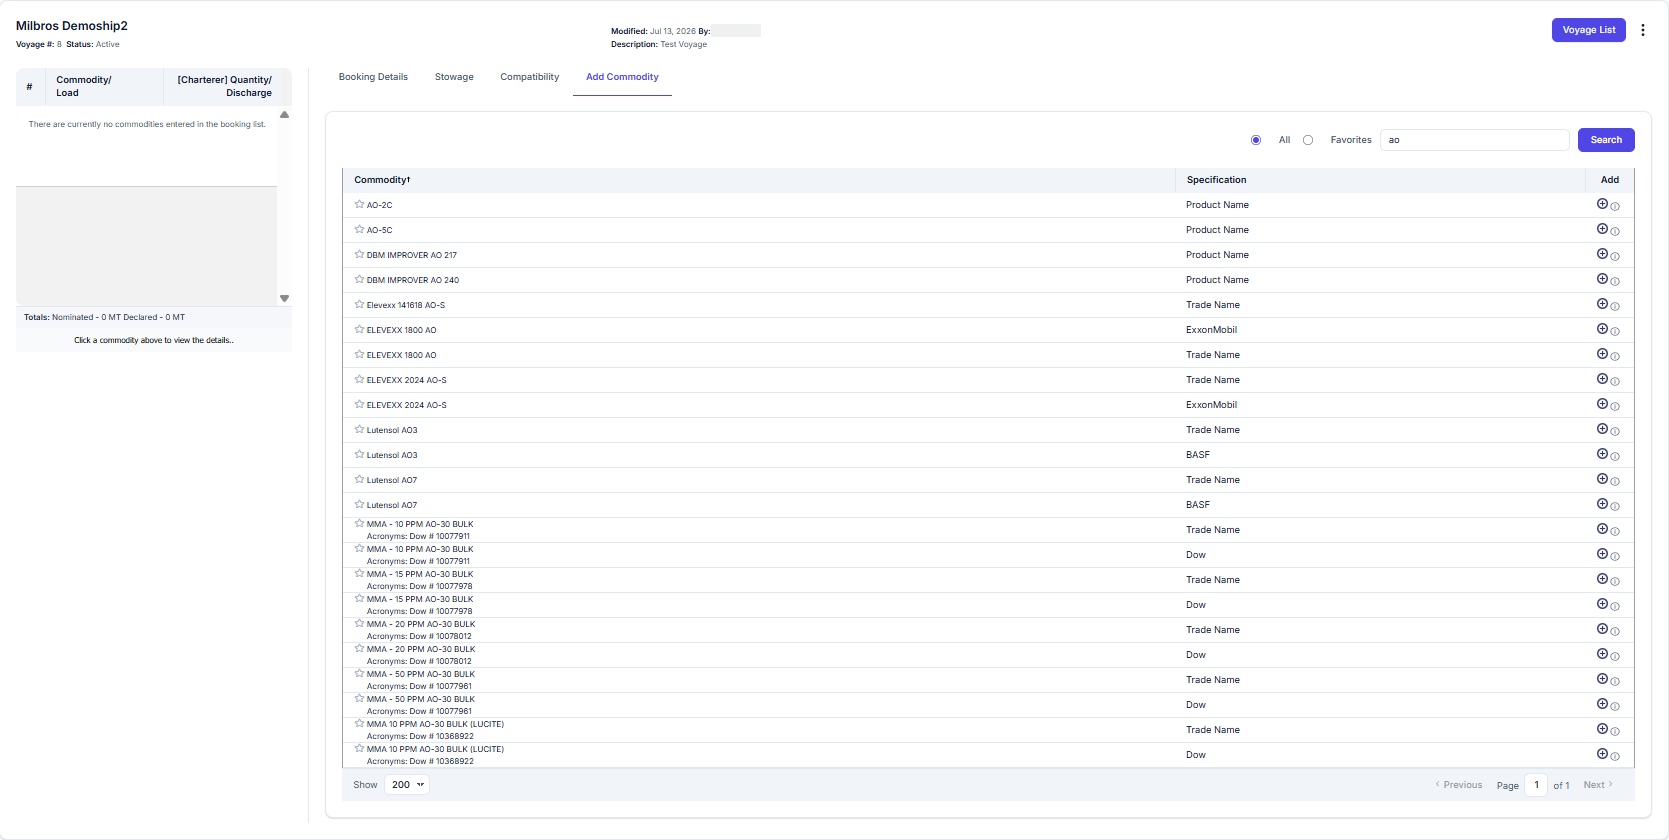
Click the Create button to create the voyage and you are then redirected to the Booking List for the newly created voyage. The left pane shows there are currently no commodities in the Booking List and the right pane displays the Commodity Search interface which you can use to lookup the commodities you wish to add to the booking list.
-
Type in the Search field the name (or part of the name) of the commodity you are looking for and hit Search. A list of the relevant commodities will be listed below the search field. Select the commodity you wish and click on the Add symbol to add it in the Booking List.
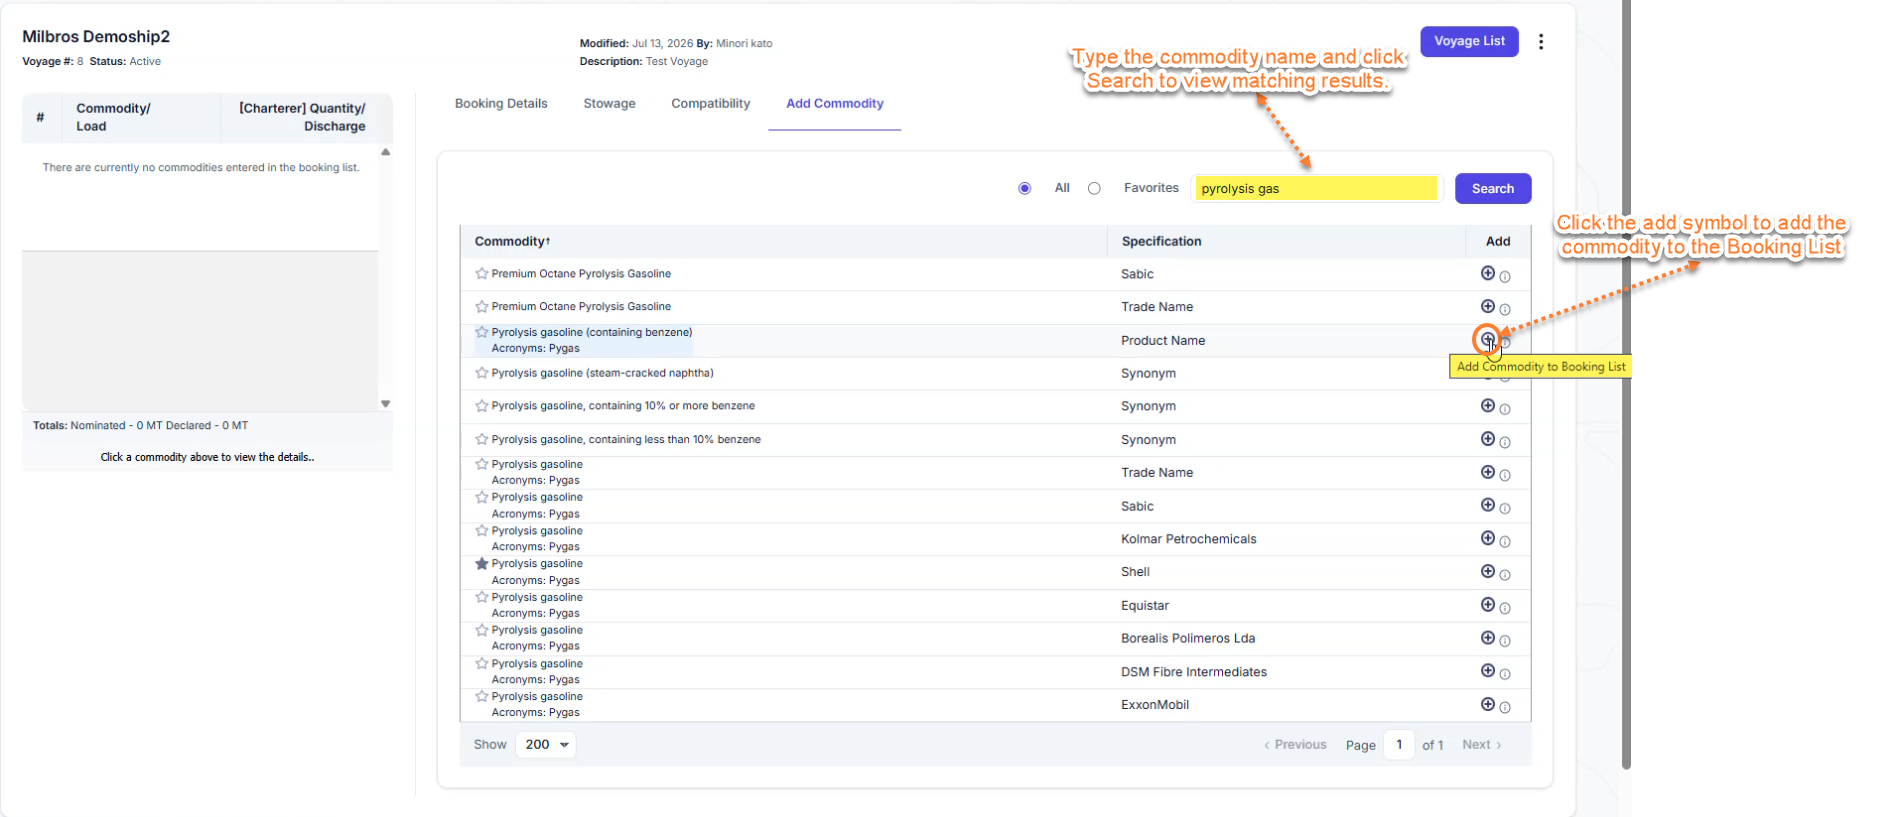
The commodity will be added to the load list.
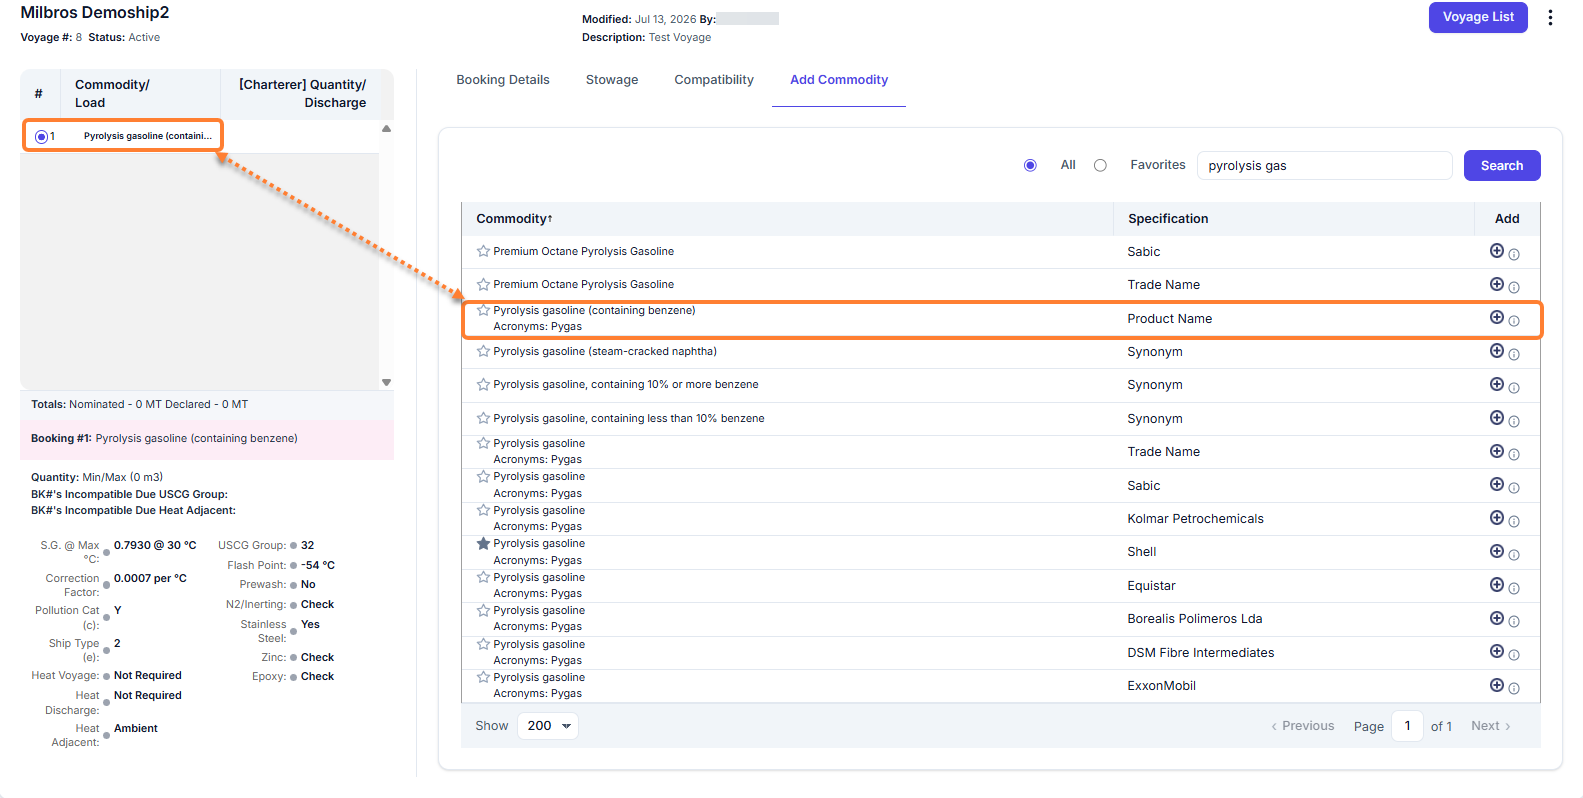
-
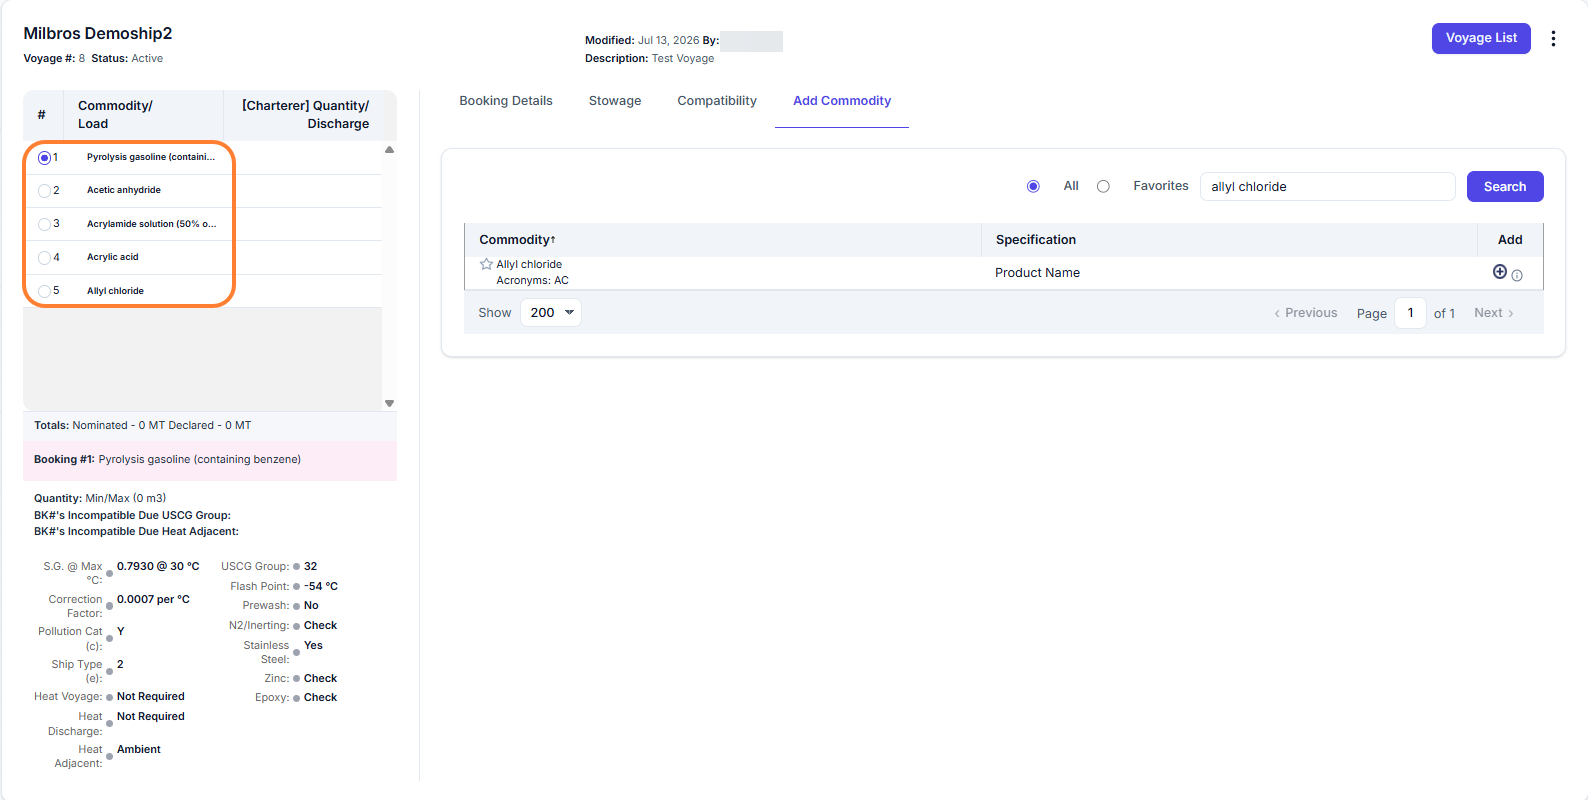
Repeat Step 6 to add more commodities if needed. The below example lists 5 different commodities.
Note that you can select a different color for each commodity if you want to distinguish between commodities easily. To do so, click the symbol as shown in the below screenshot under the Booking details tab, next to the commodity name on the right pane.
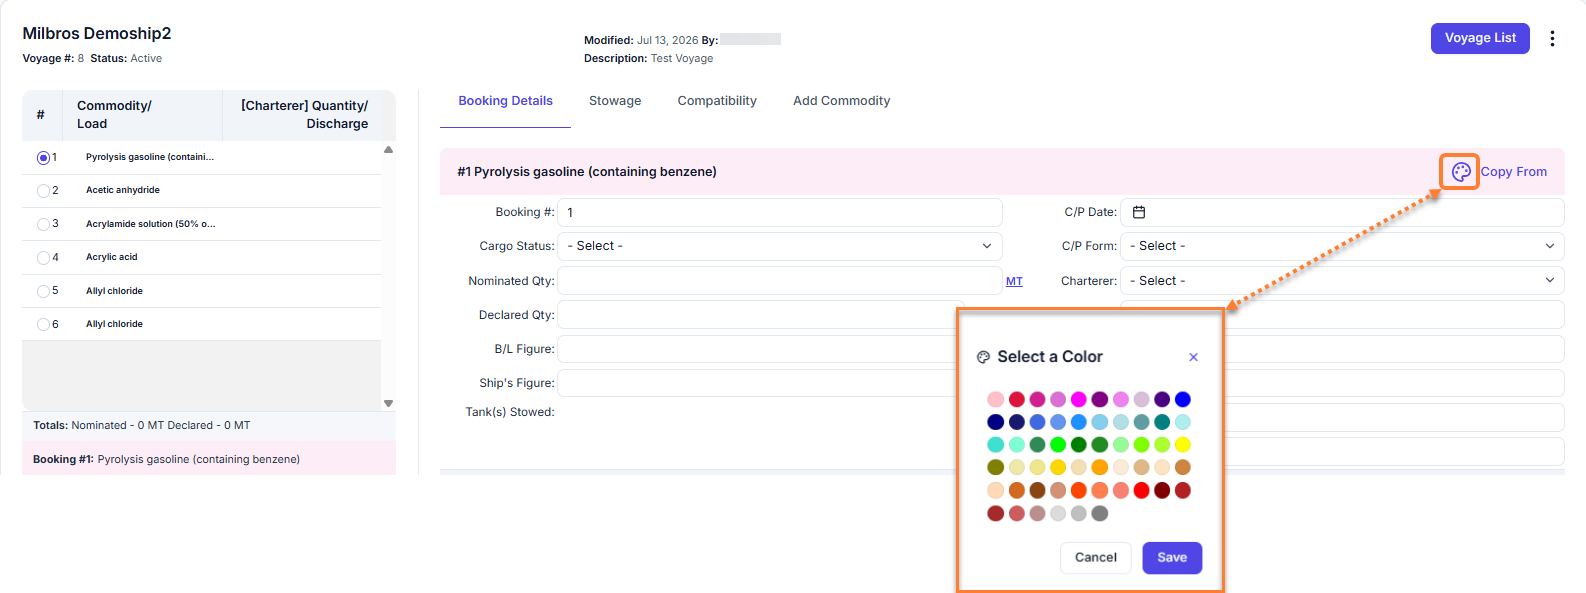
Select the next commodity and add another color and click Save. Below is an example of how each different colored commodity will appear.
Editing a Booking List
To edit the details for a booking # click the Booking Details tab at the top of the right pane and select the commodity (check box). The details for the selected Booking # will be displayed.
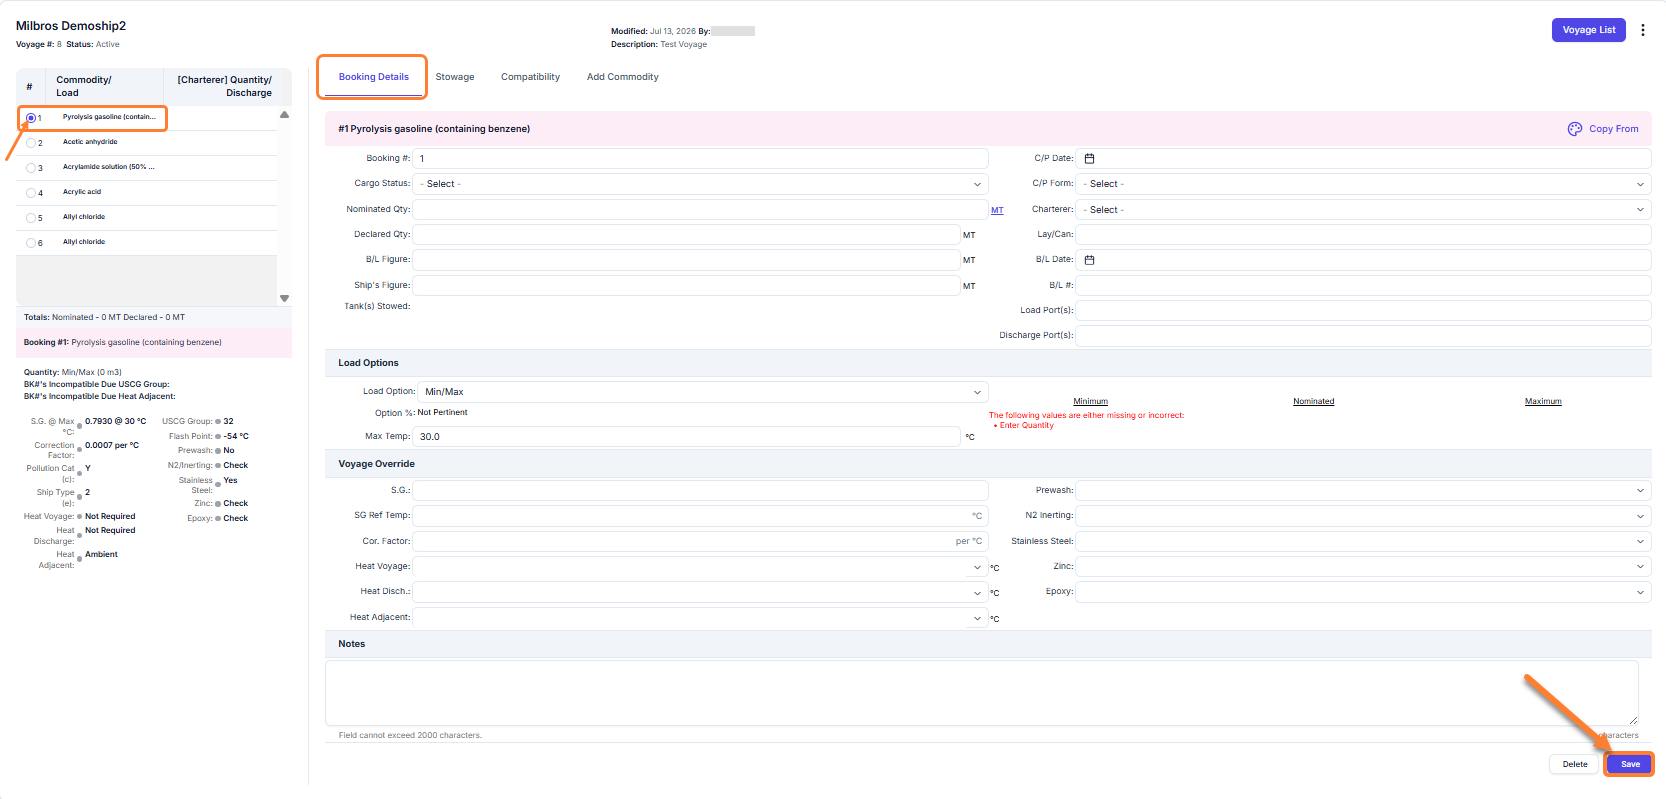
Edit the information and click the Save button to save your changes. All the fields except the Booking # are optional fields and do not have to be entered.
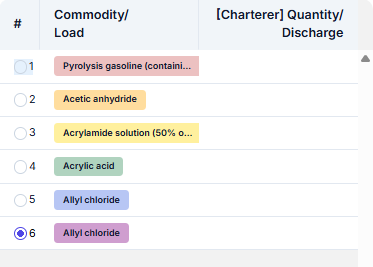
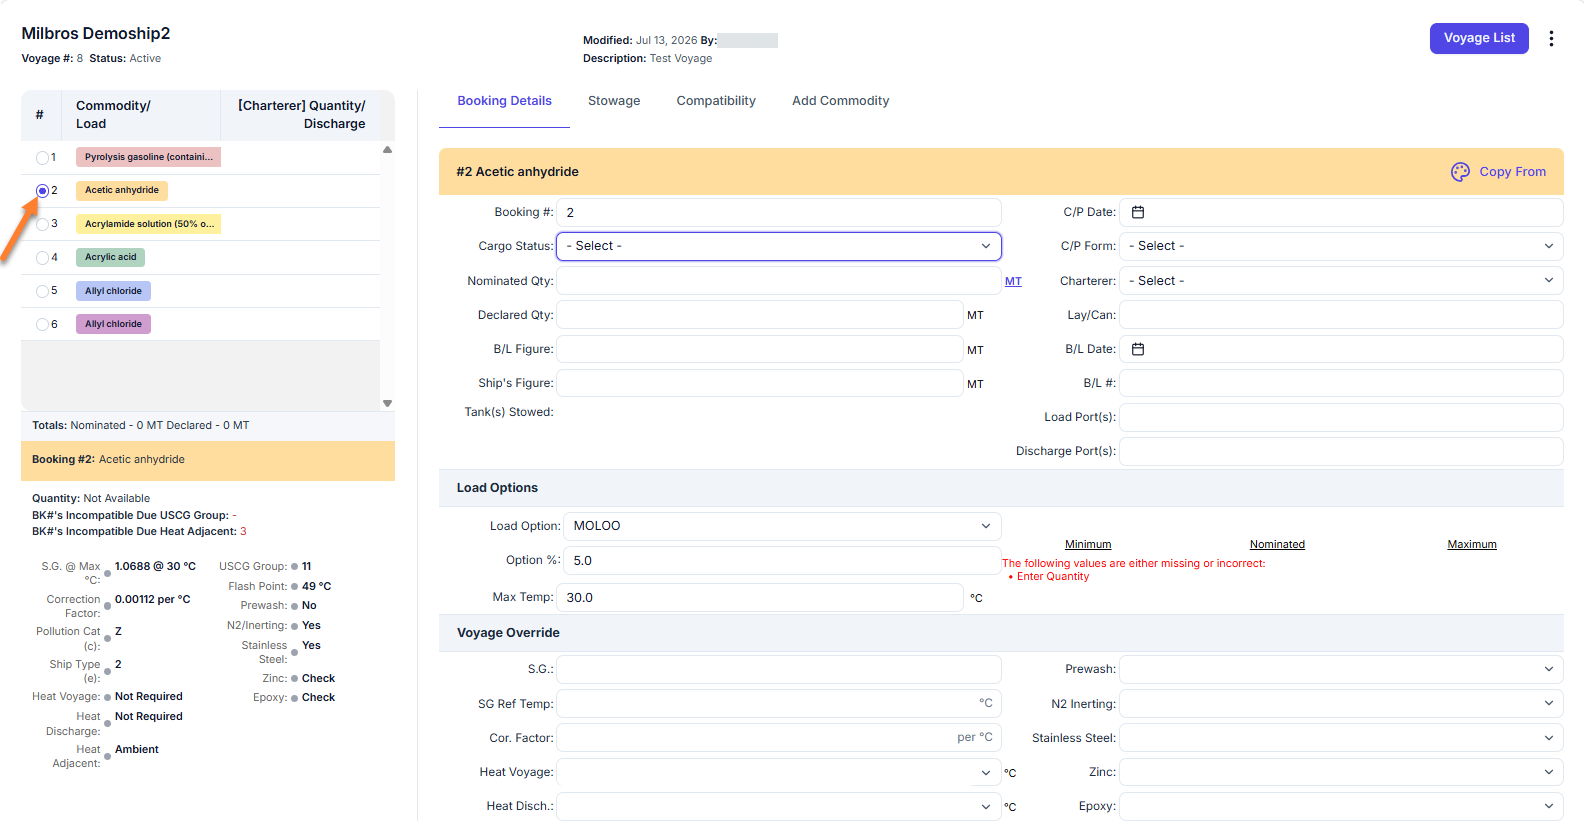
To edit another Booking #, select it from the Booking List in the left pane and repeat the same process.
Stowing the Commodities
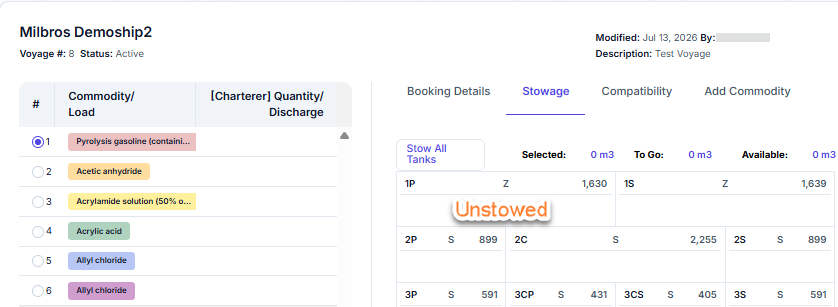
Once the Commodities have been added to the booking list you can elect to specify the tanks you wish to stow the cargo in. Click the ‘Stowage’ tab at the top of the right pane to view the tank plan diagram for the selected vessel.
If a tank plan diagram has not been created then see Section 5 for more information on creating the tank plan diagram for your vessel.
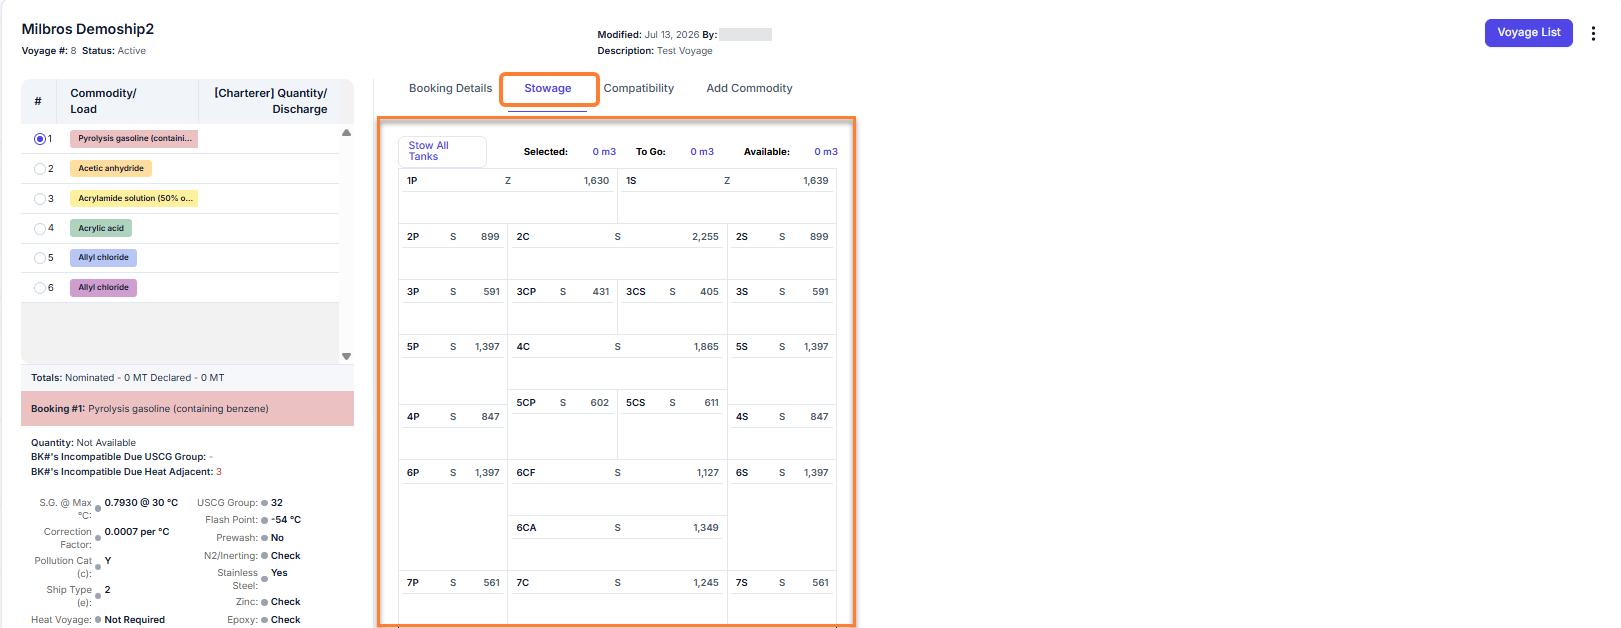
Stowing commodities is a point-and-click process. Select the commodity from the booking list in the left pane. Once selected it will highlight and any tanks where the selected Booking # is already stowed will highlight with bold font.
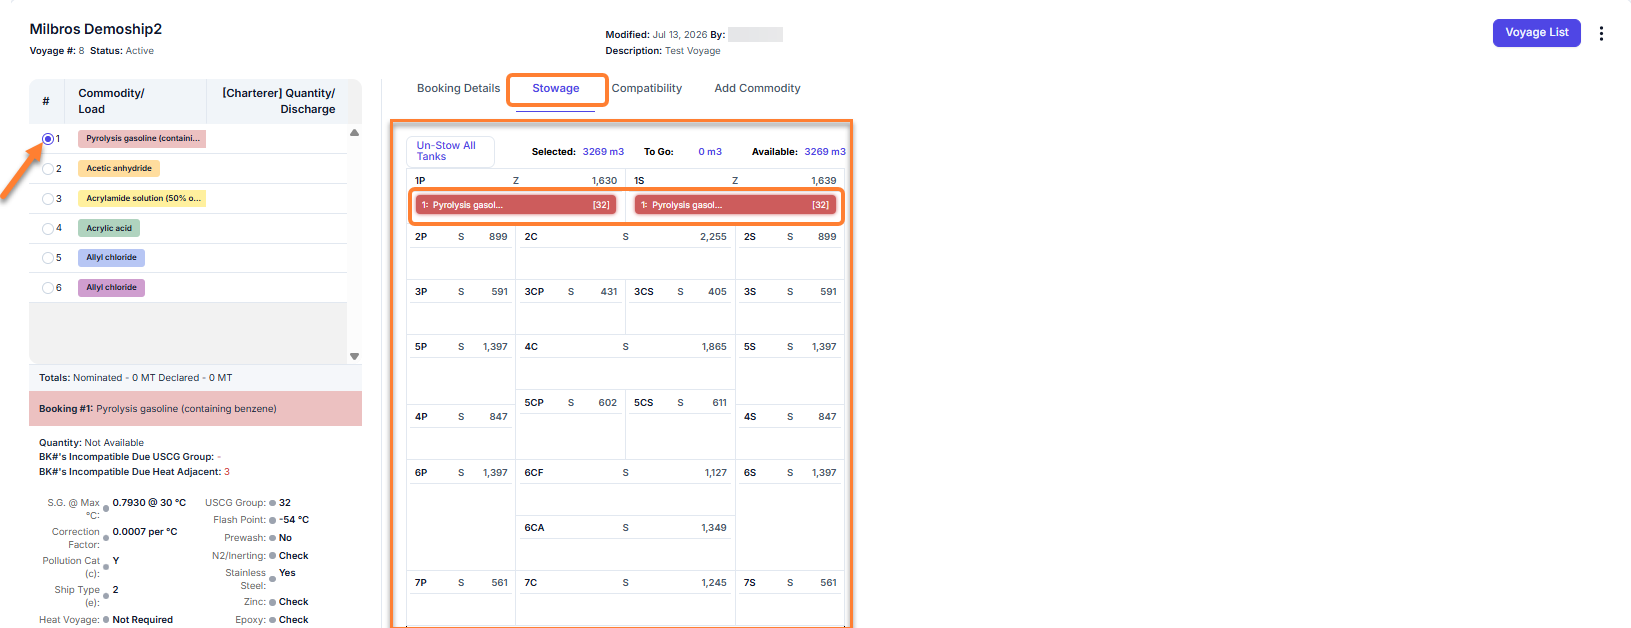
On the tank plan diagram you have three options when you hover the mouse pointer over the tank.
Tank Information:
When you hover over the top section of a tank, this icon will be displayed.
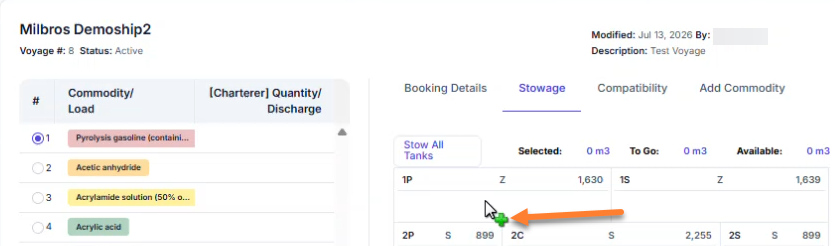
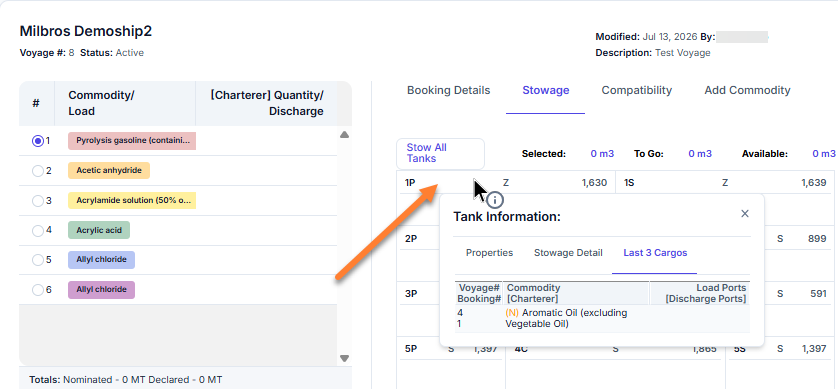
Clicking on the tank at this location will display a popup window which will have information regarding the tank along with the commodities that are stowed in the tank for the selected voyage as shown in the below example:
Stow Commodity:
When you hover the mouse over the main part of the tank and the selected commodity has not been stowed in the tank already, you will see this mouse pointer displayed (green Add symbol).
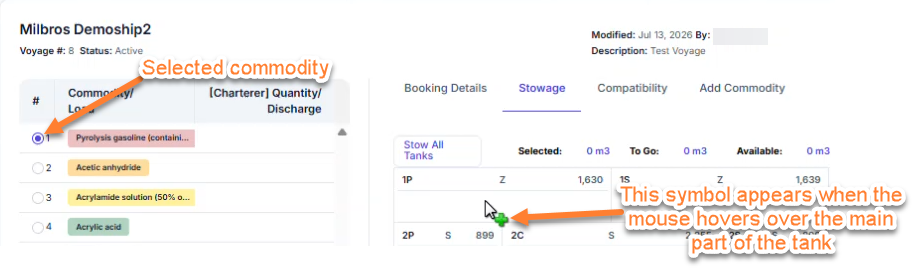
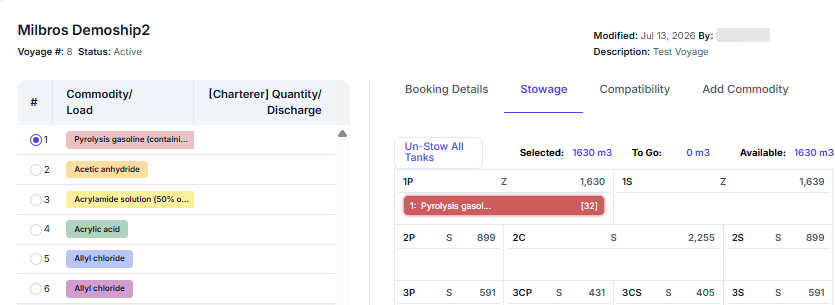
To stow the selected commodity in the selected tank click the left mouse button. The below example shows the commodity nr 1 stowed in tank 1P.
Un-Stow Commodity:
When you hover the mouse over the main part of the tank and the selected commodity is stowed in the tank already, you will see this mouse pointer displayed (red X symbol).
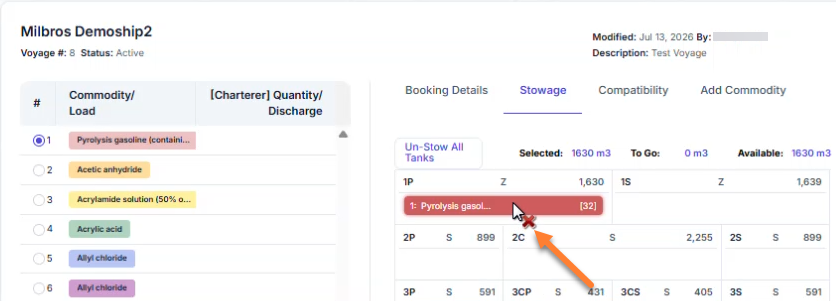
To un-stow the selected commodity from the selected tank click the left mouse button.