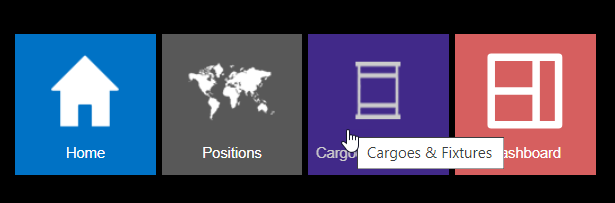
In order to get to the fixtures section, go to the main position update page click on the down arrow next to position in the upper left-hand side.
A pop down menu will appear containing four icons, click on the one called ‘Cargoes & Fixtures’.
1. Main Screen
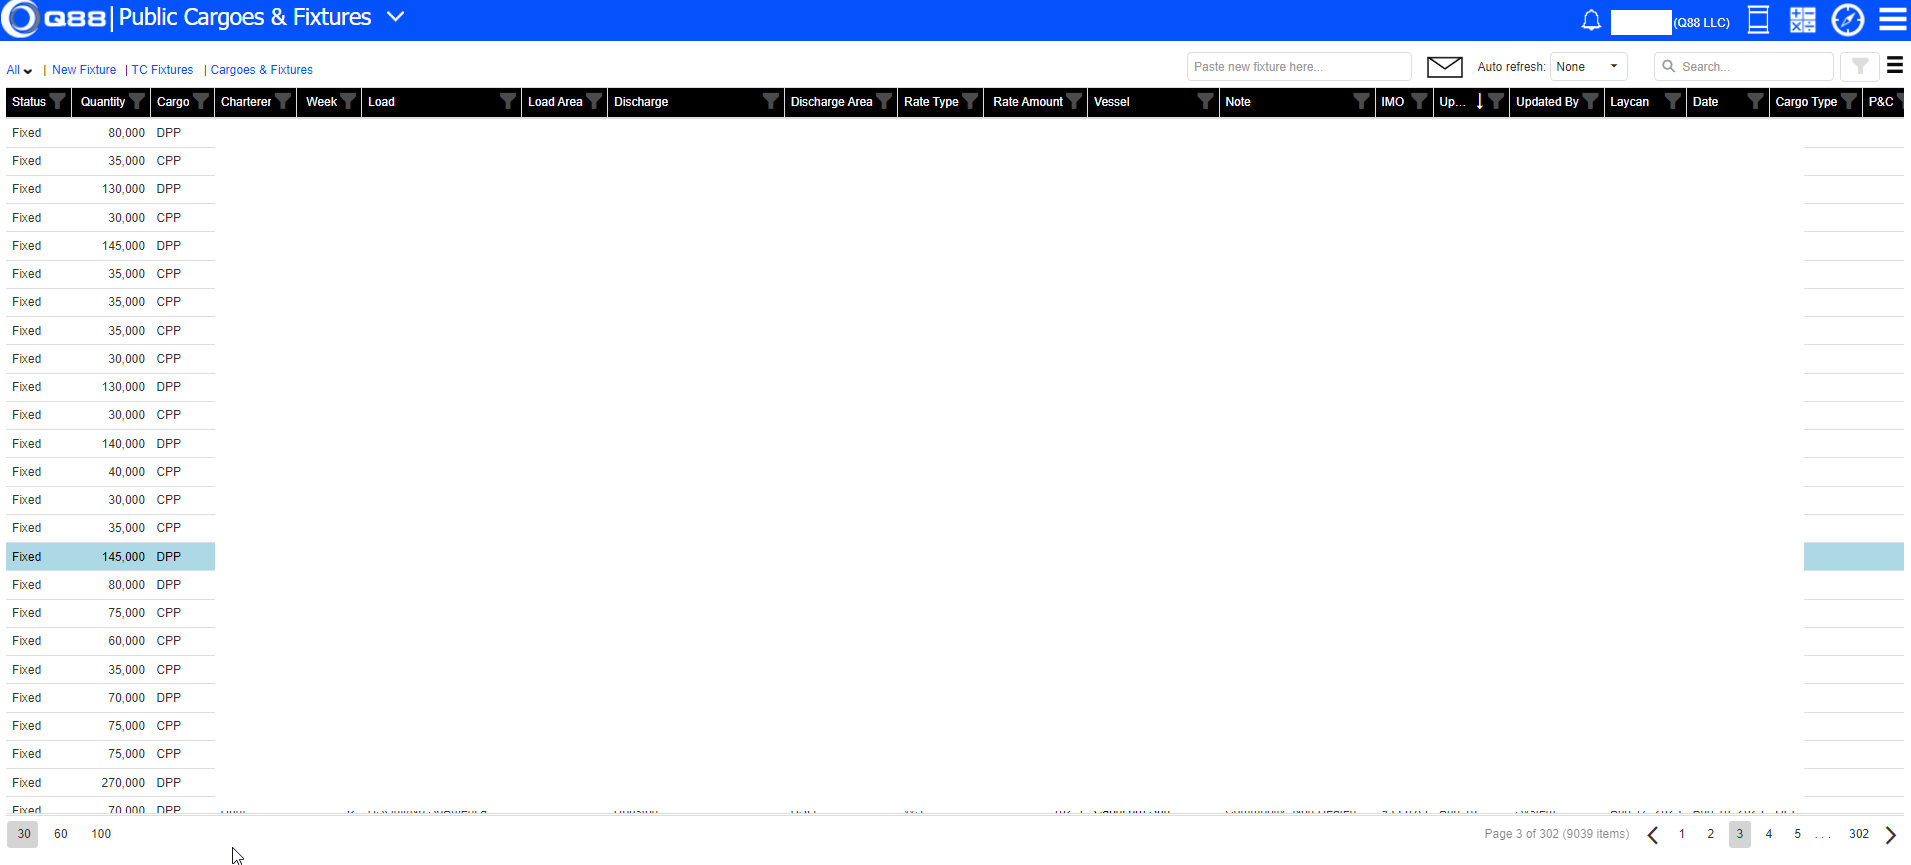
This will then bring you to the following screen that contains all fixtures contained in the database.
As part of your subscription, we include market fixtures sourced from a third party vendor daily. Keep in mind that we don’t validate this data. Every fixture that you put in remains private, including those fixtures that you change information on.
The column “Source” is the entry type : Public or Private.
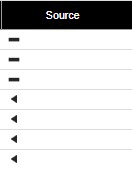
The dash icon means the source is from private (yours)
The triangle means it is a public fixture.
Public fixtures cannot be deleted but can be edited. If a public fixture is edited, the edited row is saved as a private fixture. The data that was initially public is what the other firms will see.
Shortcut keys of “F” (add a fixture) and “E” (export) work in the Cargo and Fixture view.
2. Parsing fixtures
You can cut/copy and paste fixtures from an outside source. Start by copying the fixture into this text box, as shown below and hit Enter:

Once you paste the fixture you will be brought to the Cargo and Fixture pop-up with many (if not all) of the fields filled in.
Once you save (from the disk symbol), if there are any adjustments made, you will see this pop-up.
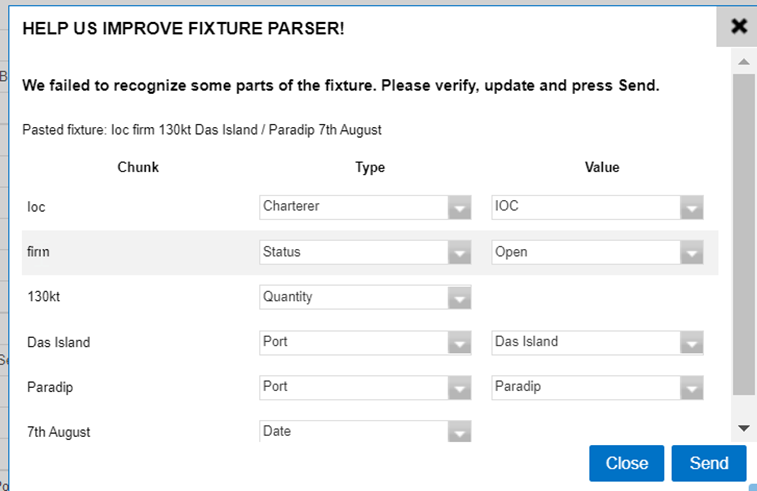
If there is something that the system did not recognize, (like firm) it will I’d this.
Make any adjustments. This is not required but will help us better interpret fixtures in the future.
3. Sorting
There is an ability to sort and/or search the entire database, or fixtures that have met your search criteria.
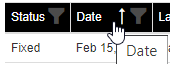
Example: Sorting by ‘Date’, the database will sort by entry date. The case that is showing is oldest to newest; by toggling the white up arrow to down, it will change the result from newest to oldest.

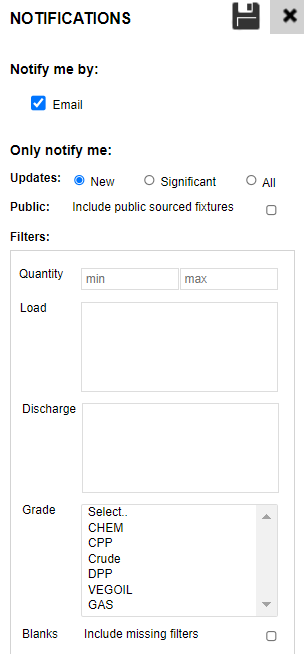
4. Cargo Notification
Using the same logic as current, you can set up a notification in Cargoes & Fixtures. Found here:
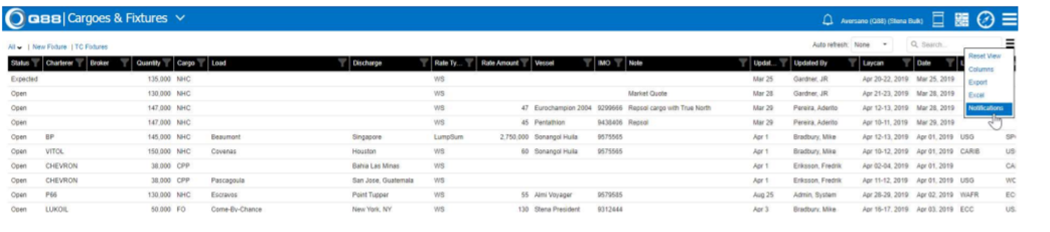
To select the filters for notifications, click on the action menu → Notifications:
-
Notify me by:
-
Email: If this box is selected, the notification will be sent to the email address that is entered in the user profile.
-
Note: The frequency of the notification will be sent whenever any changes are made automatically.
-
-
-
Only Notify me:
-
Updates:
-
New: User will be notified when a new cargo is added.
-
Significant: User will be notified when the following has been updated:
-
Status of a voyage
-
Laycan
-
Load ports
-
Discharge ports
-
Rate
-
Quantity
-
Grade
-
-
-
All:
-
User will be notified with any New and Significant updates.
-
-
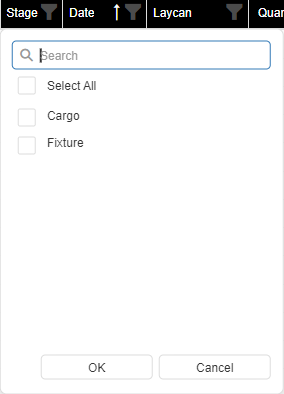
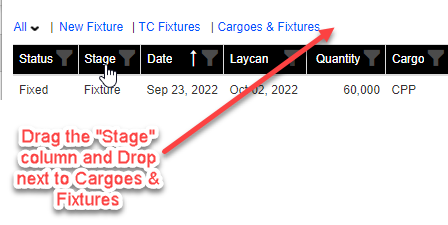
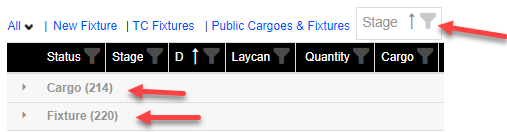
5. Displaying Cargoes Vs Fixtures
This is done by filtering on the “stage” column.
-
Those that will filter as Cargoes have the status of: Open, Working, Withdrawn and Expected.
-
All others will fixture as Fixtures.
By dragging the Filter column next to the public cargoes and fixtures or Cargoes and Fixtures, you can sort by cargos and fixtures:
6. Creating an estimate, TCE calculation and list
Applicable to Q88 VMS Clients only!
You can do all three functions right from a fixture.
Once in the pop-up click on the action bar on the right-hand side of the pop-up and click on the words VMS. There you will be brought back to your Estimator in VMS for Q88 clients.
By clicking on the ‘Estimate Cargo’ you will be brought to another window where you can click on the estimate button and be brought into your VMS estimator. Any information that is populated in this window, is transferred to the Q88 VMS (for Q88 VMS users).
By clicking on the Search button, the system will run a list based on the criteria of the information inserted. This will be the same by clicking the TCE button
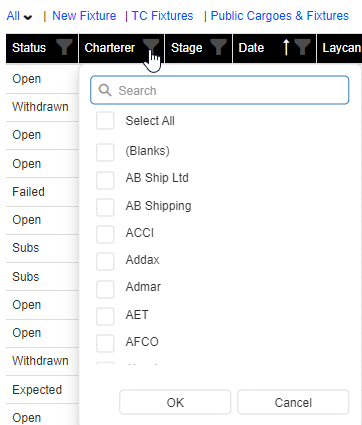
7. Searching
The system allows the users to search on several parameters at the same time. In order to see the fields, click on the filter icon.
A search on a charterer would look like this:
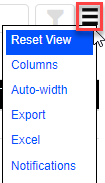
To clear a search, click on the ‘Reset View’ link at the top right-hand action menu.
or clear the Filter from X
8. Adding Sort Criteria
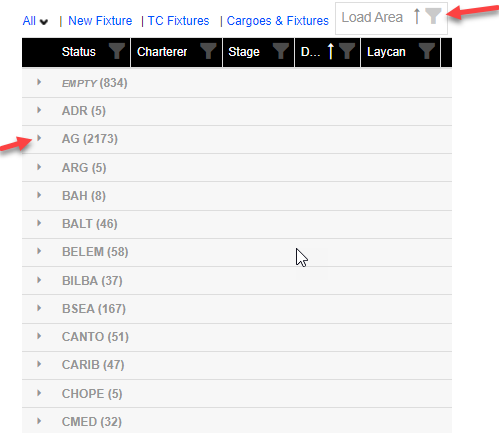
The grid gives the user the ability to have fixture broken down into groupings.
For example, if you want to see fixtures broken down by Load area, drag the Load Area column into the header and drop next to the words “Cargoes & Fixtures” or “Public Cargoes & Fixtures”, as below. You can further break down the view by clicking on the arrow next to the selected load area:
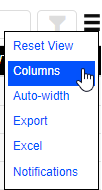
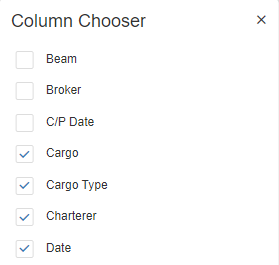
9. Setting the Output View
By clicking the ‘Columns’ from the Action Menu, you will be taken to the following screen and choose how the information is displayed.
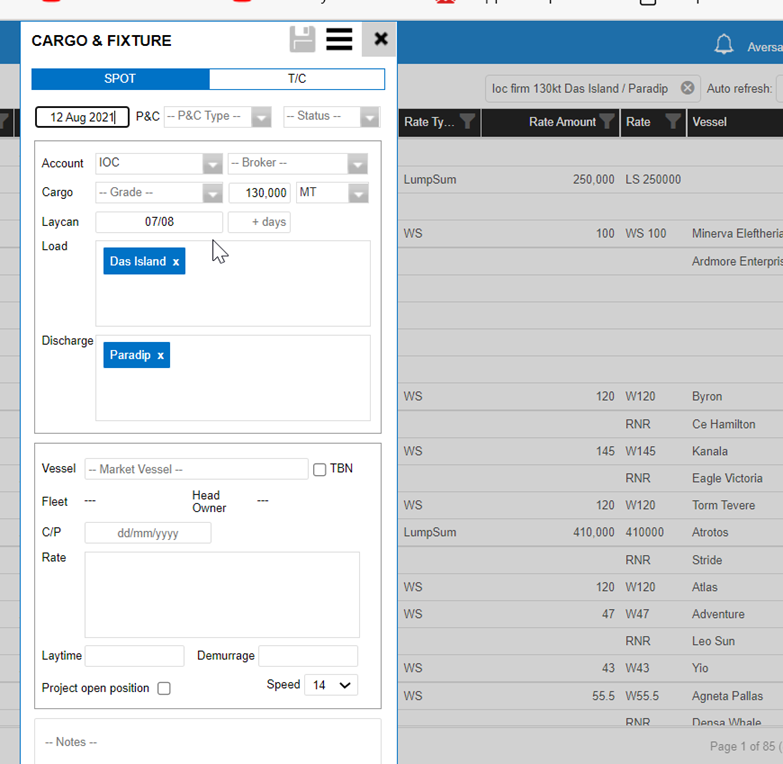
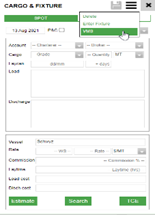
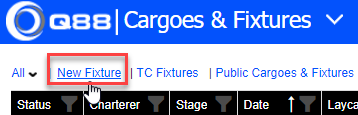
10. Add a new fixture
To add a new fixtures click on New Fixture or click the shortcut key F:
The following module will pop up. You can toggle between Spot and TC fixtures.

11. In Line Editing
Like position list, users can make edits to fixtures in the grid view. The method to enable the editing is the same, select the row and click the space bar. Most columns become active:

12. Pre – Filled Grid Views
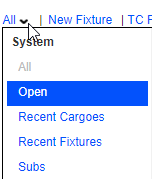
In addition to a view of ‘ALL’, we have created 4 other views that attempt to pre-sort cargos and fixtures.
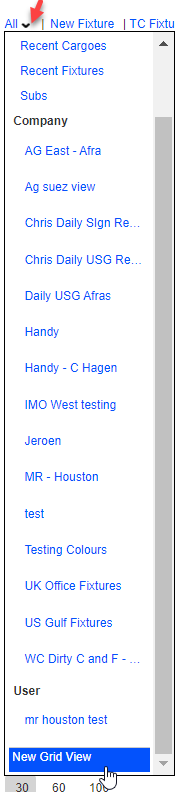
13. New Grid View
In order to format a new column order, click on ‘New Grid View’. Click the arrow next to All and go to New Grid View
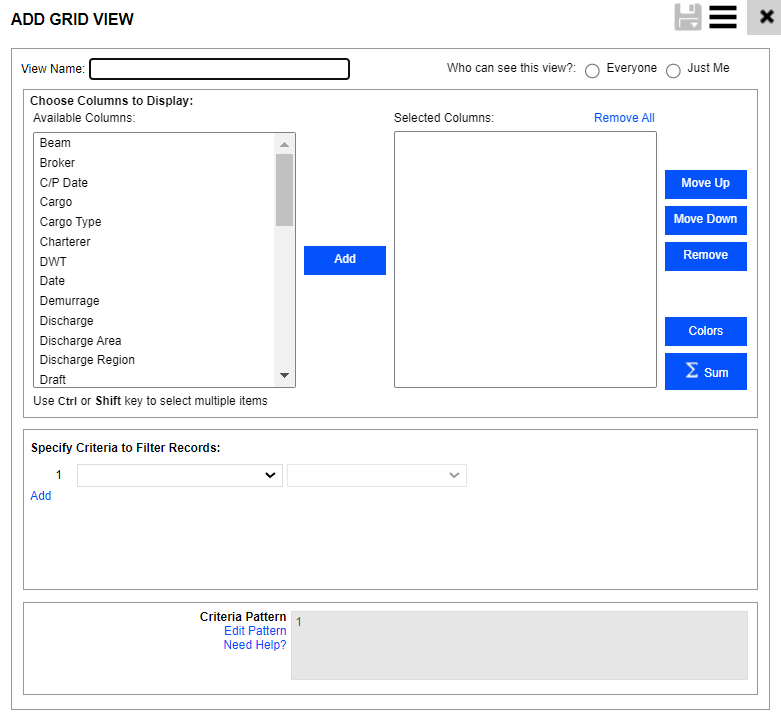
This will bring you to the following pop-up screen where you can add and sort columns to display as well as specify criteria to filter records.
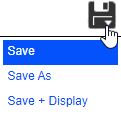
The ability to save is shown done by clicking on the disk in the upper right-hand corner of the pop-up. There will be three ways to save, as seen here:
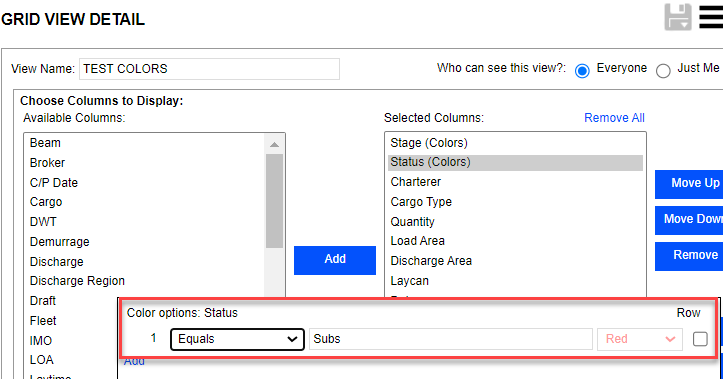
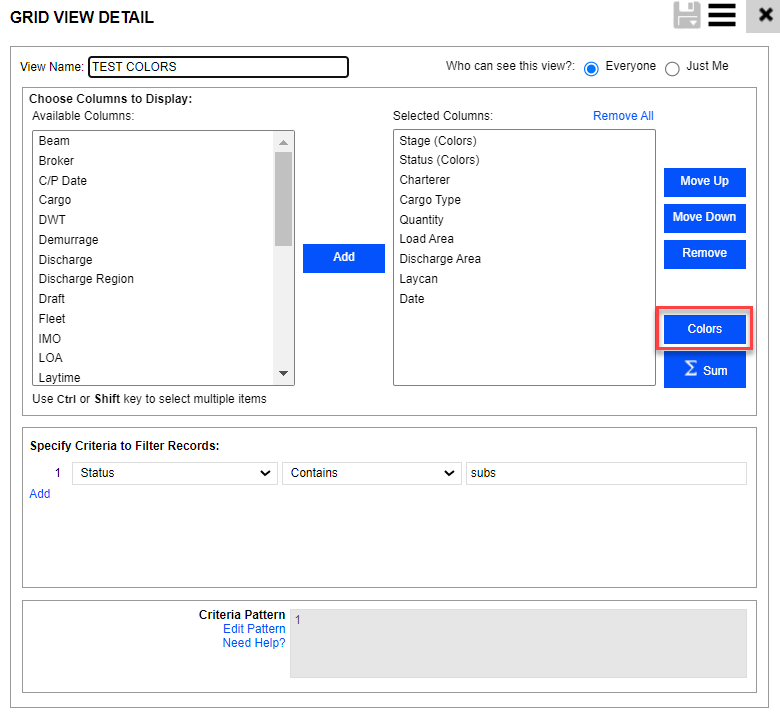
14. Conditional Formatting to New Grid
You can also add conditional formatting to the output. While in the Grid View Detail, you will see the box that says ‘colors’
By clicking on this box, you are brought to this pop up
By clicking on a column, you can select the column you want to have conditionally formatted and add colors to the conditions you want to highlight.
For example, if you want to show all ships that are ‘on subs’ you can set up the conditional formatting as such: