Connecting Mailboxes
Shared mailboxes should be connected only once, either by an Admin User or the mailbox owner, and there are multiple methods available for connecting both private and shared mailboxes.
Users may have unintended ownership of a shared mailbox if you use the following method to connect users to shared mailboxes.
Instead, please refer to the sections below on "Giving Users Access to Shared Mailboxes (Admin User)" and "Giving Users Access to Shared Mailboxes (Non-Admin User)".
-
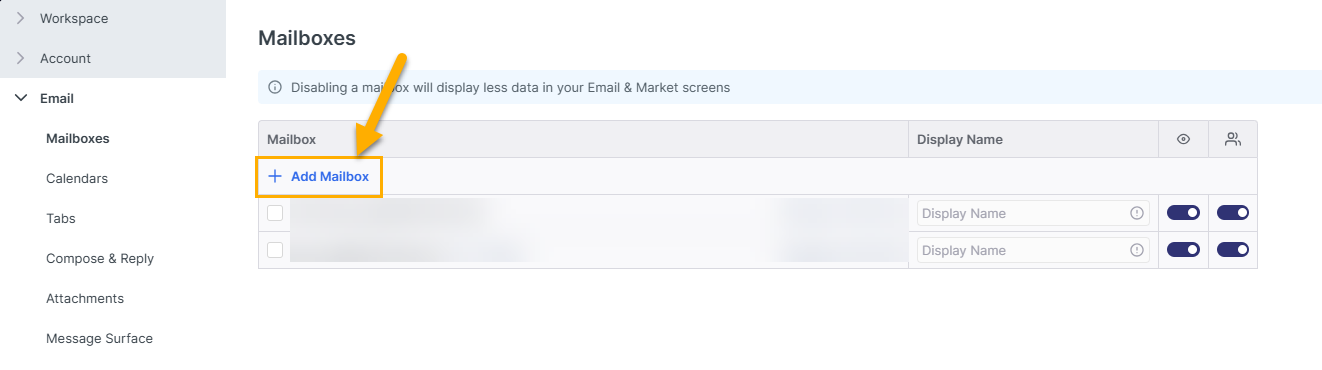
Navigate to Settings → Mailboxes:

-
Click on Add Mailbox:
-
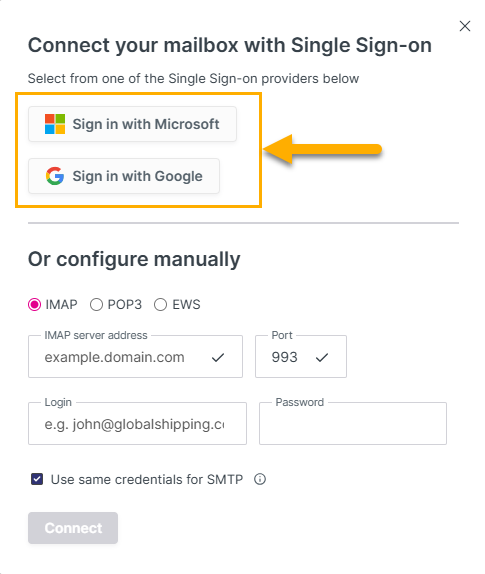
Add the mail account via Single Sign-On.
-
This option is typically available if you work with a Microsoft and Google mail setup and allows you to add an email account rapidly and securely via a protocol controlled by your mail provider.
-
Click on Sign in with Microsoft or Sign in with Google, and follow the instructions from either of these:
-
-
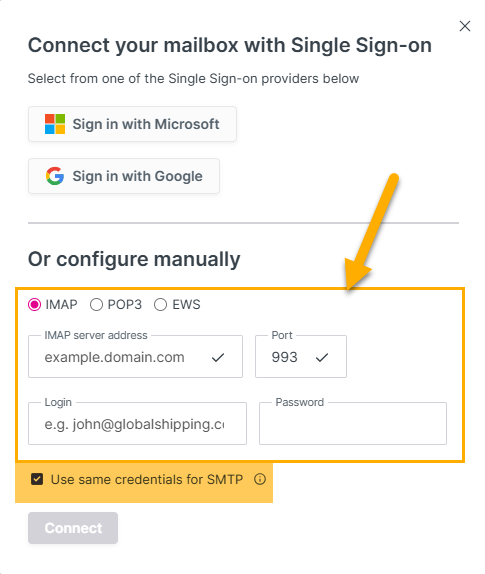
Alternatively, you can configure your account manually by setting up IMAP and SMTP details for your account:
-
If you select Use same credentials for SMTP, you will see the following screen for you to enter the IMAP details:
-
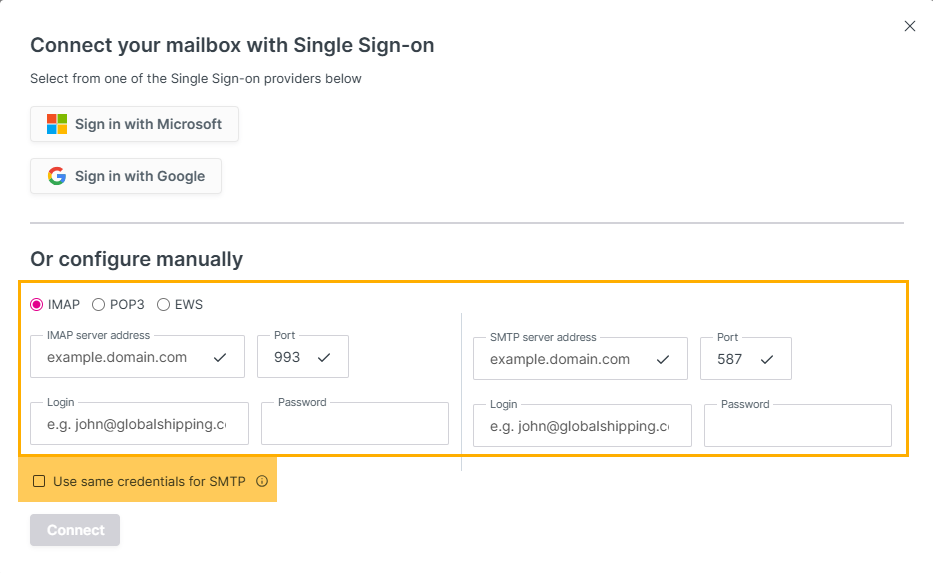
If you unselect Use same credentials for SMTP, you will have additional options to enter your SMTP details:
-
Note: Due to performance and security reasons, we strongly advise you to connect to a new inbox using Single Sign-on where it is available.
Should you have any issues, please don't hesitate to contact the platform's support for further assistance at support@shipfix.com.
Giving Users Access to Shared Mailboxes (Admin Users)
If you would like to provide user access to shared mailboxes as an Admin User/Owner of the mailbox, please do the following:
-
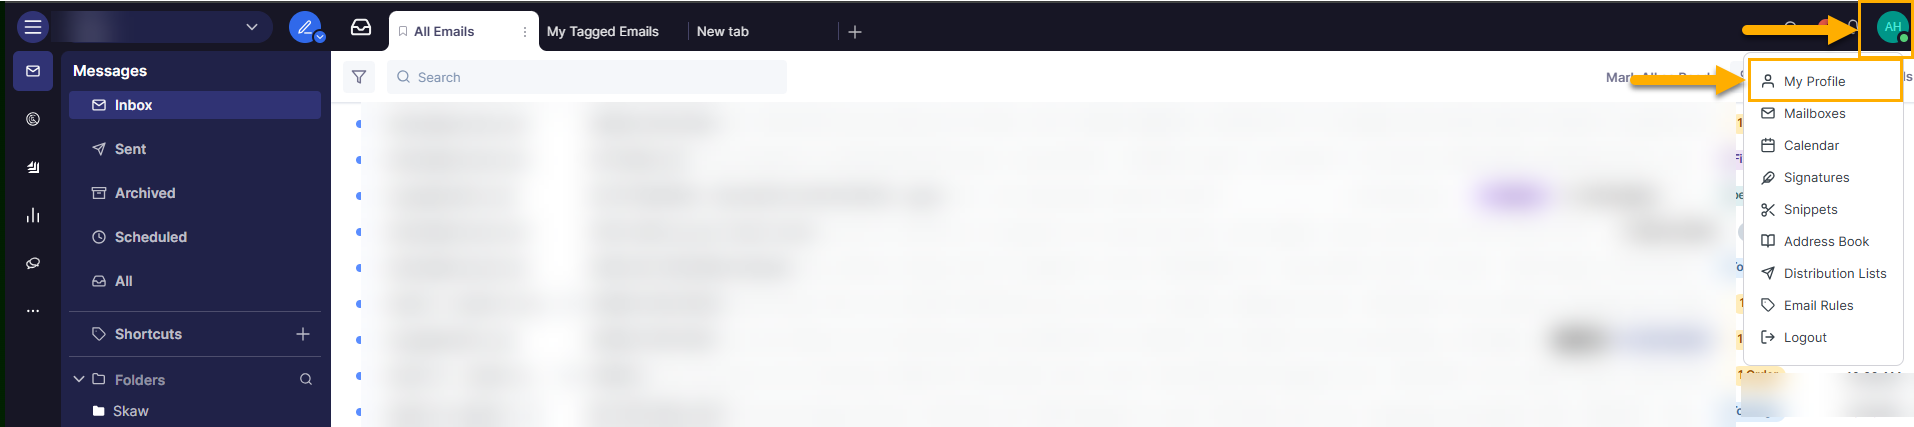
Navigate to Settings → My Profile:
-
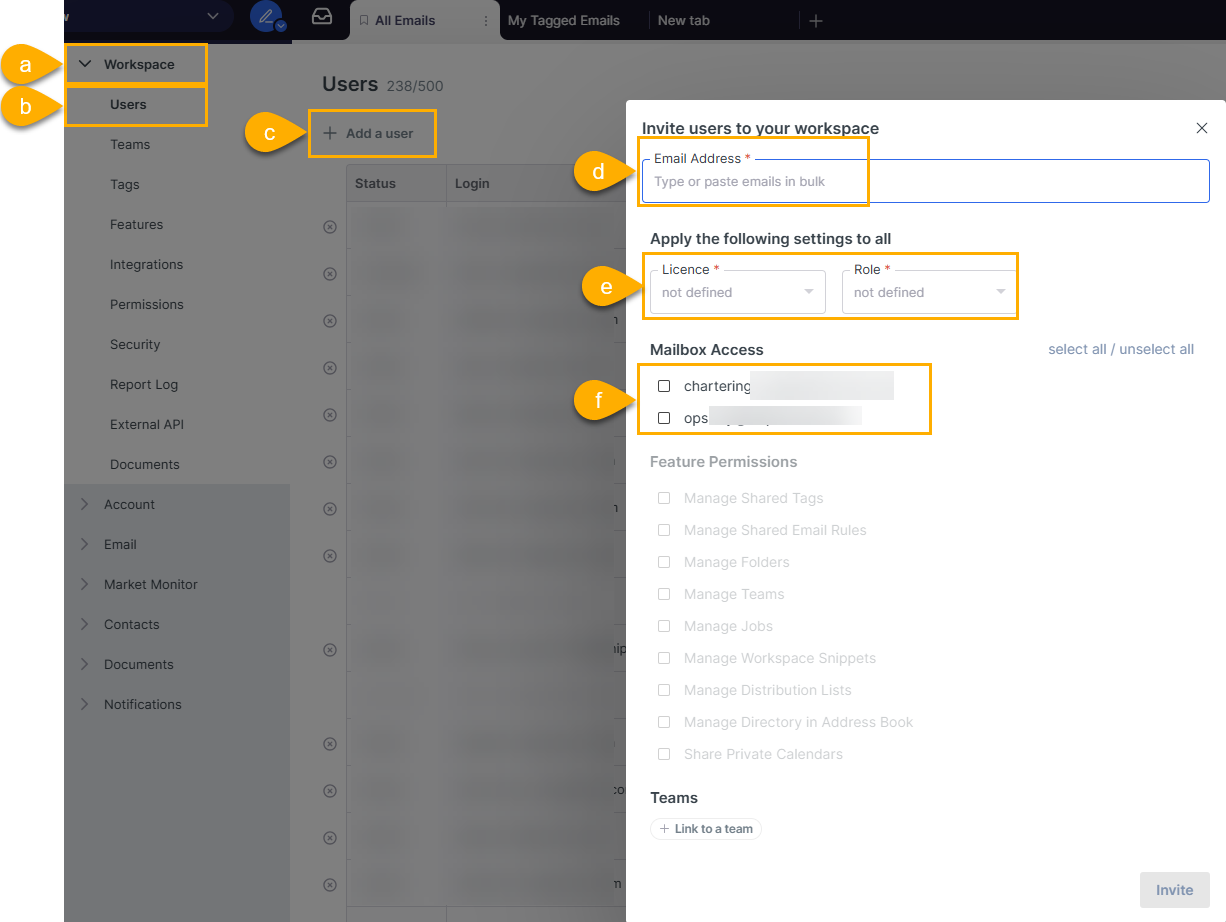
For new users, please do the following:
-
Go to Workspace.
-
Click on Users.
-
Click on Add a user.
-
Enter the email address.
-
Enter the Licence and Role.
-
Select which mailbox to grant the user access to.
-
-
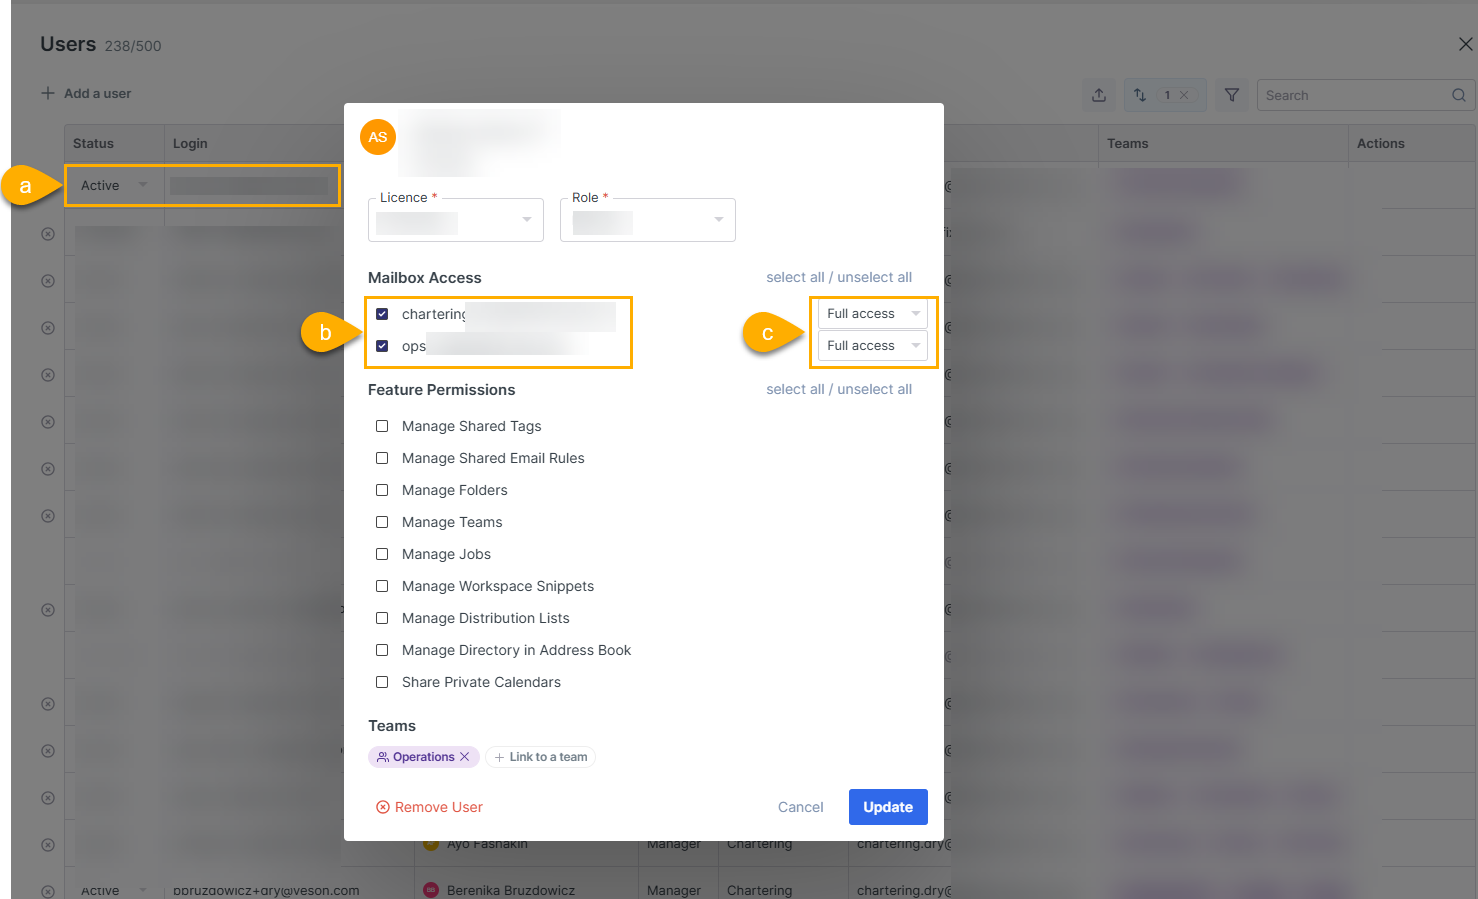
For existing users, please follow the steps below:
-
Select the user.
-
Select which mailbox to grant them access to.
-
Select what access to grant the user.
-
Giving Users Access to Shared Mailboxes (Non-Admin Users)
Alternatively, both Admin Users and Non-Admin Users can grant access to a shared mailbox by doing the following:
-
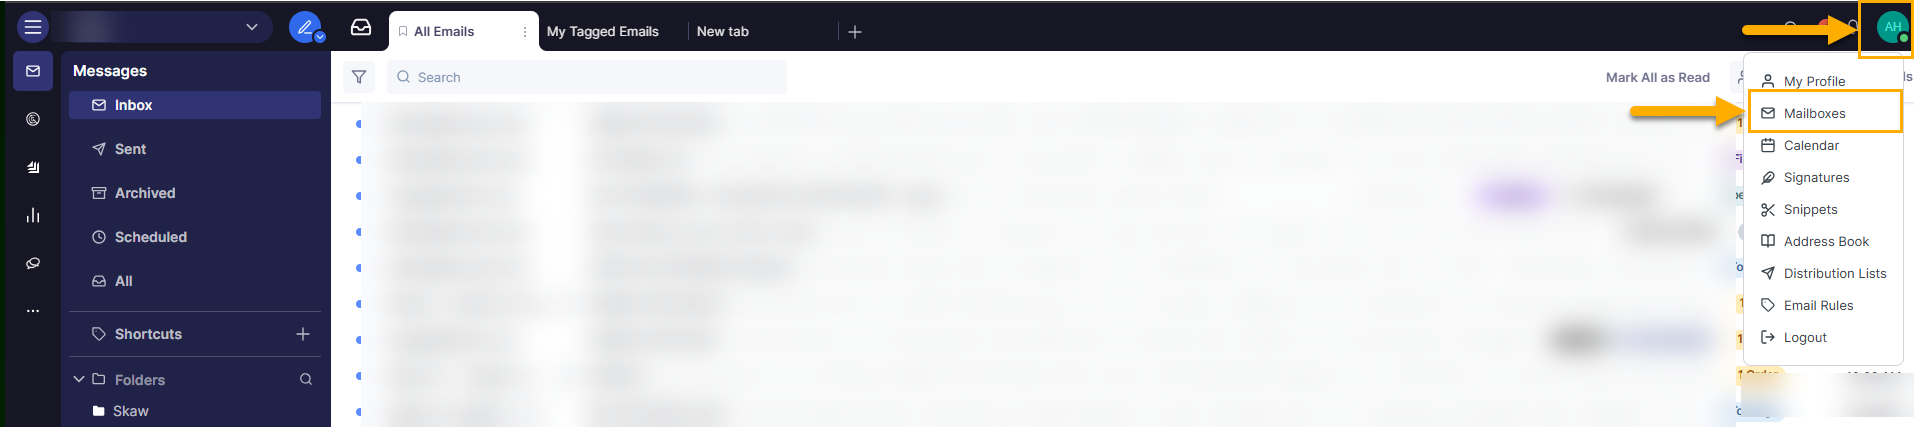
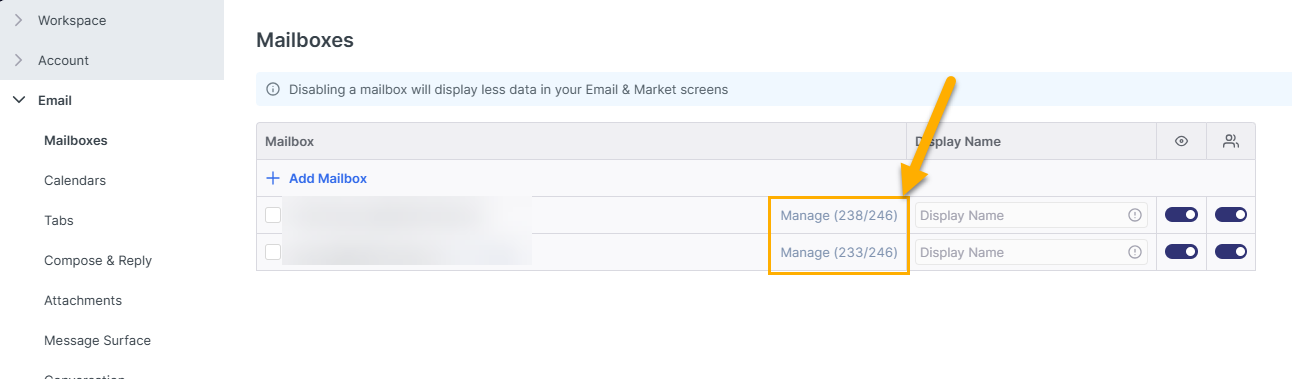
Navigate to Settings → Mailboxes:
-
Click on Manage:
-
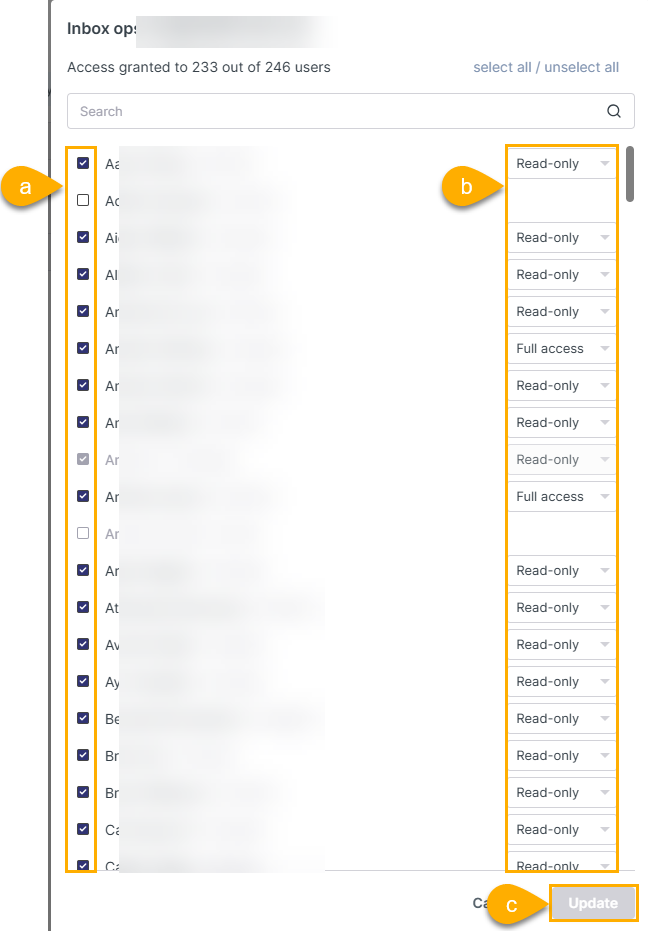
Fill out the following criteria:
-
Select the user for whom the mailbox has to be shared with (please take note that this user has to be an existing Shipfix user).
-
Select the access level for the user.
-
Click on Update to update the access rights.
-