VMS - Routing Template, Port Canal Template, Letterhead, Bank Acct, Hire Rate, and Emissions Category guide
Routing Template
The Port & Canal templates are meant to help with calculating properly the in-port consumption by defaulting more accurately the Cargo Ops days. Select the preferred Routing Template from the dropdown list. If no routing template is selected, a default template allows all routes. You can create your own Routing Template as follows:
Go to Support Admin> Company Setting> Routing Template> Add Routing Template.
If tagged to a vessel, this template guides the vessel on what routes it is allowed to navigate. The Estimation follows what is configured here.
Give a name to the routing template.
By expanding and selecting the checkboxes, you can indicate what routes the vessel is allowed to take.
Save.
*During an Estimation, further changes can still be made on an Ad-hoc basis on the Estimate’s map.
Port Canal Template
Select the preferred Port/Canal template from the drop-down. If no routing template is selected, a default template allows all routes. You can create your own Port/Canal Template as follows:
Go to Support Admin > Company Setting > Port and Canal Days > New Type.
Give the template a description name.
Input default Port Days and Non-Ops hrs (These default values appear the moment a port is added to the Estimate itinerary. These values can be amended manually on the Estimate Itinerary)
Input default Canal Days, Non-Ops hrs, and Transit Cost (These default values appear the moment the Canal is added to the Estimate itinerary. These values can be amended manually on the Estimate Itinerary)
To calculate the consumption, you can use the PortCanalTemplateConsumptionCalculator.xlsx (internal only)
Letterhead
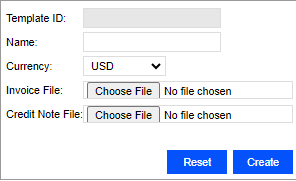
Go to Main Action Menu > Support Admin > Invoice Template. Letterheads that can be selected at the invoicing level are listed here.
Click Reset (Note: this doesn’t reset any data). Upon resetting, the Template ID and Name are cleared.
Input the Name of the letterhead. We suggest inputting the Name of the Beneficiary + Currency Type.
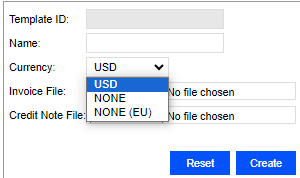
Input the Currency Type** (Three available options: USD/NONE/NONE(EU))
Upload the Invoice File* (Download the invoice from the default, and replace its letterhead provided by the client and upload)
Upload the Credit Note File* (Download the invoice from the default, and replace its letterhead provided by the client and upload)
Invoice notes*
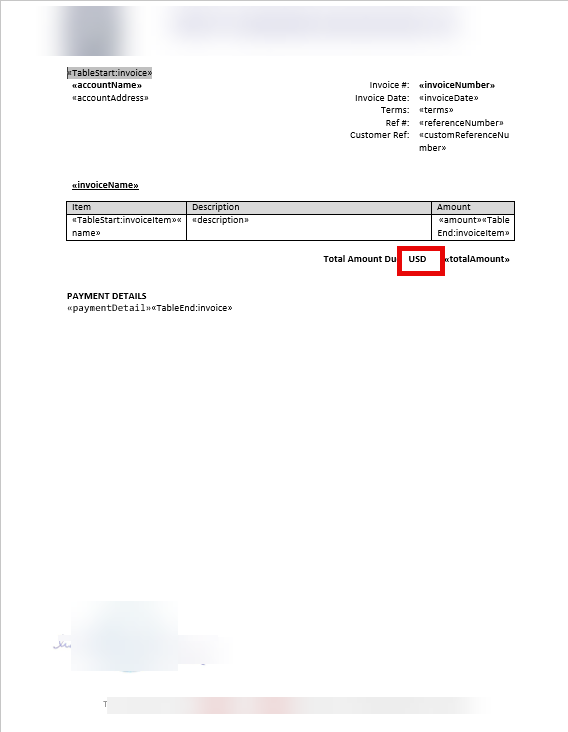
The template shows the default downloaded Invoice. Copy the letterhead provided by the client and paste it into the ‘Header.’ If the client has a ‘Footer,’ paste it into the ‘Footer’ area. Save and upload this amended file as part of steps 4 and 5.

Currency notes**
The USD reflected in the following image is static and not dynamic. If invoices require currencies other than USD (for example, JPY), the text in the invoice template needs to be amended from USD to JPY. Rename the invoice template to indicate JPY. For currencies other than USD/ EUD, select NONE. For EUD, select NONE (EU).
Assign Invoice Template to Vessel (Vessel Register)
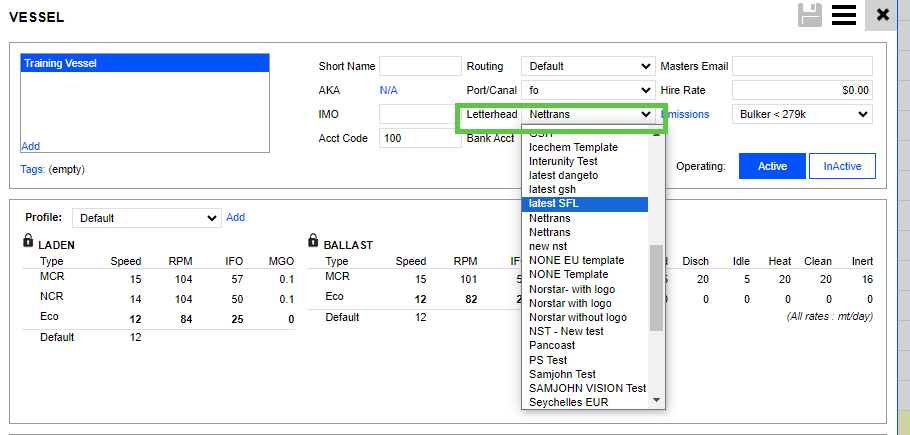
This setup assigns a default Invoice Template to a Vessel. Whenever this vessel is used in the Voyage or TC, the invoice will use the Invoice Template assigned as the Letterhead at the invoice level.
Create an Invoice Template.
Go to Main Action Menu > Vessel Register > Select the Letterhead from the dropdown > Save.
All invoices under that vessel default to the selected letterhead.
Bank Account
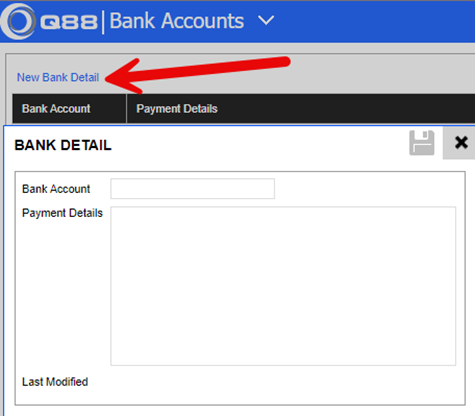
Go to Main Action Menu > Support Admin > Company Setting > Bank Account. Here, you will find a list of all bank accounts that can be selected at the invoicing level.
Input the Bank Account: A name that identifies this account details
Input the Payment Details: Bank Name, Account No, Swift Code, Address
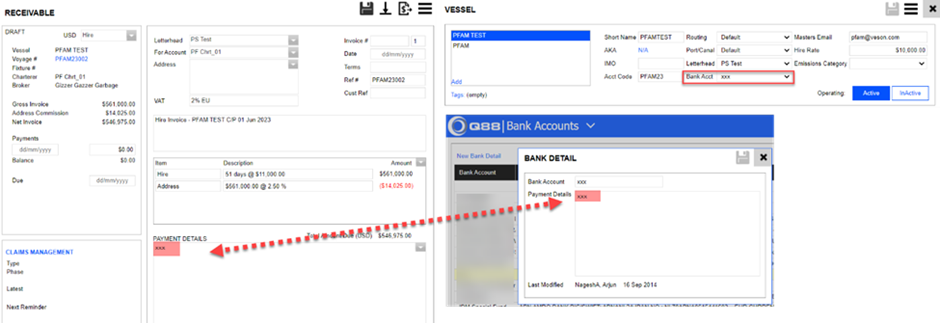
Assign Bank Account to Vessel (Vessel Register)
This setup assigns a default Bank Account to a Vessel. Whenever this vessel is used in the Voyage or TC, the invoice will use the Bank Account assigned as the Payment Details at the invoice level.
Hire Rate
If no Head Contract is inputted, the Estimate will use the Hire Rate stated here as the vessel's daily running cost.
