This guide provides an overview of the steps required to change a vessel's name in VMS, along with essential considerations to keep in mind during the process.
We advise that vessel names should only be changed after the completion of the last voyage. Changing the vessel name during an ongoing voyage is not recommended.
Steps to rename a vessel
-
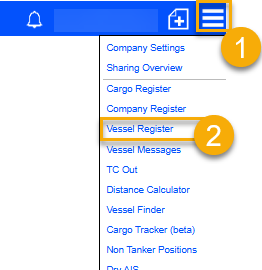
Log in to VMS and click the main menu in the top right corner. From the drop-down menu, select Vessel Register.
-
Search for the specific vessel whose name you wish to change and click on the line item to edit.

-
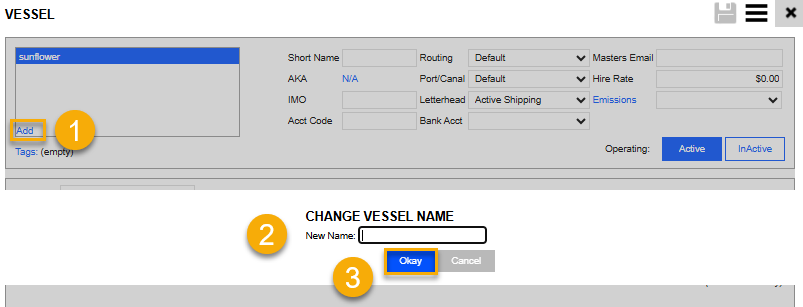
A Vessel window will appear. In the top left corner, there is a box with the vessel name. In the bottom left corner of the box, there is an option to 'Add'. Click on 'Add' to add a new vessel name. Enter the new name and click 'Okay'.
-
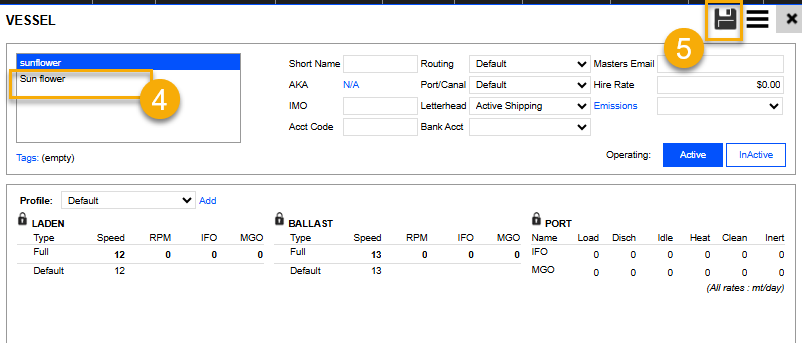
Once the new vessel name is added, it will appear as a new line. Click on the save button to save the vessel with the new name.
-
After successfully renaming the vessel, a confirmation message stating "Saved vessel" will appear in a yellow notification box. The page will then refresh and display as empty, indicating that the vessel has been updated with its new name.

-
To view the vessel again, you will need to search for the vessel using the new name.

Things to take note of
-
The existing voyage will remain with the old vessel name. Name change will only be reflected in the new estimate.
-
After the name change is completed, you will no longer be able to search for the vessel using the old name in the Vessel Register.
-
New invoices created in existing voyages will reflect the new name. Hence, it is recommended for the voyage to be completed before changing the vessel name