
Introduction:
Veslink Onboard is a voyage reporting solution which enables captains to view the latest voyage information and communicate with a shore-side office. Benefits include:
-
Report to shore faster with less manual data entry. Forms (voyage reports) automatically populate and are validated based on previously submitted data.
-
Flexibly manage port operations and send updates to shore as plans change.
-
Stay on the same page with an up-to-date view of the voyage that matches what operators see.
First Time Login & Navigation
Upon signing in to veslink.com with your provided username and password, Veslink Onboard defaults you to the Forms page for the vessel's current location and voyage, based on the voyage itinerary.
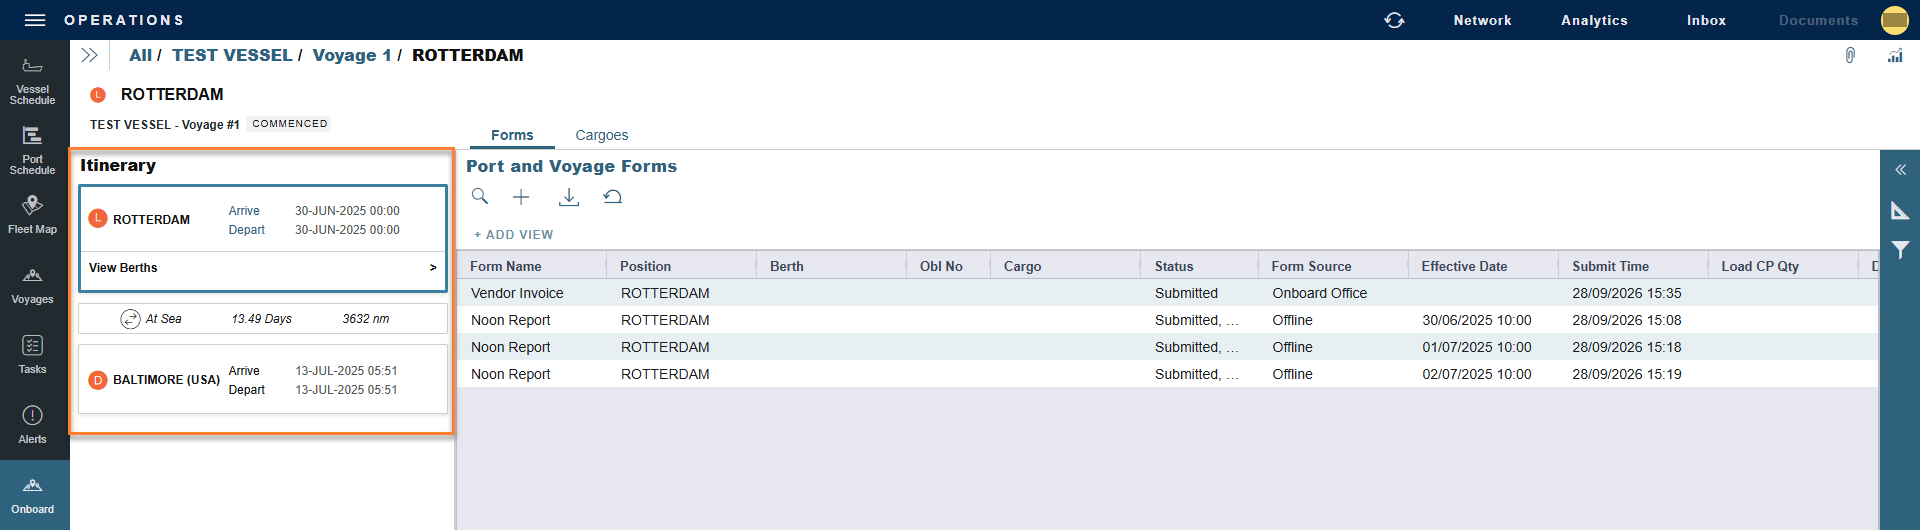
On the left-hand side of the browser window, the current voyage itinerary is displayed, with past ports of call grayed out and future ports of call shown in color. Your current position defaults to the middle of the screen and is outlined in blue.
Forms Tab
The Forms tab displays the available voyage reports to be submitted for the current voyage leg. The tab is organized into several columns; Form Name, Position (in port or at sea), Berth, Cargo (for cargo handling forms), Status (unsubmitted, submitted, processing, approved, rejected, open for resubmit) , Effective Date, and Submit Time.
The Forms tab can be filtered and sorted by clicking the … button on the top right-hand corner of the Forms tab.
To submit a form, click on the form name; it opens within the browser window. Fill in the required information and click Submit. Alternatively, you can save a draft of the form to finish completing later.
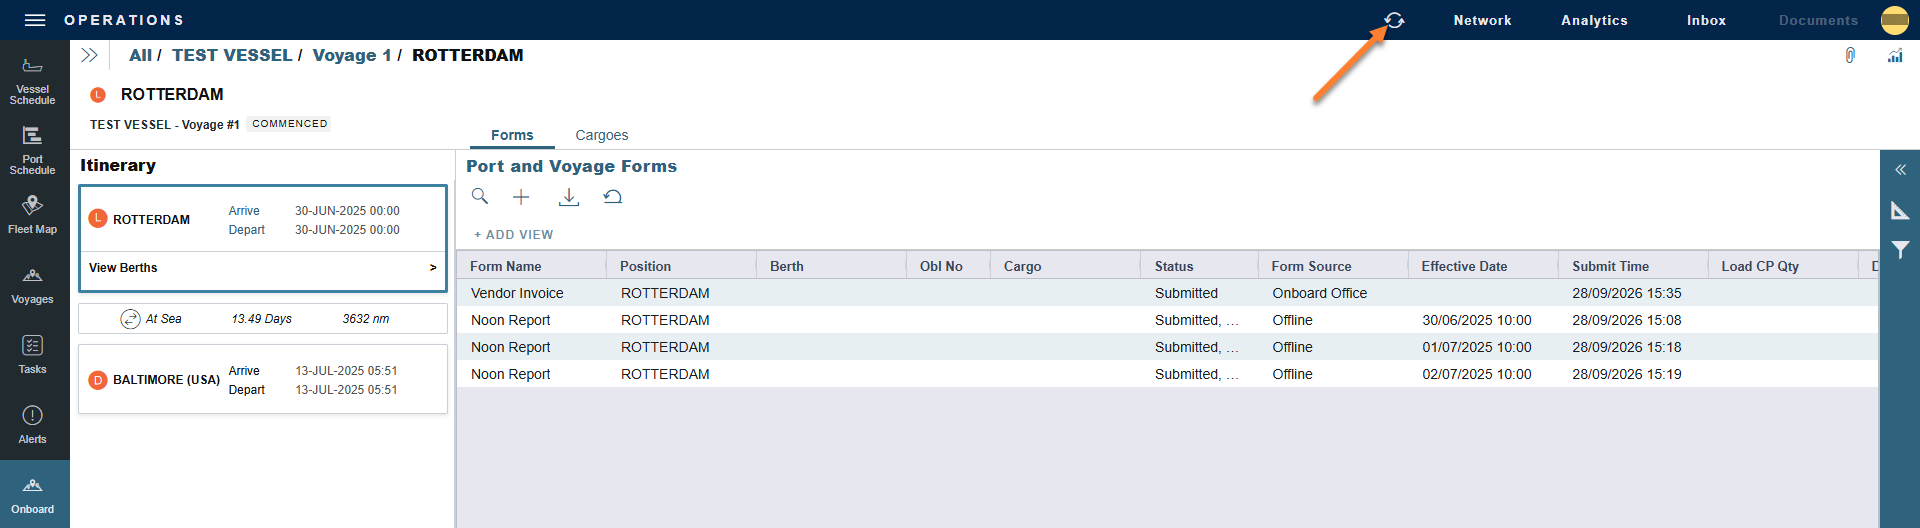
To pull new voyage data from IMOS, you should press Sync button at least once a day.
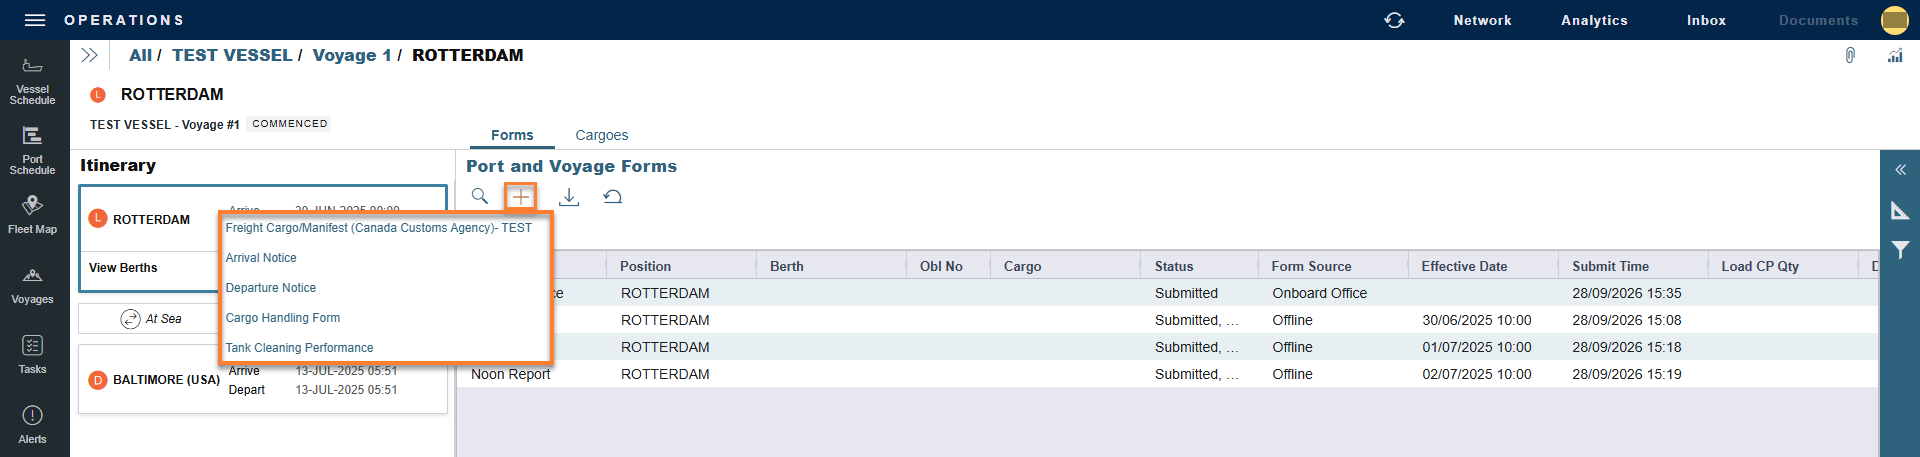
To submit a non-required form (bunkering or delay or multiple daily reports) click the + icon at the top-right-hand corner of the Forms tab for a list of additional forms.
Note: Berth-level forms cannot be submitted, and cargo actions cannot be performed, for a berth that has not yet been applied to IMOS. If you are unable to submit a form for a specific berth, press the sync button to pull the latest voyage data from IMOS and then try again.
Cargo Tab
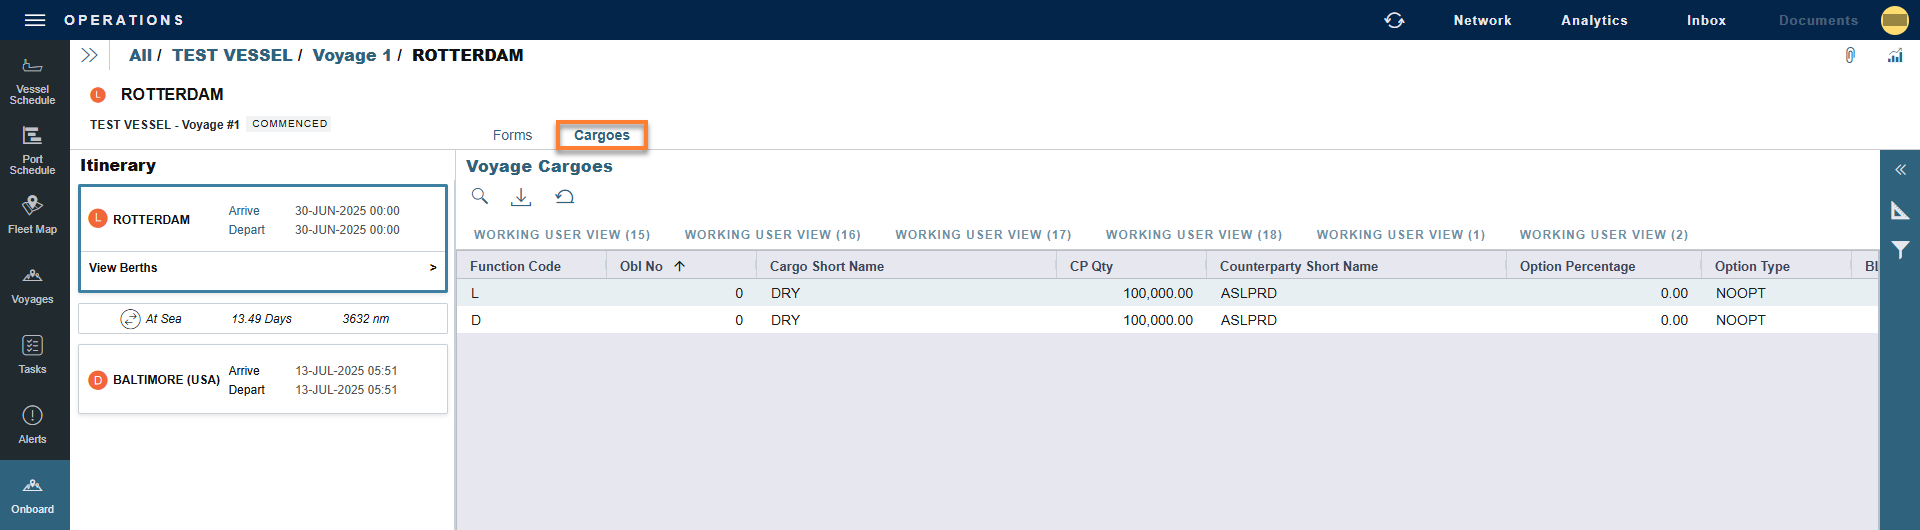
The Cargo tab lists all of the cargo movements within the given voyage. The Cargo tab is organized into several columns: Function (load or discharge), OBL No, Cargo Short Name, CP Qty, Counterparty Short Name, Option Percentage & Type, BL Qty, Booking no, CP Date, and Port.
Attachments
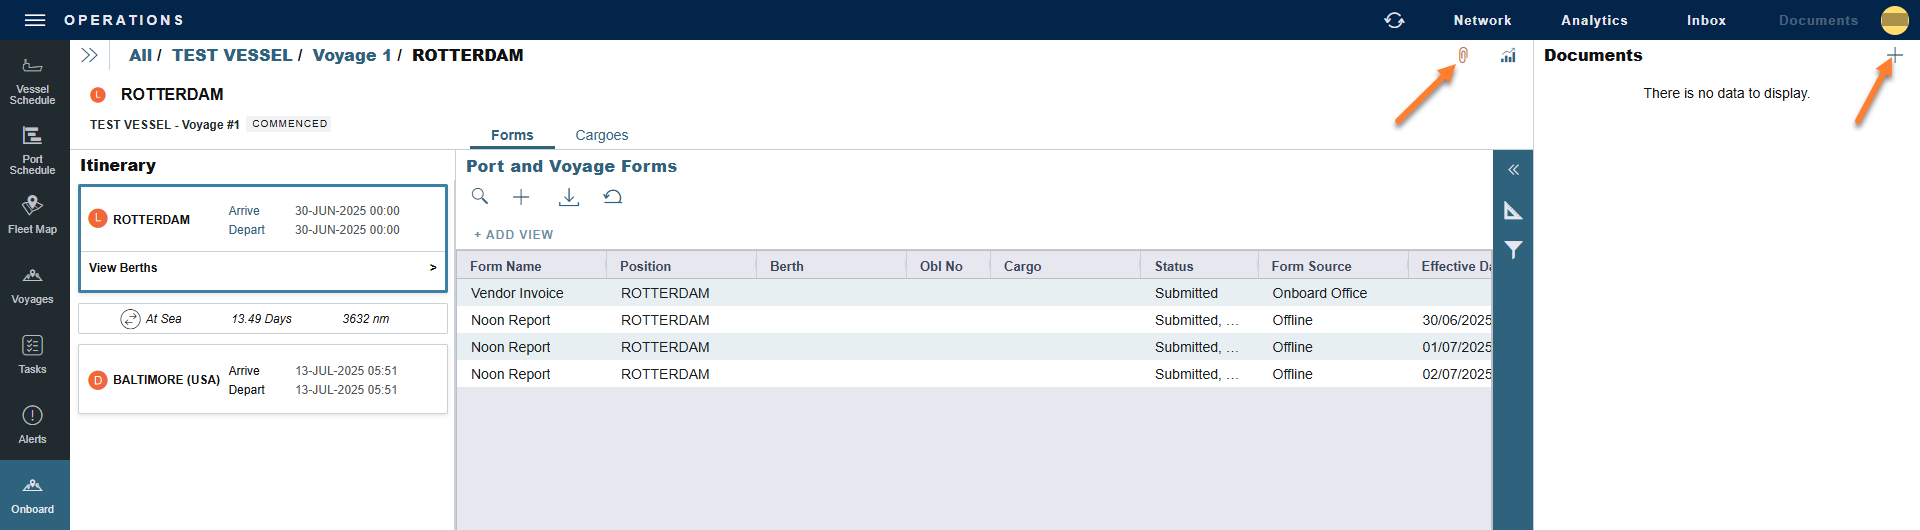
Attachments can be submitted for documents relevant to specific port call. To submit an attachment do the following:
-
Click on the paper clip icon at the top-right-hand corner of the browser window.
-
A new panel opens on the right-hand side of the browser window, displaying a list of voyage attachments.
-
To add an attachment, click on the + button at the top-right-hand corner; you can now drag and drop attachments from your computer to Veslink Onboard. Remember to replicate to transmit the submission to the office site.
Reports
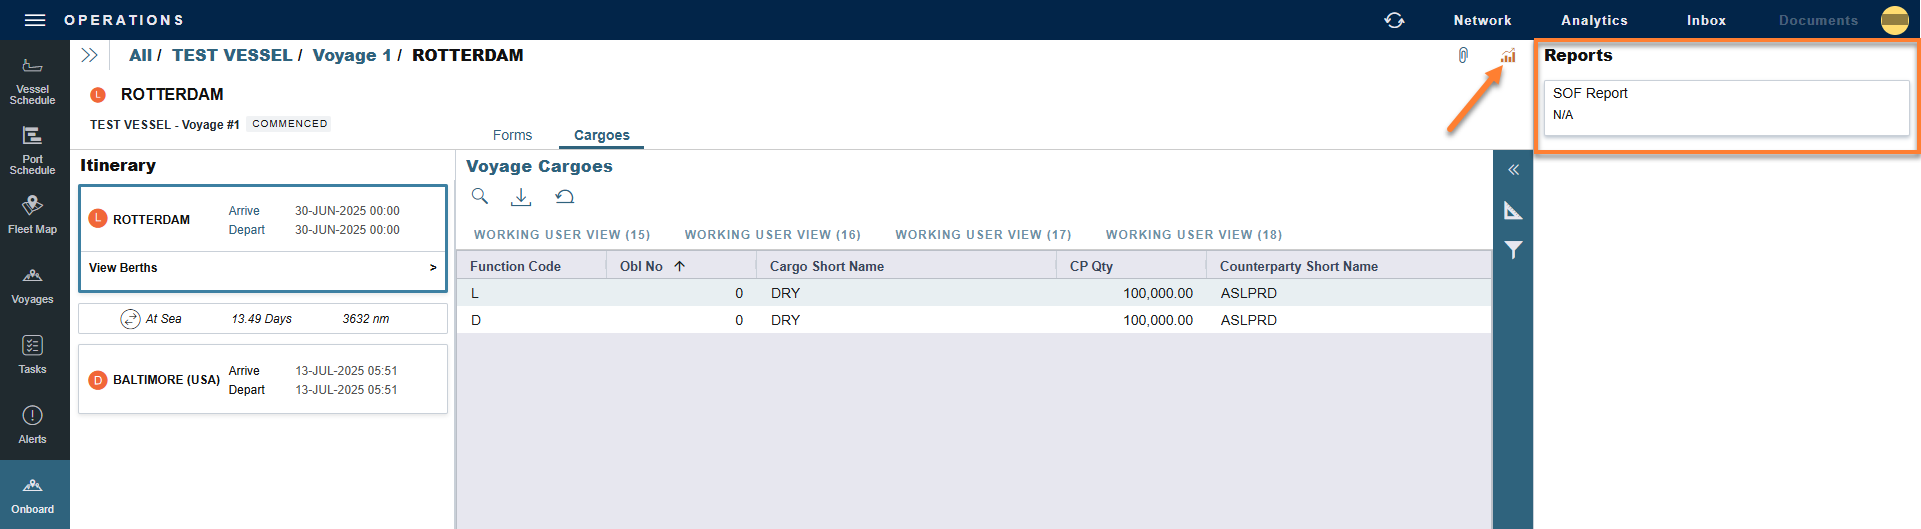
Veslink Onboard comes standard with two reports that can be used for onboard analytics distribution to relevant stakeholders. A Port Log and Statement of Facts Report can be generated based on the submitted form data.
To generate these reports, click on the graph icon next to the attachments icon on the upper right-hand corner of the browser. A reports panel appears on the right-hand side of the window, where you can select which type of report you wish to generate.
Navigating to Past and Future Voyages
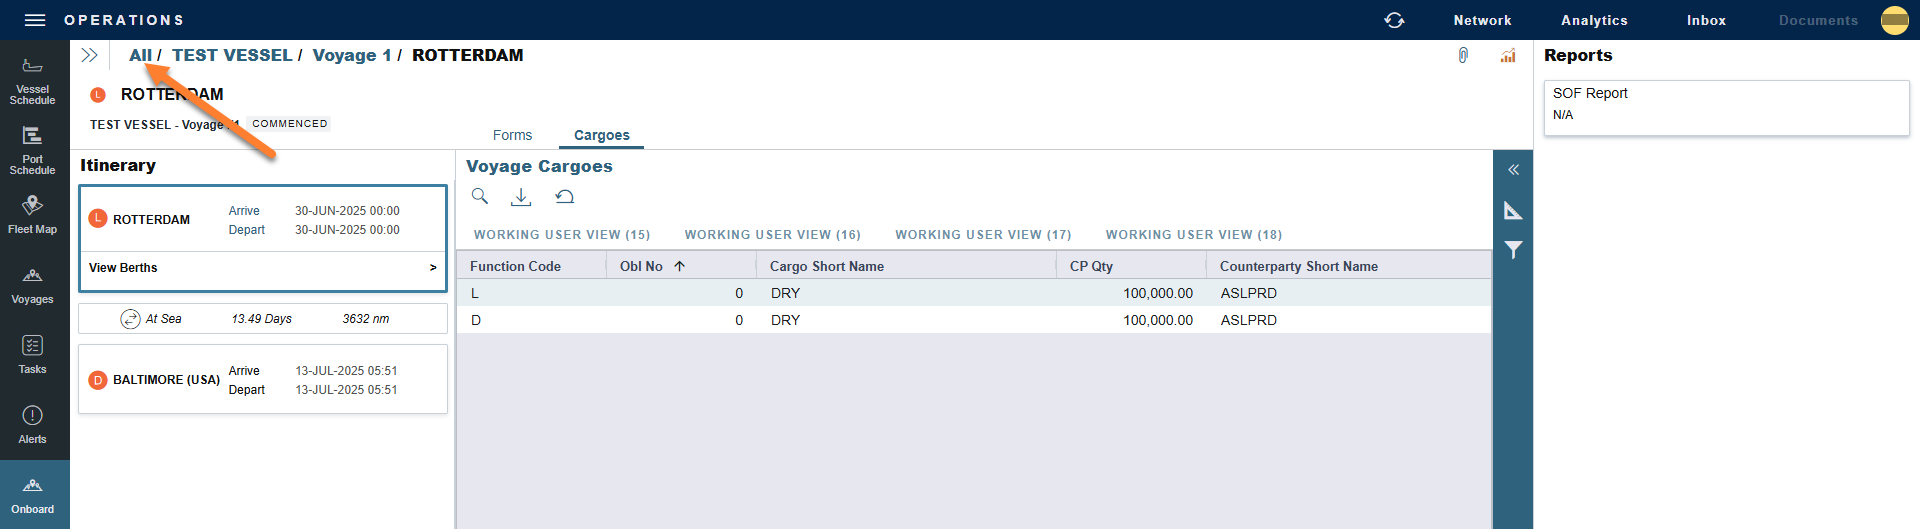
To navigate to past or future voyages click All next to your vessel name at the top-left-hand corner of the browser window. From here, a list of voyages appears, where you can select the one you wish to open.
Signing Out
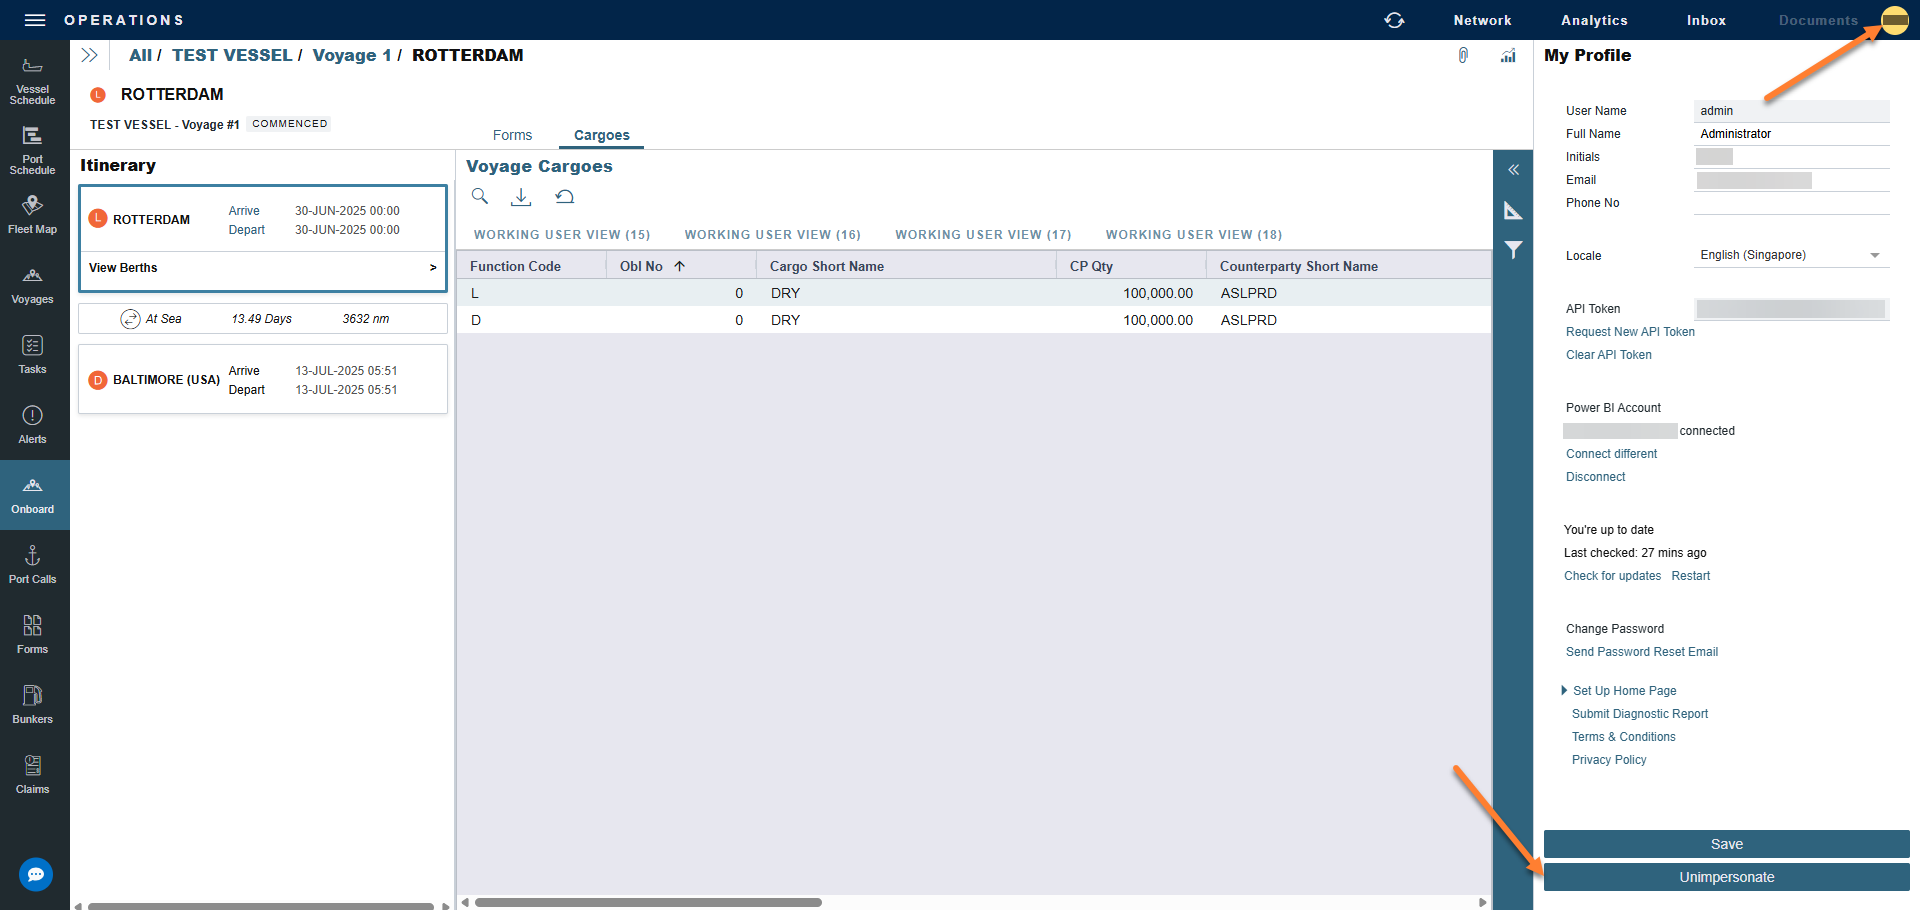
To log off of Veslink Onboard, select your initials at the top-right-hand corner of the browser window. A panel appears, labeled My Profile on the right-hand side of the screen. At the bottom of the panel select Unimpersonate.