Export a List
To export the entire list of vessels on the position list, enter the key E (export) on the keyboard or click “Export” from the menu, as shown in the following image:
When you click Export, the following window displays.

The system will default to the “Standard” format (Current View), but if you wish, you can select one of the currently saved formats from the dropdown list shown in the following image or click the Add ➕ symbol to create a new format.
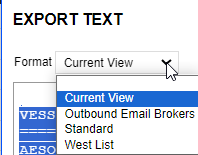
For more guidance about export formats, refer to Export Formats
Select an export output
There are five outputs for exporting a position list. The Output buttons options are as follows:

-
Email: The Position List is automatically brought into a format to email directly from the system.
-
Text: The Position List is exported as plain text properly spaced using a fixed-font style.
-
Data: The Position List is exported as tab-delimited, which is the best format to copy/paste into Excel.
-
Table: The Position List is exported as an html table which is useful when using HTML-supported emails.
This view allows you to adjust column widths, as shown in the following image. Make sure you change the dropdown list to Adjust Column widths.

-
Excel: The Position List is automatically downloaded as an Excel file.
Adjust export settings
The Settings hyperlink displays the following window, which is used to apply additional settings to the position list grid and export format.
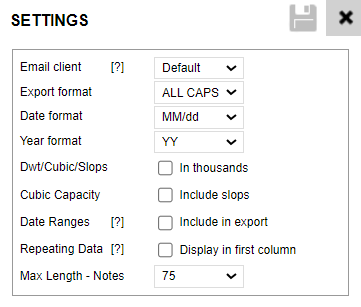
The settings are explained as follows:
-
Email client: Some email clients don’t work well with our ‘Text’ output format, so select the other options on this drop-down to find the one that works best.
-
Export format: Change the export text case between normal and ALLCAPS.
-
Date format: Allows you to select which date format you wish to use for the exported list.
-
Year format: Specifies if the Year Built field will display as a 2 or 4-digit year. We recommend using a 4-digit year if you are frequently using Excel.
-
Dwt/Cubic/Slops: Specifies if these 3 fields will display in thousands or full numbers (for example, “301, 123” or “301”)
-
Cubic Capacity: Select the ‘Include Slops’ checkbox to include the slop cubic as part of the Cubic column
-
Date Ranges: Open Dates can be specified as a range, for example, “Nov 15-25”. Selecting this checkbox will include the date range when exporting the ETA and Open Date fields.
-
Repeating Data: Select the ‘Display in the first column’ to include repeating values in the first column
-
Max Length - Notes: Click the dropdown to select the maximum length of your notes to display (from 25 to 200)