Home > Data Center > Creating a Voyage Itinerary in Distances
To create an itinerary in Distances, add ports or positions. Then, adjust the itinerary as needed by deleting or changing the sequence of ports or positions and editing fields.
To view and compare up to three itineraries, manage Voyage tabs.
Hover information: Information appears when you hover over the map:
-
On a port that is in the itinerary:
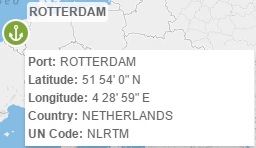
Port name, latitude and longitude, country, and UN code appear below it.
-
Anywhere on the map:

Latitude, longitude, and map scale appear in the lower-left corner of the map.
Adding a Port or Position
To add a port or a position, do one of the following:
-
Type in the Enter a port or position field.

-
Start typing the name of a port and select it from the list that appears.
-
Type the coordinates for a position and click

Examples:
1 23' 45" N 123 45' 67" E
1 23 45 N 123 45 67 E
1.23456 S 9.8765 W
-
-
Select from the Map:
-
Find the location on the map:
-
Zoom in to see port names. To zoom, click

-
Hover over a point to see its latitude and longitude.
-
-
Right-click and then click one of the following:
-
Add Point to Input
-
The coordinates appear in the Enter a port or position field. To add it to the itinerary, click
-
-
Add Port Name to Input
-
The port name appears in the Enter a port or position field. To add it to the itinerary, click
-
-
Go Via this Point (between two ports/positions in the itinerary)
-
The coordinates are added to the current leg.
-
-
-
As you add ports and positions:
-
The first port or position appears in the itinerary, with the Commence Date and Time, and on the map.
-
A Voyage Summary appears below the itinerary.
-
Additional ports and positions are added Via passage, Speed, Distance, Port Days, and Sea Days to the itinerary.
Voyage Itinerary & Summary

|
Icons on the Map
|
Adjusting the Itinerary
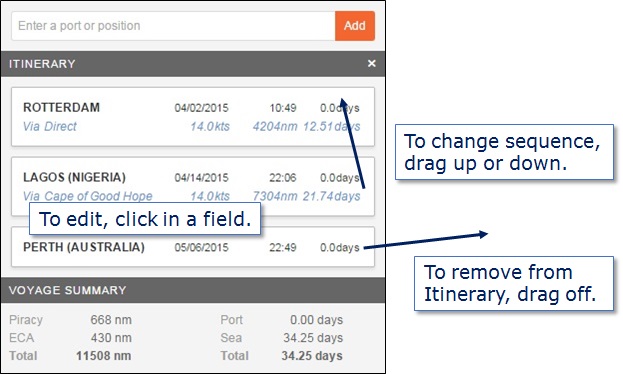
When you have entered all the ports/positions, you can adjust the itinerary.
-
Change sequence: Drag and drop a port/position in the itinerary.
-
Delete: Drag the port/position off the itinerary.
-
Modify fields: Click and edit any of the following:
-
Port name/point position
-
Commence/Arrival Date and Time
-
Sea/Port Days
-
Via passage
-
Speed
-
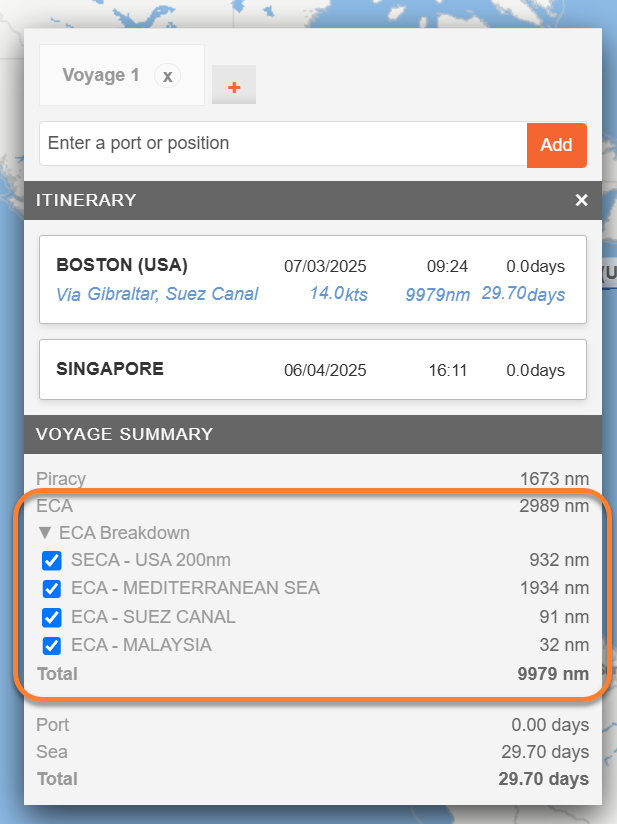
Change the ECA Breakdown
The ECA Breakdown provides a detailed breakdown of ECA miles per ECA zone. Use the checkboxes by each ECA zone to deselect specific zones and exclude their miles from the total ECA miles calculation.
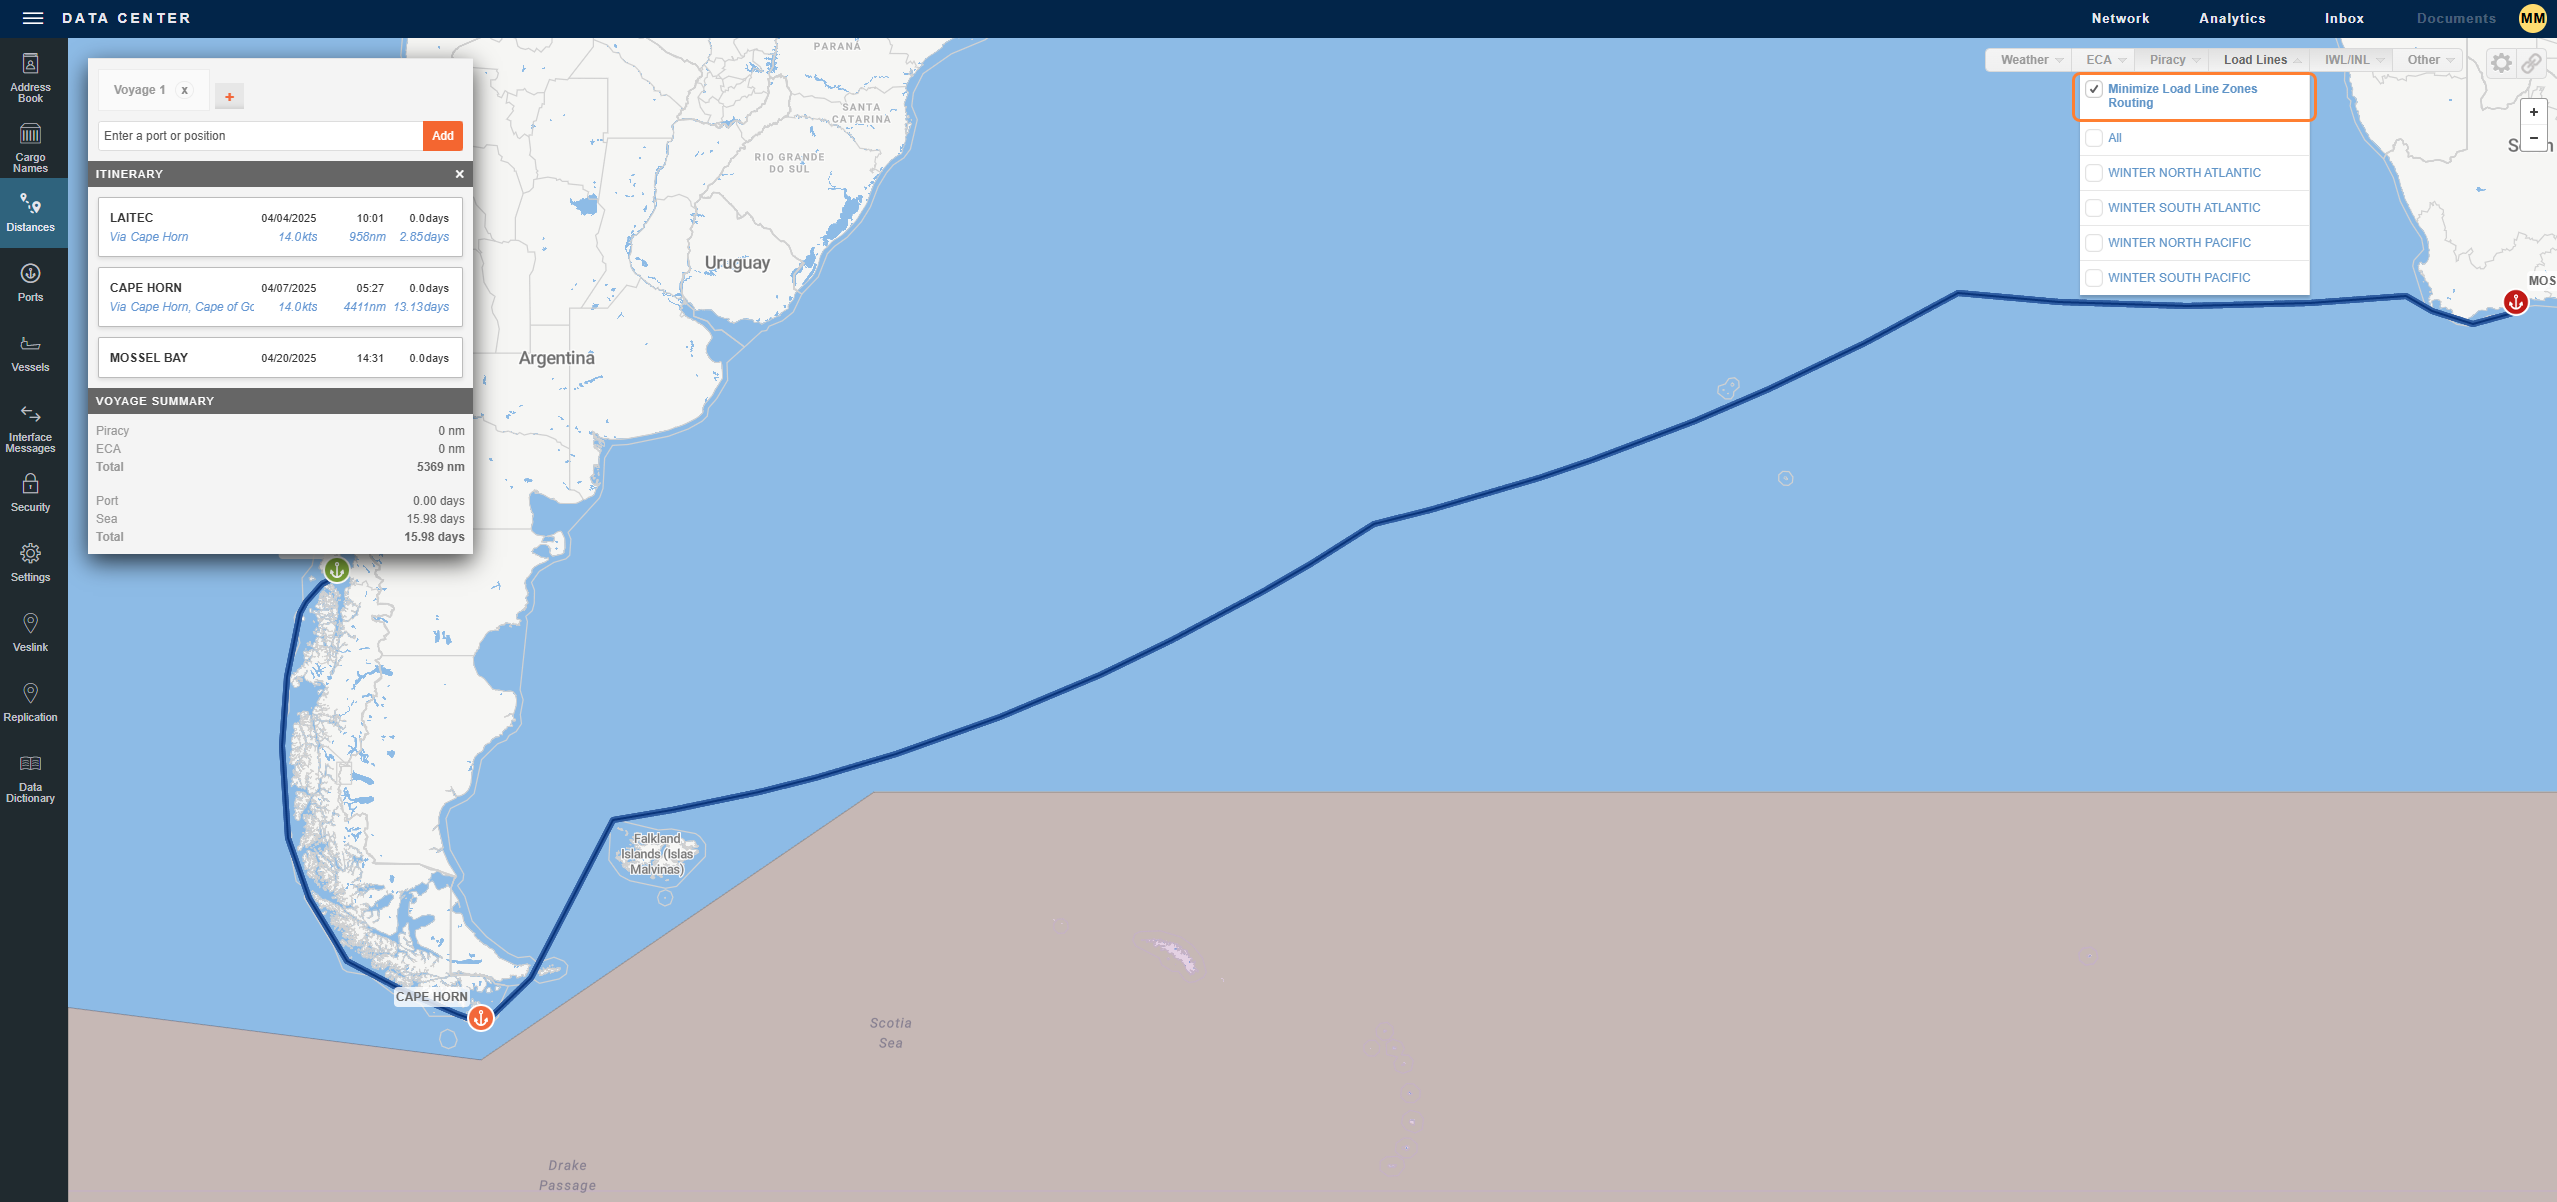
Minimize IWL/INL Zones Routing
Under Load Lines, select the Minimize IWL/INL Zones Routing checkbox in the dropdown list to minimize IWL/INL zones routing and apply these changes to the map.
Managing Voyage Tabs
Using Voyage tabs, you can view and compare up to three itineraries.
-
To copy a Voyage tab, select it and then click

-
To highlight an itinerary in the map, do either of the following:
-
Click the Voyage tab.
-
Click the route in the map.
-
-
To delete a Voyage tab, click

Sharing a Link to the Itinerary
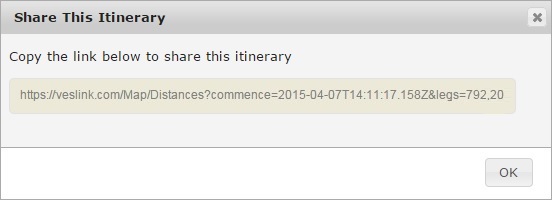
You can share an itinerary with colleagues and business partners.
-
To create a link to an itinerary, select the Voyage tab you want to share and then click

-
Click the link.
-
To copy the link, either right-click and click Copy or type Ctrl + C. The link is copied to the Clipboard.
-
To paste the link into an email or wherever appropriate, either right-click and click Paste or type Ctrl + V.