IMOS - Estimate Analysis
This article describes different ways you can optimize and analyze the estimate after you create a baseline estimate.
Step 1: Visualize Your Estimate on the Map
To visualize and optimize your itinerary, you may open the Estimate map view.

Notes:
The following steps optimize the itinerary on the map. All changes you make on the map will update your Estimated itinerary.
The Veson IMOS Platform calculates distances from berth to berth, not pilot station to pilot station. Insert pilot stations in the itinerary as required.
Step 2: Optimize Routing for ECA, Piracy, and Weather

Select alternative routing as necessary:
Set ECA routing as necessary.
Select Piracy routing as necessary.
Drag-and-drop additional ports as needed.
Note: The best way to move ports is to drag-and-drop the port icons.Observe Weather forecasts.
Scroll down and observe changes to the P&L in Estimate column view.
Return to the Estimate details view by clicking the Estimate ID.
Note: The Veson IMOS Platform does not prompt routing options, but uses the shortest route by default.
Step 3: Update Passing Points/Canals
Right-click passing points/canals to change Routing.

The Veson IMOS Platform automatically adds passing points (function P; e.g., the English Channel, when entering an ECA zone) and canal passages (function I).
It is not possible to enter Port Activities/Days to P ports, but it is possible to enter them for I ports. To add days and port expenses to passages (e.g., SKAW), switch the port function from P to I.
Step 4: Add Any Waiting Days
If you picked up existing cargo to try to fit on this vessel, the laycan of the cargo and the open date of the vessel might not exactly match. Sometimes, the vessel has to wait for the cargo at port if the laycan starts late. You can use the Wait for Laycan menu option to add any waiting days to the itinerary (if laycan is entered).

Step 5: If Needed, Run the Reposition Analysis
Use the Reposition Analysis available from the menu and insert the reposition port in the estimate if required. A reposition port is needed if the vessel's expected next open position is not the same as the last discharge port.

Step 6: Auto Calculate Cargo Quantities using Max Lift Calculations
The load and discharge quantities in an Estimate can be auto calculated based on the Max Lift Calculation. This option allows a vessel to load as much cargo as possible to maximize profit.
Max Lift is the maximum quantity a vessel can lift in the port in the voyage that has the most restrictive deadweight and draft limits. This amount can be calculated based on the density of the cargo, the vessel's deadweight, and the weight of bunkers and everything on the vessel.
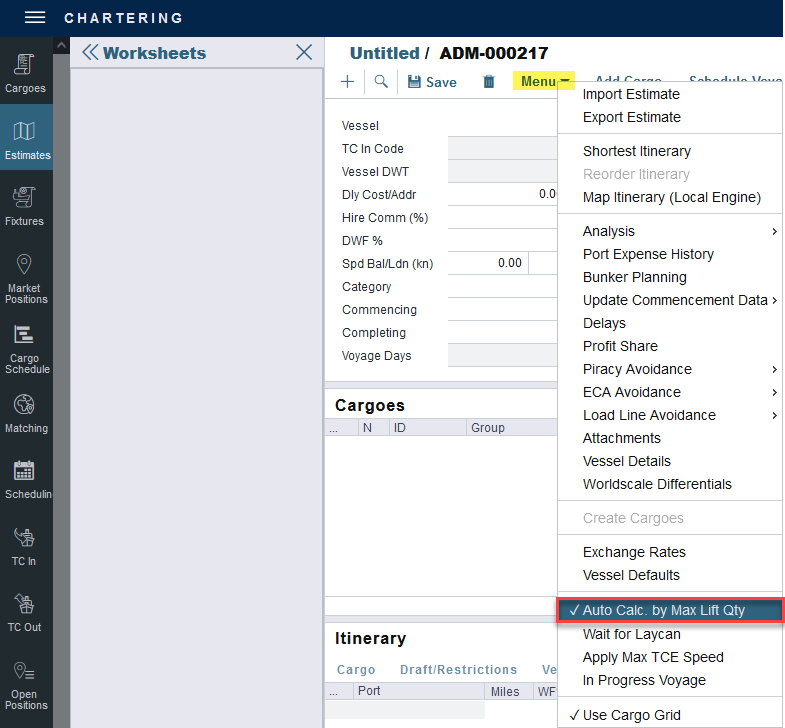
On an Estimate column or details toolbar, click … or Menu and then click Auto Calculate by Max Lift Qty.

The following information is used in this calculation:
Bunkers ROB
Cargo Class Dry or Unspecified: Stowage Factor (M3/MT or Ft3/MT)
Cargo Class Liquid: Density (API/Specific Gravity)
Cargo Class Dry: The Capacity Basis default is Grain, but you can change it on the Cargo Name form.
The L/D Quantity fields in the Draft/Restrictions tab will auto-update based on the values in the MaxLift column.
To check the Max Lift calculation details, hover over the MaxLift field; the full calculation is visible.

It is possible to override the calculated values in the Draft/Restrictions tab.
Update the value in the L/D Qty column and click enter. The overridden field will be highlighted in blue.
Another option is to turn off the auto calculation in the Menu (step 1).

Check out https://help.veson.com/imos/vip-max-lift-calculations to learn more about this calculation, and review more industry specific examples.
Step 7: Run Other Estimate Analyses

Use Analysis to optimize voyage planning:
Freight Sensitivity Analysis
Speed Comparison Analysis: Click Generate From Vessel Speeds.
Bunker Sensitivity Analysis
Note: Avoid using the Speed Sensitivity Analysis, as it is linear, theoretical data, and not based on vessel-configured data.
