
The Fleet Report tool instantly generates vessel data tables that would otherwise take hours to create manually.
Access the Fleet Report
Navigate to Vessels → Fleet Report in the sidebar menu.
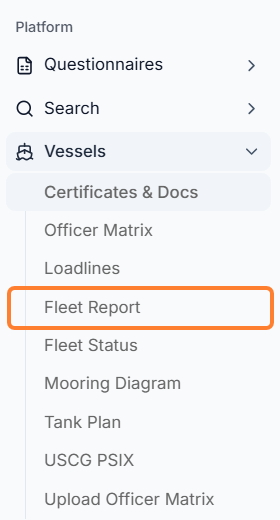
Fleet Report Page
On the Fleet Report Page, you can expand the dropdown list to select the report you have already saved.
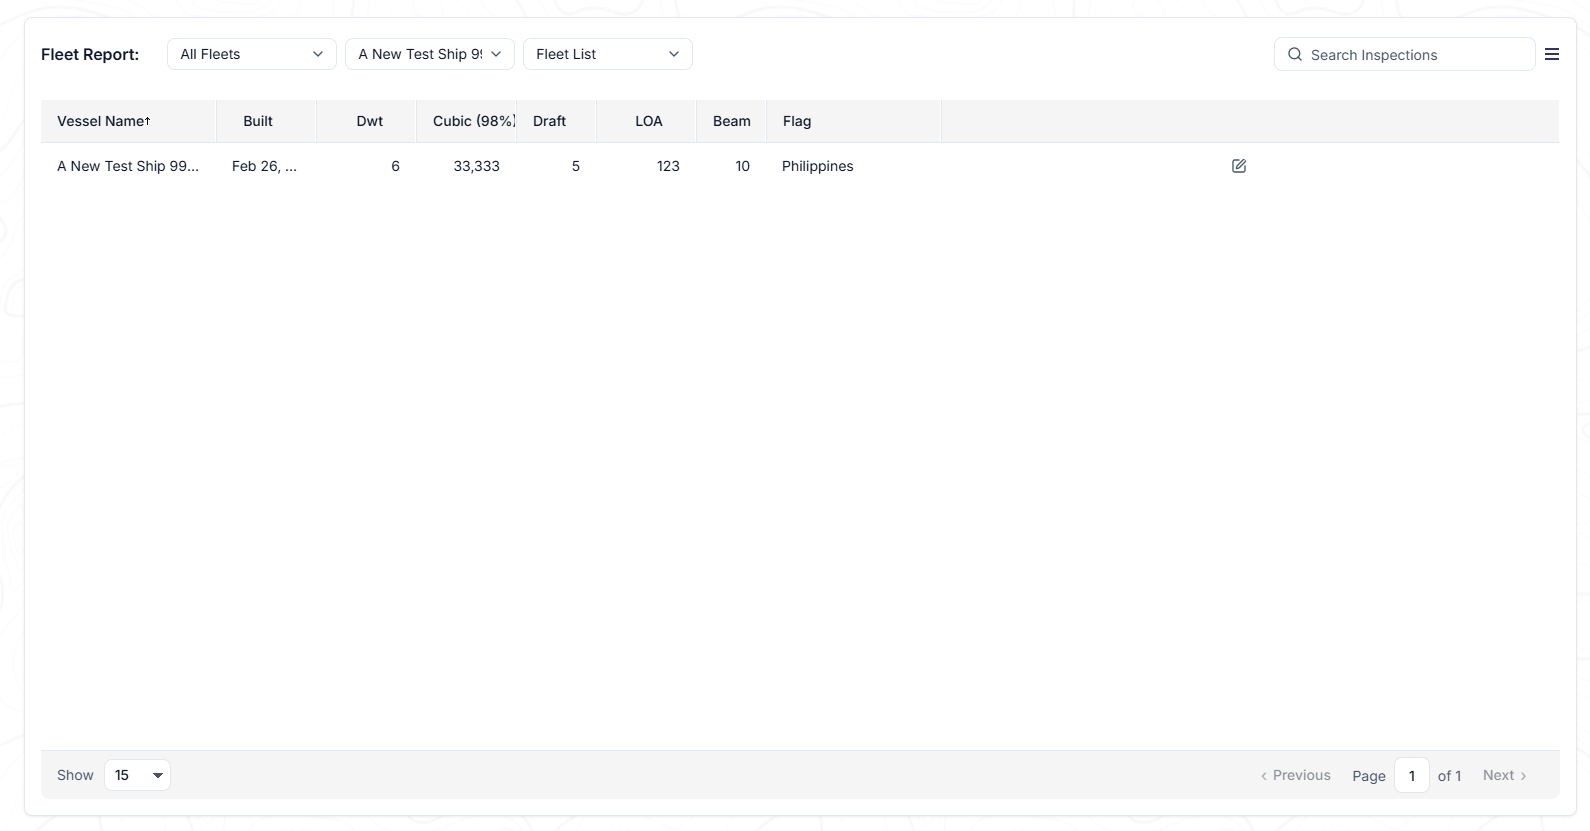
Adding a New View
After clicking on Add New View, you can set up the new view by doing the following:
-
Give a name to the new view you are adding.
-
Select who can see the new view (your company/user).
-
Select columns to be displayed either by typing in the field or choosing from the list.
-
You can move them around and add colors.
-
-
Add the selected columns.
-
Specify criteria (i.e. Flag to be Greece).
-
Set the criteria pattern by using commas, parenthesis, and/or format.
-
Click Save.
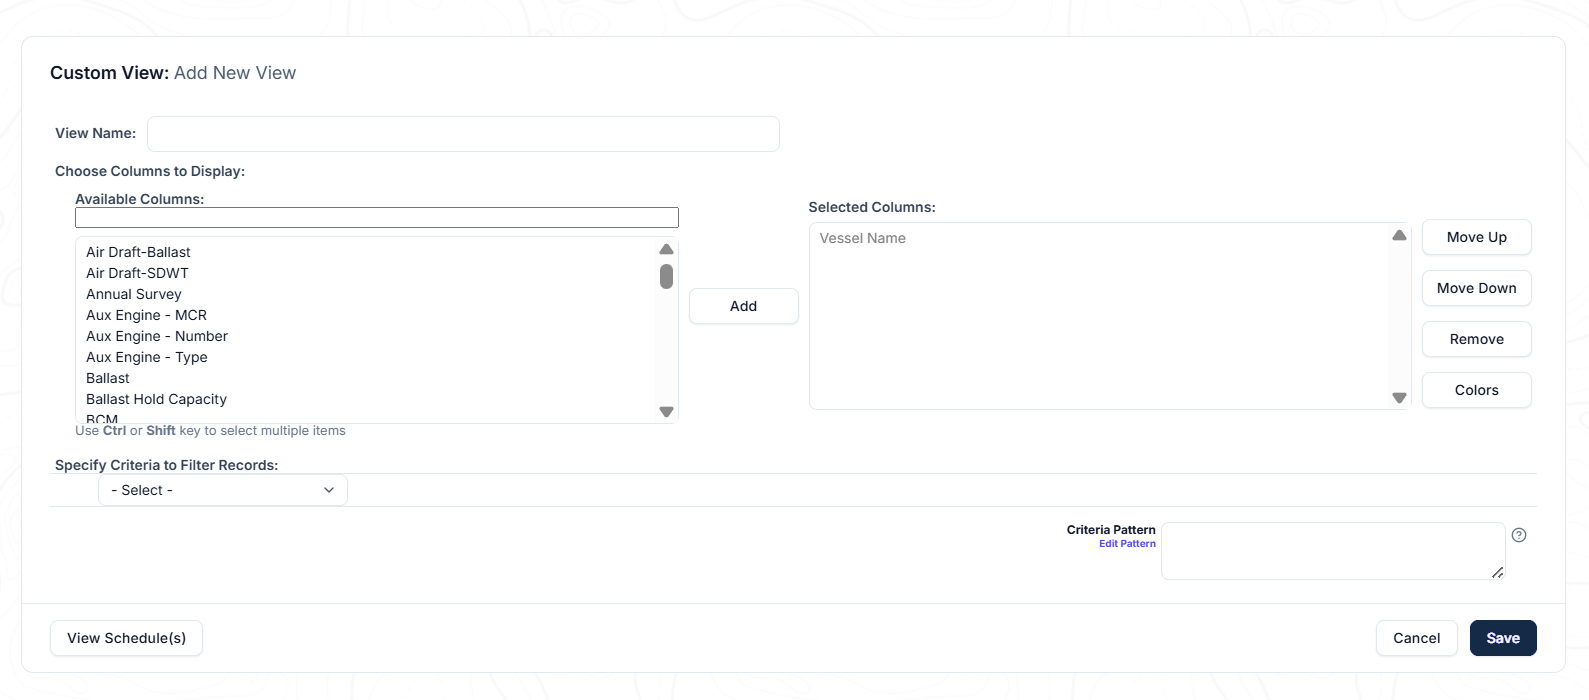
After clicking on the Save button, you will return to the Fleet Report window.
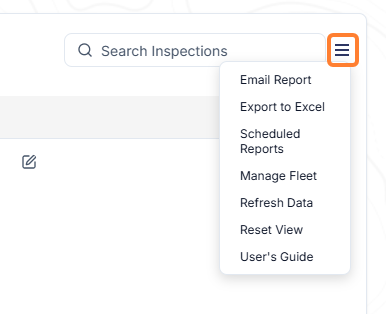
Actions in the Fleet Report Menu
-
Email Report: The system will automatically attach the Fleet Report to an email.
-
Export to Excel: The system will export the current list of certificate records into an Excel document and will be downloaded into your computer.
-
Scheduled Reports: Schedule a report of any view (system or user-created) to be emailed to you.
You can add a new scheduled report by clicking New Schedule and then selecting the report from the list.
-
Add recipients (as many emails as needed).
-
Set the Fleet, Frequency (Daily/Weekly/Monthly), and time to send the scheduled report out → Save.
By setting up a Scheduled Report, the user will not need to create the same report on a regular basis as the system will collect the current data and will send the report as scheduled.
-
Manage Fleet: You will be directed to the Fleets page.
-
Refresh Data: Refresh the underlying data from the database.
-
Reset View: Resets the sorting and filtering for the selected View.
-
User’s Guide: Download the User’s Guide to the certificate module.