The following provides a step-by-step guide on how to add a new fuel type into the system, including all necessary configurations to ensure its usability for future voyages.
Biofuels are viewed in the same way as normal fuels in IMOS and can be added using the same steps.
Creating a New Fuel Type in IMOS
To add a new fuel type in IMOS, please do the following:
-
Navigate to the Data Center module, click on … → under the Vessels section, click on Fuel/Lube Types.

-
Once you are on the Fuel/Lube Types page, click on Add new row to add the new fuel type.

-
If the new fuel type has backup fuels, you can indicate it in the Backup Fuel column.
-
It is also important to ensure that CO2 factors and Fuel EU factors are added to ensure accurate calculation of emissions and Fuel EU levels.
Please review the factors with the emission verifiers to establish appropriate emissions factors.

Before including the fuel type in any estimates or voyages, it is important to define the consumption rate for that fuel type specific to the vessel. This is crucial for the system to accurately calculate the estimated consumption for Bunker Planning or to provide accurate actual consumption in a voyage. Please refer to the next section on defining the consumption rate for the new fuel type.
Defining the Consumption Rate of the New Fuel Type
To define the consumption rate of the new fuel type, you will first need to go to the vessel card of the specific vessel.
-
Navigate to Data Center → click on Vessels → search for the specific vessel.
-
Click on Add new row in the ‘In Port Consumption Table’ to add the new fuel type.
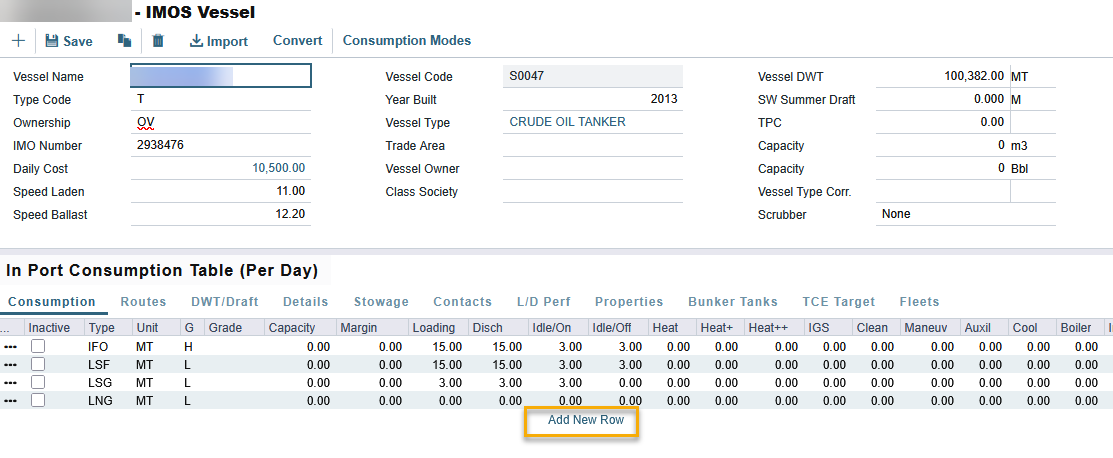
The In-port Consumption Table determines the vessel’s consumption rate for activities conducted in port, such as Loading and Discharging. Conversely, the Speed Consumption Table determines the consumption rate of the vessel while at sea. For more information, please refer to: https://help.veson.com/imos/imos-consumption-tab-vessel.
On the vessel card, within the In-Port Consumption table, a maximum of six fuel types can be assigned to each vessel. If this limit is reached, users have the option to deactivate fuel types that are no longer in use by selecting the Inactive checkbox.
Once the fuel type has been successfully added in the Data Center, users can proceed to include it in relevant estimates and voyages.
Adding New Fuel Types to Voyages and Estimates
To add a new fuel type to an existing voyage, please consult the following article: https://help.veson.com/imos/vip-add-new-bunker-type-to-voyage.
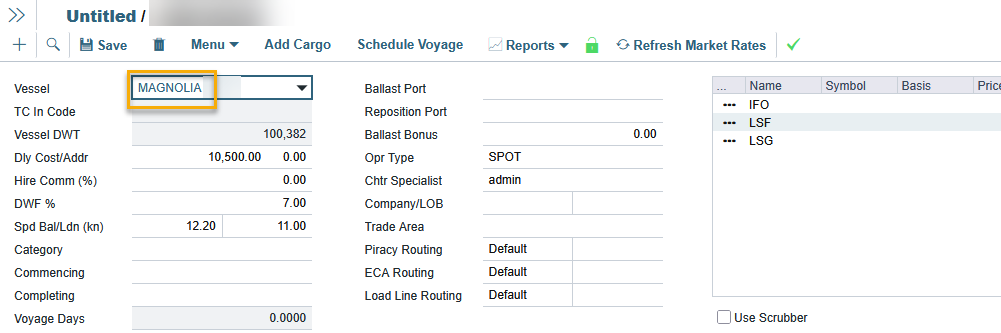
When the vessel is selected for a new estimate, the consumption details will be automatically incorporated into the estimate.
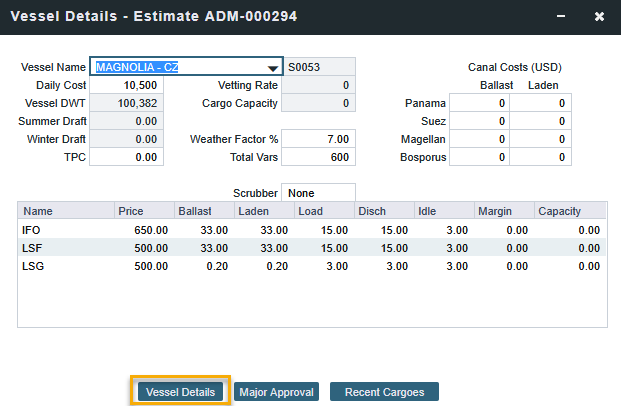
For an existing estimate, it is necessary to resync the vessel information to include the new fuel type. This will ensure that the related consumption details are updated in the estimate for recalculation. Please follow these steps to resync:
-
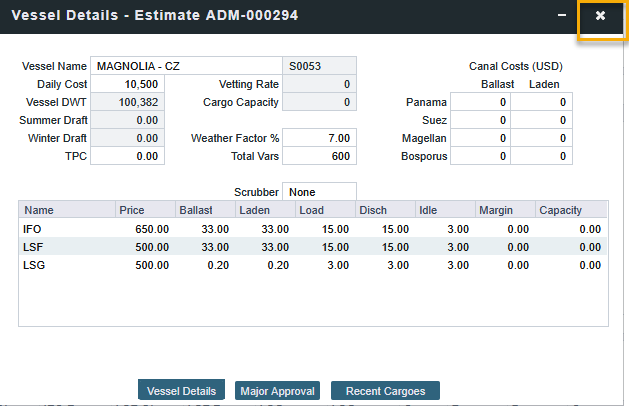
Click on the vessel name hyperlink to open the vessel details window.
-
Click on the Vessel Details button to open the vessel card details page.
-
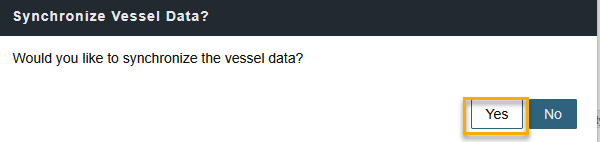
When you close the vessel window, a ‘Synchronize Vessel Data’ pop-up window will be prompted. After clicking on the ‘Yes’ button, close the vessel details window and save the estimate.
Creating a New Fuel Zone
With each introduction of a new fuel type, it is essential to reassess the existing Fuel Zone setup. This ensures that the current Fuel Zone accommodates the new fuel type, allowing accurate estimates to be created using the correct fuel type.
When updating or establishing a new Fuel Zone, please refer to the following article for guidance. https://help.veson.com/imos/imos-creating-a-fuel-zone-set
Recommendations:
-
It is always recommended to test the new fuel zone in your test environment first to ensure that the results are as expected before applying the same in your production environment.
-
Users should duplicate an existing fuel zone to implement necessary modifications, rather than altering the current fuel zone. This approach guarantees that other users relying on the same fuel zone remain unaffected.
-
-
It is important to ensure that each fuel zone set is tailored to a specific combination of fuel types. For example, if one vessel operates on LSG, LFO, and MGO, while another vessel utilises only LFO and MGO, these two combinations should each have a distinct fuel zone created for them.
Once the fuel zone is created, it is advisable to conduct several estimates to account for different scenarios and verify that the consumption aligns with expectations.
Fuel zone changes are not reflected in the estimate after updates
If you are editing an existing fuel zone that is currently used in an estimate, there may be instances where the latest updates are not reflected in that estimate. To ensure that the modifications from the fuel zone are included in the current estimate, you will need to reselect the fuel zone.
Please follow these steps:
-
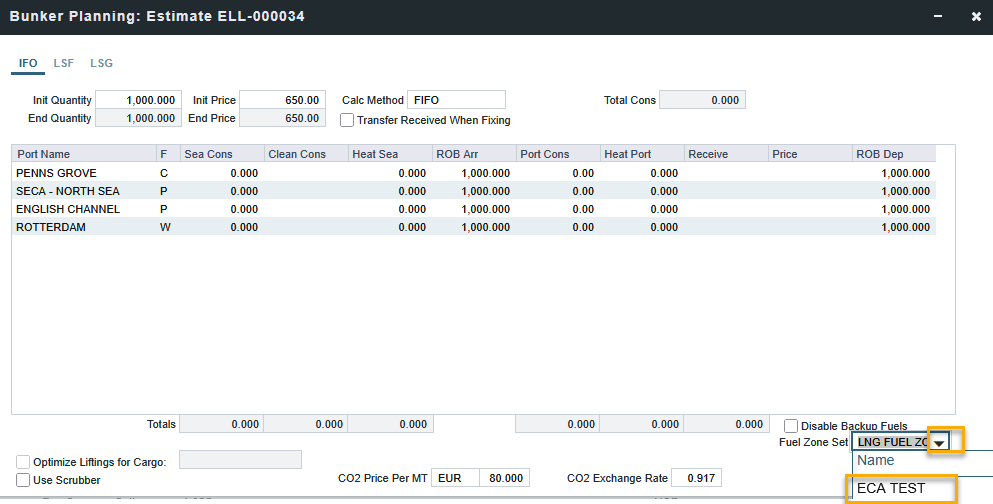
On the Bunker Planning window, click the dropdown for Fuel Zone Set and select a different fuel zone set that is not the one where you have made changes.
-
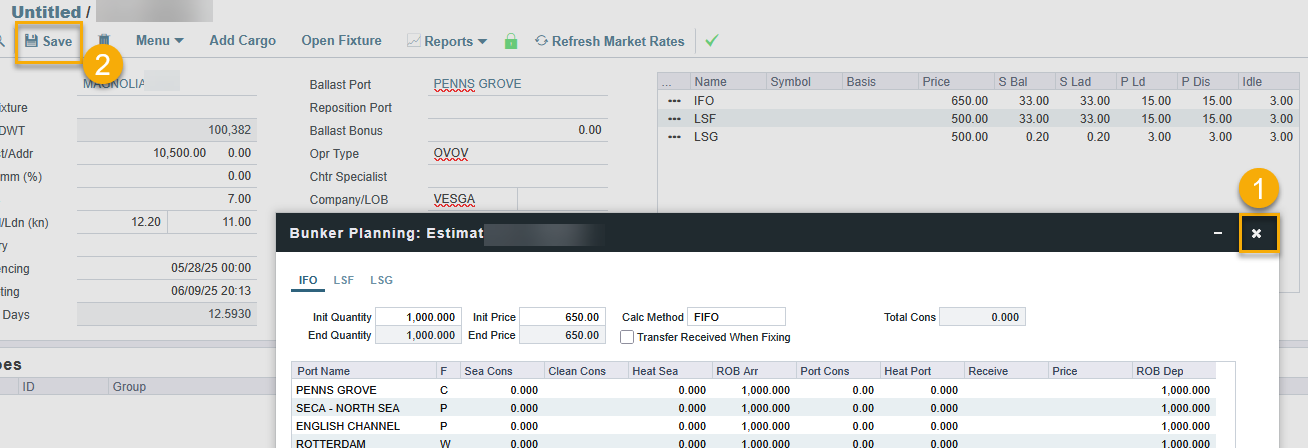
Close the window and click "Save" in the estimate.
-
Once the changes are saved, refresh the estimate and return to the Bunker Planning window.
-
Then, select the original fuel zone that you have updated.
-
The consumption should now reflect the updates based on the selected fuel zone.
-
If you encounter any further issues, please submit a support ticket through our Help Center.
Related articles for reference:
https://help.veson.com/imos/vip-about-vessel-consumption-setup