
Note: You must have the View Voyages General Permission enabled.
You can open the Fleet Map from one of the following locations:
|
Location |
To access the Fleet Map: |
|---|---|
|
Veslink |
Click the Voyages tab. |
|
Browser |
Click the shortcut or enter the URL in your browser. |
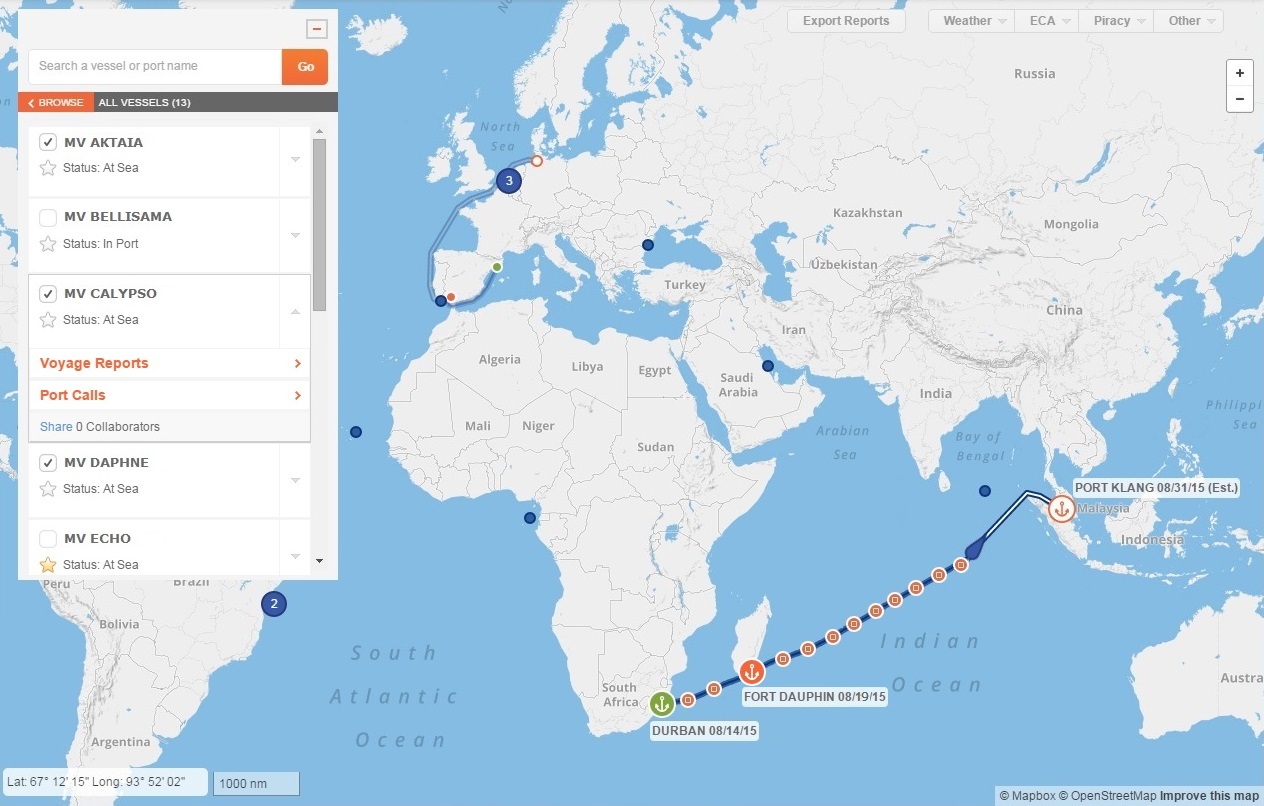
The Voyages tab opens a map, with a Search box. To find vessels and voyages to view, you can either search for a vessel or port name or filter the vessel list and browse. Before finding voyages, you can:
-
Export Voyage Reports to an Excel file.
-
Select map views and overlays to highlight Weather, ECA Zones, Piracy Zones, Load Lines, and IWL/INL Zones.
-
Add vessels to your Favorites list.
Favorite Vessels
To add a vessel to your Favorites list, click 
On the Dashboard, you can filter the list of incoming forms to show only those sent from vessels on your Favorites list.
Finding a Voyage
The Search box has a Search field at the top and a vessel list below. All vessels with current voyages appear in the vessel list with their statuses.
To minimize the Search box to see more of the map, click 

Searching for a Voyage
The Search field is a powerful tool for finding vessels or ports. As you start typing, the field autofills with possible results. When the correct result appears, click Go.

When you search by:
-
Port Name, the map zooms to the port's coordinates.
-
Vessel Name, the map zooms out to show the full voyage route in detailed view.
-
Another Vessel Name, the detailed view of the route of that vessel appears, along with the normal view of the routes of the previous vessels.
-
Filtering and Browsing Through the Vessel List
To filter the list of vessels, click 
-
Vessels in Port
-
Vessels at Sea
-
Selected Vessels (When you are finished, click Clear All Selections, at the bottom of the list.)
-
Favorite Vessels
-
All Vessels
To view their voyages on the map, select vessels in one of these ways:
-
Select one or more check boxes to highlight voyages on the map in normal view.
-
Click on the downwards arrow to highlight the vessel in detailed view on the map. Only one vessel can be shown in detailed view at a time.
Viewing Routes on the Map
Detailed View
To view a single voyage route in detail, do one of the following:
-
Click a blue dot on the map.
-
Right-click a blue dot on the map and click Show Route.
-
Click on the downwards arrow next to the vessel name in the vessel list.
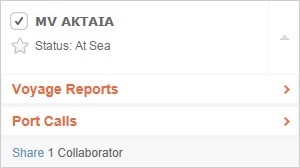
The list expands to show links to Voyage Reports and Port Calls, and a link to Share the voyage, along with the number of collaborators you are sharing with. The map centers on the voyage, and the route is highlighted with additional voyage details. Only one vessel route can be shown in detail at a time.
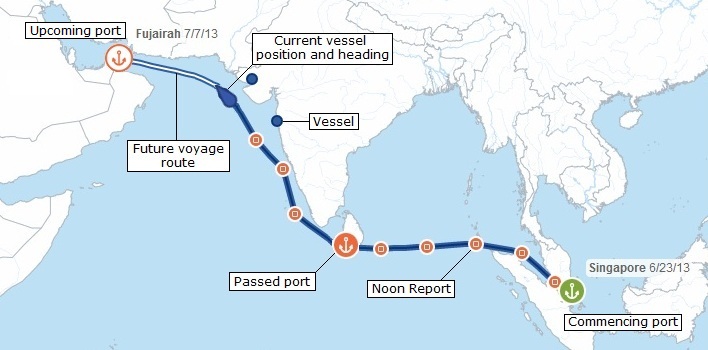
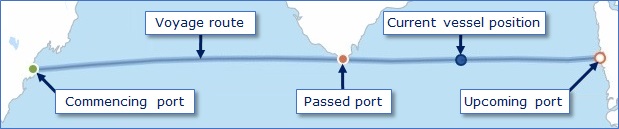
Vessels appear as blue dots on the map. Ports appear as larger dots with anchors:
Icons on the Map in Detailed View
-

-

-

-

-

-

For more information:
-
To view Vessel Details, right-click the blue arrow and click View Master Data.
-
To view Voyage Report information, hover over a port or report dot.
-
To view a report in the Voyage Reports list, right-click the port or report dot and click View Report.
Normal View
While you are viewing one voyage in detailed view, you can compare others to it in less detail. To view one or more routes in normal view, select the check box for each vessel in the list:
Icons on the Map in Normal View
-

-

-

-

-

Sharing the Map
You can embed the map in intranet and external websites and apps to share it, by augmenting the URL with the following parameters:
-
embed = true (Optional. This parameter removes the top-level tabs and shows only the map.)
-
hideVesselList = true (Optional. This parameter hides the vessel list on the left.)
-
username = user@veslink.com (Required. Replace with the username with maps permissions only.)
-
password = password (Required. Replace with the password.)
The well-formed URL will be something like this:
http://www.veslink.com/Map/Fleet?embed=true&hideVesselList=true&username=user@veslink.com&password=password