Home > Voyage Reporting > Forms & Form Groups
Requires the Voyage Reporting module.
To open the list of forms, in the Forms and Vessels workspace, click Forms on the left side.
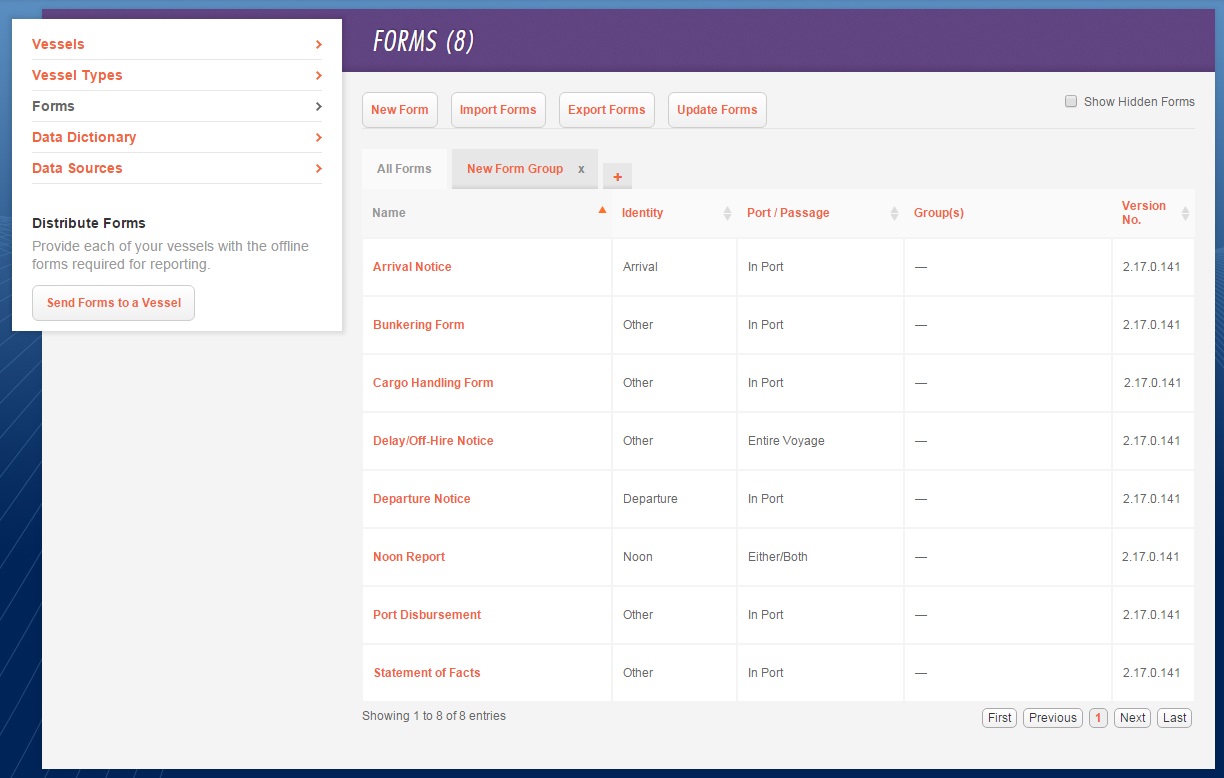
You can view all forms with their Version Number, or view Form Groups and see the forms included in them and the vessels associated with them.
-
To edit a form, click its name on the All Forms tab.
-
Standard forms have limited editing.
-
Custom forms can be edited.
-
-
To edit a form group, click its tab.
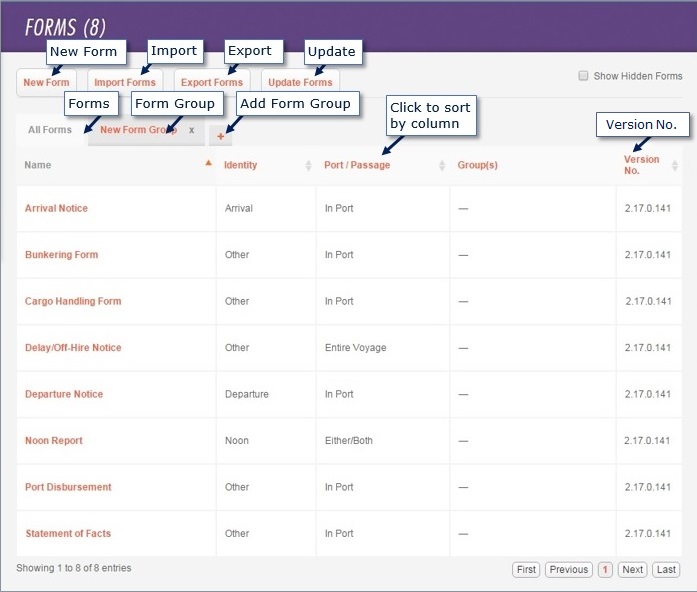
Importing Forms
To import forms:
-
Click

-
Click Choose File and select the Zip file of forms to import.
-
Click

-
To change which values the new forms overwrite, click Show Overwriting Behavior. The uploaded forms overwrite the existing ones.
-
Select any values that you do not want to overwrite, and clear any values that you want to overwrite.
-
Click OK.
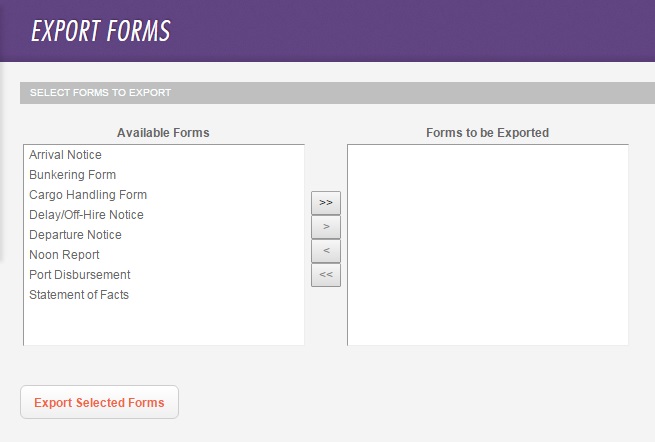
Exporting Forms
To export forms:
-
Click

-
Add forms to be exported:
-

-

-

-

-
-
Click

-
Select the location on your computer where you want the forms saved and click Save. The forms are saved as RDL, VFML, and XML files inside a Zip folder.
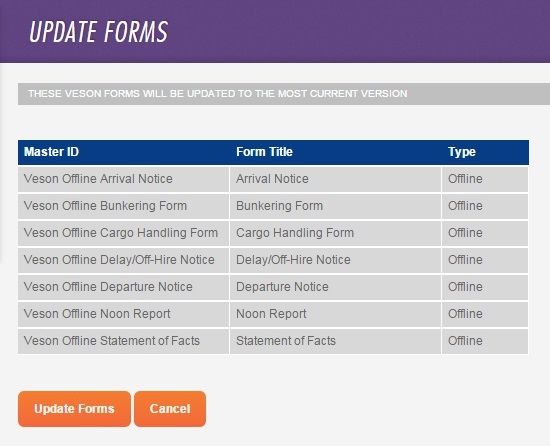
Updating Standard Forms
Veson Nautical periodically releases new versions of standard forms. To update your standard forms to the latest version:
-
Click

-
Click

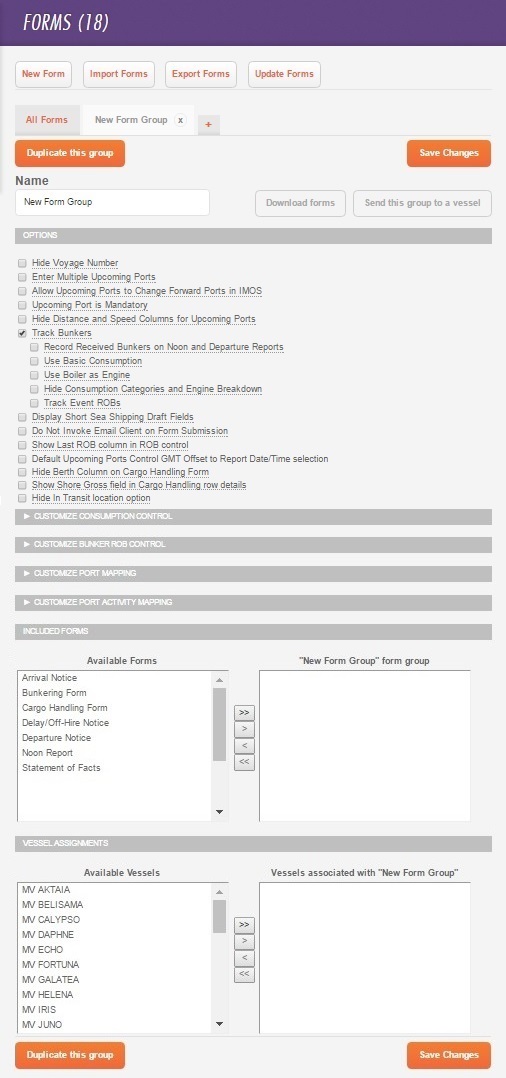
Adding a New Form Group
To add a Form Group:
-
Click

-
Type a Name for the form group.
-
Select Options. These control the behavior of form submissions by vessels associated with the form group.
-
You can hover over underlined fields to see their definitions.
-
Default Upcoming Ports Control GMT Offset to Report Date/Time selection: The GMT offset selected for Date/Time automatically populates in the upcoming ports grid, but users can change the GMT offset for any ports in the grid.
-
Show Shore Gross field in Cargo Handling row details: On the Cargo Handling form, a Shore Figure field appears above Charterer in row details. The field appears as Shore quantity on the Onboard SOF Report and (with configuration flag CFGCargoLossControl enabled) maps to the GSV Shore field on the Cargo Handling Cargo Loss tab.
-
-
To customize the forms in this group (optional), click:

to expand a section.
-
To customize consumption categories and tooltips, use the following sections:
-
Customize Consumption Control
-
Customize Bunker ROB Control
-
-
To Customize Port Mapping or Customize Port Activity Mapping, contact Veson Nautical via the Help Center.
-
-
Under Included Forms, select forms from the Available Forms list to add to the new form group.
-
Under Vessel Assignments, select vessels from the Available Vessels list to assign to the form group.
-
To save the new group, click

From the Form Group tab you can also:
-
Delete the Form Group: Click

-
Copy the Form Group to create a new, identical one:

-
Download the forms in this Form Group for a vessel:

-
Send the forms in this Form Group to a vessel:

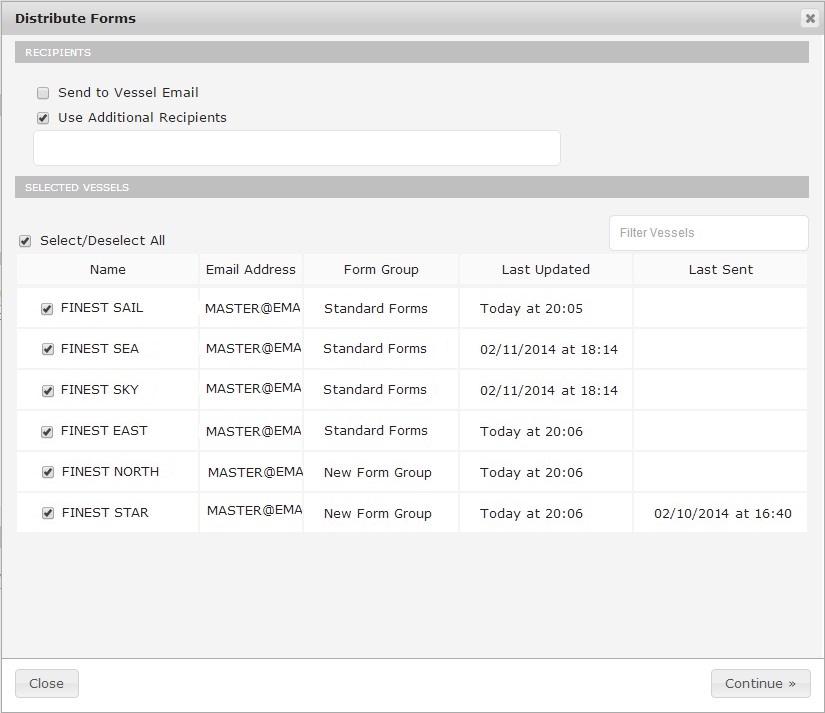
Sending Forms to a Vessel
To send forms to vessels:
-
Click
-
To send the forms to the vessel email address, select the Send to Vessel Email check box.
-
To send to additional recipients, select the Use Additional Recipients check box and type additional email addresses in the field.
-
To change or add a Vessel Email for a vessel, on its Vessel Contacts tab, add or amend the vessel's email address and save. The new email address should be visible in Voyage Reporting a few seconds after a refresh of the page.
-
-
Select the check boxes for the vessels you want to send the forms to.
-
To filter vessels, begin typing in the Filter field.
-
To select all vessels, select the check box at the top of the list; you can then clear check boxes for individual vessels.
-
-
Click Continue.
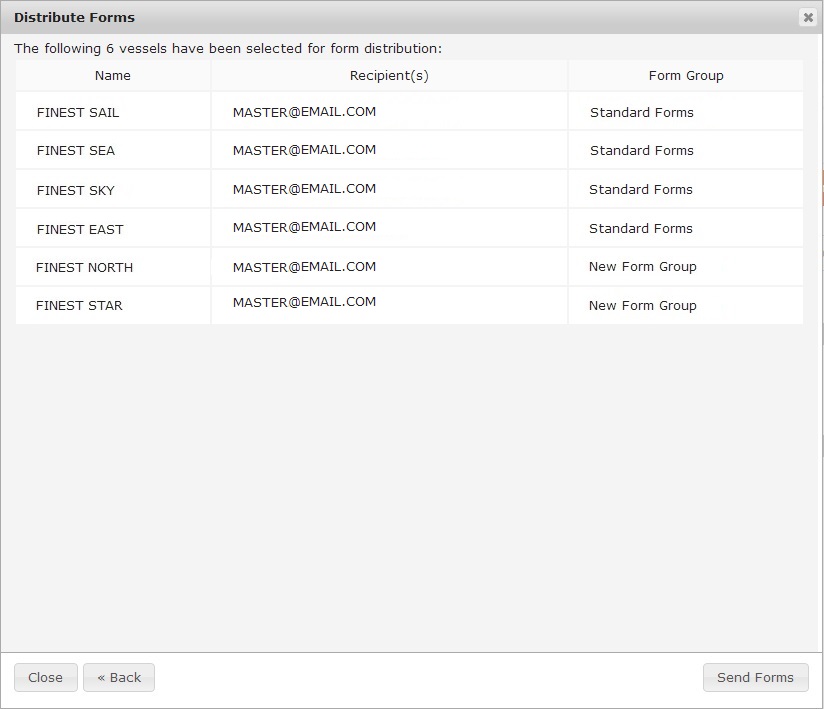
Information for the selected vessels appears. If you want to change something, click Back.
-
When all is correct, click Send Forms.