Home > Analytics > Creating a Report in the Report Designer
To access Design Mode to edit reports in Report Designer, your IT admin must grant you access to the Report Designer module Rights under Data Center → Security.
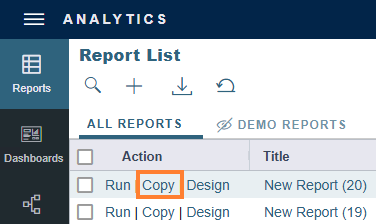
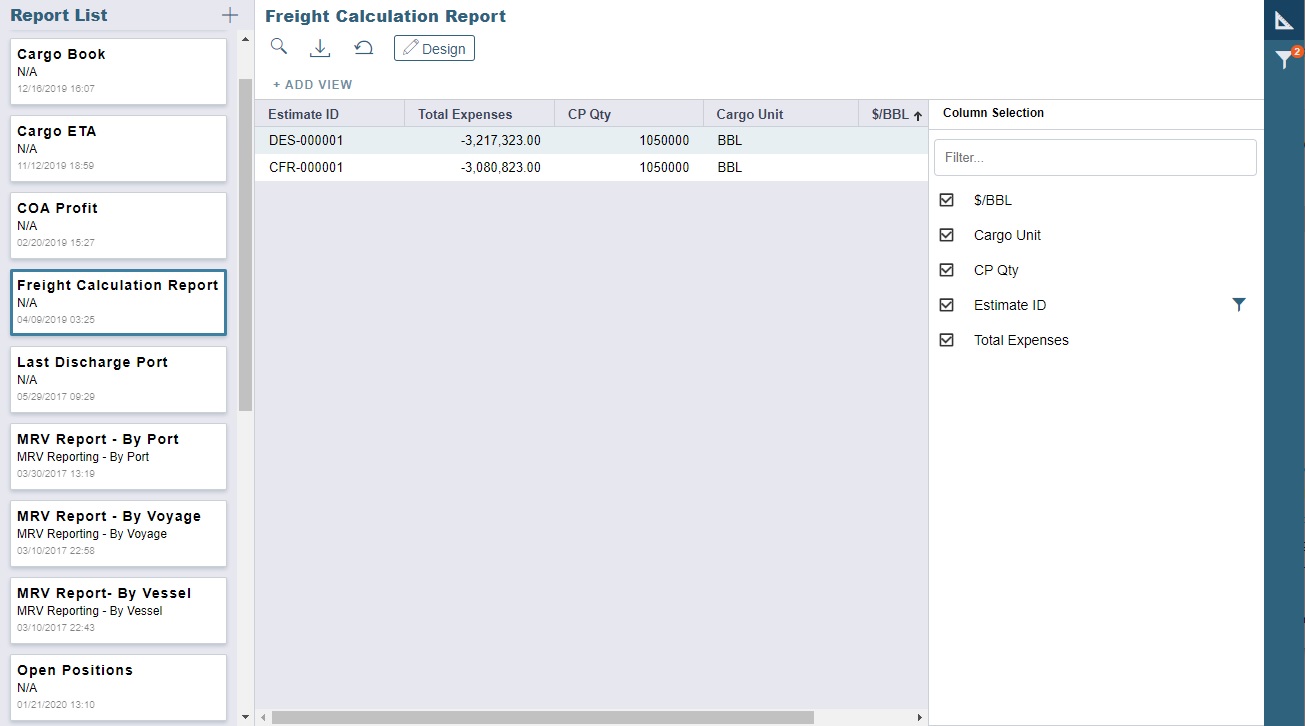
In the Analytics module, you can create custom reports from the Report List by either clicking on + and then selecting New Report or if you want to edit an existing report you can click on the Design hyperlink under the Action column. After you enter in Design Mode, you can apply filters that decrease loading times, group data, create custom columns, add aggregated functions, and perform simple calculations. The Report Designer provides a live preview where all of your edits appear and you can export your report in different formats.
Report Designer Modes
The Report Designer has two modes: Design Mode to create the report and Report View Mode to view the report. To switch between these two modes, click the Design hyperlink or click the ![]()
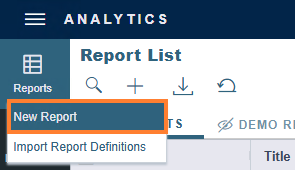
To create a report, click + → click New Report.
-
To copy a report from the Report List, click Copy.
Design Mode
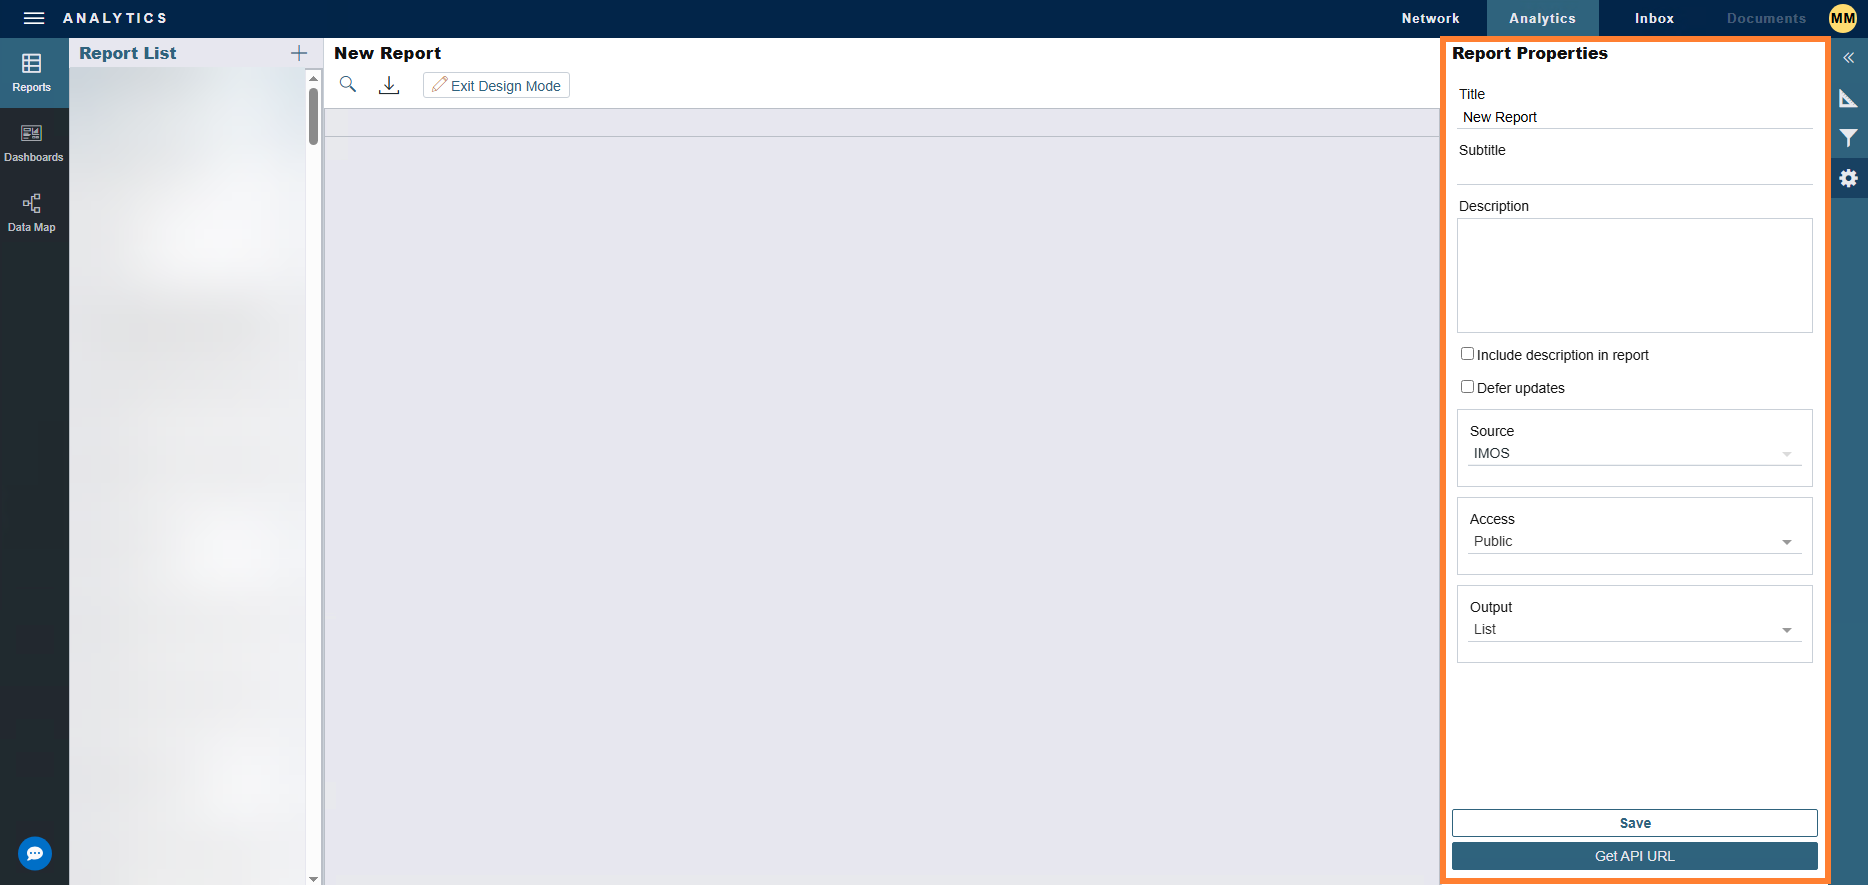
In Design Mode, you can build your report by adding columns, filters, and aggregate functions.
-
Define the report properties.
-
On the Report Properties panel, you can do any of the following:
-
Enter the Title, Subtitle, and Description. To include the description in the report, select the Include description in report, select the check box.
-
Note: Create reports with unique titles (max 64 characters in length). If a new report is created with an already existing name (capitalization does not differentiate titles), the report cannot be run via Scheduled Tasks.
-
-
Select the Defer updates: Changes you make to your report appear in real time. To improve performance and loading times, select this checkbox to hold updates until after setting up the report. When selected, refresh your browser to see the results of your design.
-
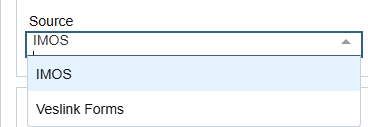
Select a data Source:
-
IMOS: IMOS data, shown in the Data Map.
-
Veslink Forms: Includes data from the Voyage Reporting forms currently in the database.
-
Onboard (requires a separate license): Includes data from Onboard voyages and port calls. After replication, Onboard users with Security Groups access can run these reports from the Reports panel.
-
-
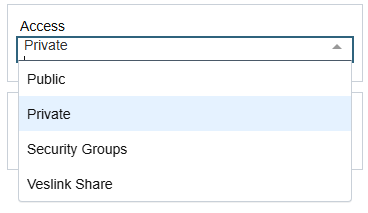
Select the Access type:
-
Private (default)
-
Public: Users with permissions to edit public reports, can edit all public reports regardless of report ownership.
-
Security Groups: For each group, you can assign either Inherit Rights from Group (


-
Veslink Share
-
-
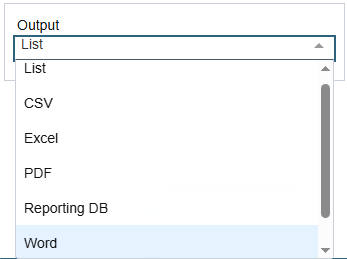
Select the Output type: Each Output type has different options.
-
List
-
CSV, PDF, Word, or XML:
-
Excel:
-
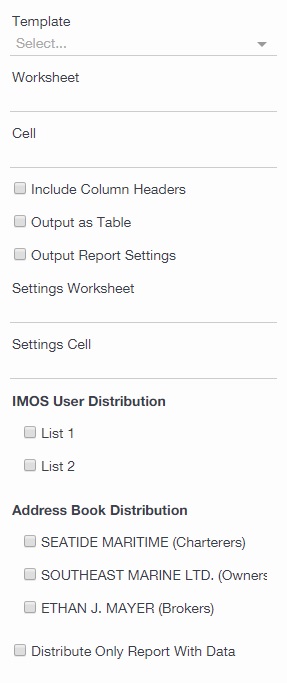
Template: Select an Excel Template from File Management.
-
-
Reporting DB:
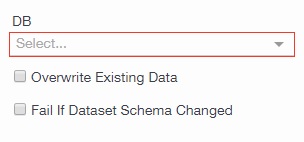
Note: Use of the Reporting Database requires a separate license. To set it up, contact Veson Nautical Support.
-
-
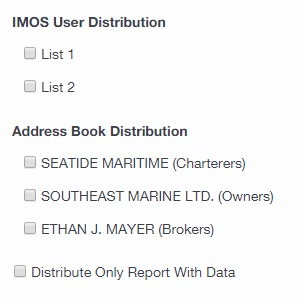
IMOS User Distribution: Distribute reports to IMOS users, which can be set up in Data Center → Security.
-
Address Book Distribution (for CSV, Excel, PDF, Word, and XML Output types only): Reports can be distributed to both IMOS users and external contacts.
-
You can set this up in Data Center → Address Book → have the Reports checkbox selected on the Contacts tab.
-
-
To prevent the distribution of empty reports, select the Distribute Only Report With Data checkbox.
-
If you have the API module, get the API URL for the report by clicking Get API URL.
-
For outgoing email configuration, IMOS users can only use Veson’s @veslink.com email addresses or provide their own SMTP. Office 365 SMTP can no longer be used.
-
-
Click Save.
-
Report View Mode
In either mode:
-
As with any other list, you can search, change your view, save user views (for reports with Source IMOS, in Report View mode only), and export.
-
When you open a report, the default list view is the original dataset of the report.
-
The currently selected list view is highlighted and underlined (for example, LIST VIEW NAME).
Viewing Tables and Elements
You must have the Data Dictionary module right selected under Quick Links in the Data Center.
In Data Dictionary, you can view all tables and elements (fields) used throughout IMOS, including custom elements.